How To Use Sales Navigator For Recruiting? [2026 Tutorial]
Contents
Can you use LinkedIn Sales Navigator to recruit?
Yes!
Does it work better than LinkedIn Recruiter?
Yes, in some sense.
Well, Sales Navigator is even better than LinkedIn Recruiter because you can use the same tool to find potential clients and candidates.
In addition, Sales Navigator is cheaper than LinkedIn Recruiter ($99/month VS $170/month), which changes a lot if you don’t want to invest that much.
In this article, I’ll show you all you need to know on how to use Sales Navigator for recruiting:
- How to find candidates on LinkedIn Sales Navigator?
- How to Use Sales Navigator For Your Recruiting Business?
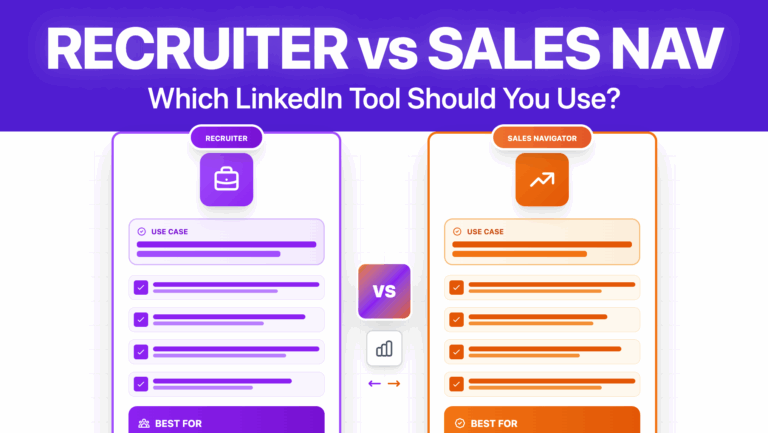
- LinkedIn Sales Navigator VS Recruiter: What is the Best Option?
Let’s dive in.
How To Find Candidates on LinkedIn Sales Navigator?
Effectively, LinkedIn Recruiter is not the same as Sales Navigator. They are two different products.
But the funny thing is that LinkedIn Sales Navigator can be a better option for talent acquisition teams than LinkedIn Recruiter.
Here is my step-by-step guide on using Sales Navigator to fill your pipeline with top job seekers’ profiles:
- Use Sales Navigator Filters to Find Candidates
- Automate Candidate Sourcing With Saved Searches
- Personalize Your Outreach
- Export Candidates From Sales Navigator and find their Emails
- Find Open To Work Candidates on Sales Navigator
1. Use Sales Navigator Filters to Find Candidates
Sales Navigator has more filters than LinkedIn Recruiter.
Sales Navigator offers more than 30 filters.
![How To Use Sales Navigator For Recruiting? [2026 Tutorial] 1 use sales navigator filters to find candidates](https://evaboot.com/wp-content/uploads/2024/07/CleanShot-at-@-x-6-916x1024.png)
Among them, the most useful ones are:
- Current Job Title
- Past Job Tile
- Current Company
- Past Company
- School
- Years of Experience
- Years in Current Company
- And More…
These filters are used for sales and recruiting.
LinkedIn Recruiter Lite has 27 filters.
![How To Use Sales Navigator For Recruiting? [2026 Tutorial] 2 linkedin recruiter lite advanced filter](https://evaboot.com/wp-content/uploads/2024/07/CleanShot-at-@-x-7-1024x498.png)
You can find all of these filters on Sales Navigator except for:
- Skills
- Year of Graduation
You can easily bypass this lack with the “Years of Experience” and “Keywords” filters.
Indeed, the Keyword filter will look for keywords in all the profiles, including the Skills section.
![How To Use Sales Navigator For Recruiting? [2026 Tutorial] 3 use keyword filter to find skills sales navigator](https://evaboot.com/wp-content/uploads/2022/07/use-keyword-filter-to-find-skills-sales-navigator-1024x682.png)
In the same way, you don’t need to know the year of graduation if you know how long the candidate has been working with the “Years of experience” filter.
![How To Use Sales Navigator For Recruiting? [2026 Tutorial] 4 use sales navigator filters for sourcing recruiters](https://evaboot.com/wp-content/uploads/2022/07/use-sales-navigator-filters-for-sourcing-recruiters-1024x569.png)
Here is an example of a candidate sourcing that you can do with Sales Navigator.
To learn more about using Sales Navigator to find candidates like in Recruiter, watch this tutorial.
It will teach you more about filters and LinkedIn Sales Navigator Boolean search.
2. Automate Candidate Sourcing With Saved Searches
Once you have finished tuning your Sales Navigator search filters, you can save your search so that you get notified every time a new candidate matches the filters.
For that, click “Save Search” next to the LinkedIn profile that matches your search criteria.
![How To Use Sales Navigator For Recruiting? [2026 Tutorial] 5 sales navigator saved search to find new candidates](https://evaboot.com/wp-content/uploads/2022/07/sales-navigator-saved-search-to-find-new-candidates-1024x422.png)
Once your search is saved, you can click “Saved Searches” to access it.
![How To Use Sales Navigator For Recruiting? [2026 Tutorial] 6 automate candidate sourcing sales navigator](https://evaboot.com/wp-content/uploads/2022/07/automate-candidate-sourcing-sales-navigator-1024x476.png)
In the ‘New results’ column, you’ll find all the new candidates that match your filters.
Every week, LinkedIn will add new profiles to your talent pool that you can contact immediately.
3. Personalize Your Outreach
I’ve experimented recently by creating a Python developer profile on LinkedIn.
The number of messages and requests the profile receives daily is insane.
![How To Use Sales Navigator For Recruiting? [2026 Tutorial] 7 personalize sourcing messages sales navigator](https://evaboot.com/wp-content/uploads/2022/07/personalize-sourcing-messages-sales-navigator-978x1024.png)
There is no way to stand out without hyper-personalization.
This is the key to successful LinkedIn outreach campaigns.
LinkedIn Sales Navigator helps you personalize your messages by providing icebreaker ideas in the InMail inbox.
![How To Use Sales Navigator For Recruiting? [2026 Tutorial] 8 how to send messages to candidates on sales navigator](https://evaboot.com/wp-content/uploads/2022/07/how-to-send-messages-to-candidates-on-sales-navigator-1024x612.png)
You get 50 InMail credits per month with Sales Navigator.
However, you can send unlimited InMails if you identify Open Profiles.
Here’s a tutorial on how to do that:
You can also send a classic connection request to candidates but take note that they are limited to 100 connections per week.
There are also some hacks to bypass this limit that you can find in this video:
If candidates don’t reply to InMails or connection requests, you can try to get their emails to get a reply.
Here’s how to proceed.
4. Export Candidates From Sales Navigator and find their Emails
One benefit of using Sales Navigator is that you can add many plugins and extensions, unlike Recruiter.
Creating email lists from LinkedIn Sales Navigator searches and lists is straightforward with Evaboot.
Step #1: Extract your search using the Evaboot Chrome extension.
![How To Use Sales Navigator For Recruiting? [2026 Tutorial] 9 export candidates from sales navigator](https://evaboot.com/wp-content/uploads/2022/07/export-candidates-from-sales-navigator-1024x689.png)
Step #2: Once your extraction is completed, click Find Emails to add the files in your CSV.
![How To Use Sales Navigator For Recruiting? [2026 Tutorial] 10 find candidates email from sales naviagtor](https://evaboot.com/wp-content/uploads/2024/07/CleanShot-at-@-x-8-1024x249.png)
Step #3: Download your file.
![How To Use Sales Navigator For Recruiting? [2026 Tutorial] 11 email extracted from linkedin sales navigator.png](https://evaboot.com/wp-content/uploads/2022/07/email-extracted-from-linkedin-sales-navigator.png-1024x659.webp)
Evaboot will find and verify the professional email addresses of candidates and add them to the file.
5. Find Open To Work Candidates on Sales Navigator
There is no “Open to Work” filter on Sales Navigator.
Honestly, do you want to pay $835/month just to have this filter?
There is a workaround if you use Sales Navigator + Evaboot.
You won’t be able to filter on “Open to work”…
But you can find who is “Open to work” among the candidates you extracted.
![How To Use Sales Navigator For Recruiting? [2026 Tutorial] 12 detect open to work profile sales navigator](https://evaboot.com/wp-content/uploads/2022/07/detect-open-to-work-profile-sales-navigator-1024x647.png)
Congratulations. You now know how to find candidates with LinkedIn Sales Navigator.
You can do much more than that with this tool.
Why don’t you also use it to find clients for your recruiting business?
How to Use Sales Navigator For Your Recruiting Business?
Sales Navigator is a wonderful LinkedIn prospecting tool if you are a recruitment agency or a recruiting business.
You can decide to target leads or accounts.
![How To Use Sales Navigator For Recruiting? [2026 Tutorial] 13 how to use sales navigator for recruiting business](https://evaboot.com/wp-content/uploads/2022/07/how-to-use-sales-navigator-for-recruiting-business-1024x607.png)
If you are a recruiting business, you should use the account search.
Here’s why:
- Build a list of companies currently hiring on LinkedIn
- Save The Search To Be Notified When New Companies Start Hiring
- Save The Search To Be Notified When New Companies Start Hiring
- Find the Decision-Makers
- Send Personalized Messages With Account Alerts
- Automate Your Lead Generation Process With Account Lists
- Automate Your Outreach With a Prospecting Tool
1. Build a list of companies currently hiring on LinkedIn
There is a magic filter you can use: “Hiring on LinkedIn.”
![How To Use Sales Navigator For Recruiting? [2026 Tutorial] 14 hiring filter sales navigator account search](https://evaboot.com/wp-content/uploads/2022/07/hiring-filter-sales-navigator-account-search-1024x422.png)
This filter will show all the companies with one or more job postings opened on LinkedIn.
![How To Use Sales Navigator For Recruiting? [2026 Tutorial] 15 build lead list recruiting businesses](https://evaboot.com/wp-content/uploads/2022/07/build-lead-list-recruiting-businesses-1024x518.png)
Then you can add other filters on top of that, like:
- Company Headcount
- Growth Rate
- Size of Departments
- Department Growth
- Location
- Industry
- And more…
This will allow you to build a qualified list of accounts currently recruiting on LinkedIn.
It is also a super icebreaker for the messages you will send in your LinkedIn prospecting campaign.
2. Save The Search To Be Notified When New Companies Start Hiring
You can save your account list to get notified whenever a company posts a job offer on LinkedIn.
![How To Use Sales Navigator For Recruiting? [2026 Tutorial] 16 save account search linkedin sales navigator](https://evaboot.com/wp-content/uploads/2022/07/save-account-search-linkedin-sales-navigator-1024x483.png)
Every week, you will be notified of new companies offering new jobs.
![How To Use Sales Navigator For Recruiting? [2026 Tutorial] 17 automate lead generation recruiting business](https://evaboot.com/wp-content/uploads/2022/07/automate-lead-generation-recruiting-business-1024x490.png)
That is a great way to put your lead generation on autopilot as a recruiting business.
3. Analyze Their Needs with Company Pages Insights
Once you have identified a list of companies, you will get insights into their recruiting needs on their company pages.
![How To Use Sales Navigator For Recruiting? [2026 Tutorial] 18 get insight clients sales navigator](https://evaboot.com/wp-content/uploads/2022/07/get-insight-clients-sales-navigator-1024x476.png)
To do this:
- Go to the company page
- Go to the insight section
- Click on Job Openings
- You will see how many job offers they have currently opened
- And in which department they are hiring
Knowing exactly which position they are hiring is gold.
If you use this information correctly in your LinkedIn sales prospecting messages, your reply rates will skyrocket.
You have identified the needs of your prospect.
Now, let’s identify the right decision-makers to contact.
4. Find the Decision-Makers
You can use the Relationship Map on the company page to find company decision-makers to contact.
![How To Use Sales Navigator For Recruiting? [2026 Tutorial] 19 find decision makers linkedin sales navigator](https://evaboot.com/wp-content/uploads/2022/07/find-decision-makers-linkedin-sales-navigator-1024x601.png)
If it’s a large company, you can filter Recommended Lead on Functions and select Human Resources.
LinkedIn will show the decision-makers inside the HR Department.
If it’s a small company, you will see the C-levels directly in the relationship map on the right. Often, in small companies, C-levels handle recruiting themselves.
Great. You have identified the right decision-makers.
Now, let’s see how to send a message that will 100% get a reply.
5. Send Personalized Messages With Account Alerts
You must send personalized messages to maximize your chances of getting a reply.
For that, you can use the alert section of company pages.
![How To Use Sales Navigator For Recruiting? [2026 Tutorial] 20 use alerts to get icebreakers ideas](https://evaboot.com/wp-content/uploads/2022/07/use-alerts-to-get-icebreakers-ideas-1024x496.png)
In this section, you will find all sorts of company updates:
- LinkedIn posts shared by the company page
- Mentions in the news
- New Decision-makers
That is perfect material to think about a personalized icebreaker.
![How To Use Sales Navigator For Recruiting? [2026 Tutorial] 21 recruiting business lead generation with sales navigator](https://evaboot.com/wp-content/uploads/2022/07/recruiting-business-lead-generation-with-sales-navigator-1024x824.png)
For example, here I see that they appeared on a TV Show recently.
Let’s mention that in the message.
It will show that I don’t come out of nowhere, and I’ve done some research on them.
Example of a message you could send
Hey Sam,
Heard about Gener8 Ads through Dragon Den.
Congrats on growing the company so fast this year!
I’ve seen you’re currently hiring 2 engineers.
Are the position field yet?
This message has a high chance of getting a reply because I precisely mention their need and add a personalized icebreaker.
If you want to know more about how to get more appointments with LinkedIn, you can check this video:
That was the manual way to prospect as a recruiting business on LinkedIn Sales Navigator.
Now, let’s see how to automate the process.
6. Automate Your Lead Generation Process With Account Lists
If you don’t need to check every company page, there’s a simple process for identifying all the decision-makers in a list of companies.
It’s called Account-Based Searching.
The first step is to make an account search on LinkedIn to build an account list.
![How To Use Sales Navigator For Recruiting? [2026 Tutorial] 22 build client list sales navigator recruiting](https://evaboot.com/wp-content/uploads/2022/07/build-client-list-sales-navigator-recruiting-1024x685.png)
For that:
- Select companies using the tick boxes
- Click “save to list”
- Create a list of the accounts in an existing list
After that:
- Go on the lead search
- Find the workflow filter
- Select the company list you have just built
- Add filters to find decision-makers
Boom.
![How To Use Sales Navigator For Recruiting? [2026 Tutorial] 23 find decision makers sales navigator recruiting](https://evaboot.com/wp-content/uploads/2022/07/find-decision-makers-sales-navigator-recruiting-1024x718.png)
You have just created a super-targeted list of decision-makers.
You can now export your lead list and find emails with Evaboot.
![How To Use Sales Navigator For Recruiting? [2026 Tutorial] 24 extract recruiting clients into csv](https://evaboot.com/wp-content/uploads/2022/07/extract-recruiting-clients-into-csv-1024x703.png)
There you go.
You now have an Excel file with all the information you need about your prospects and their emails.
You can contact them manually or use an outreach tool to automate this process for you.
7. Automate Your Outreach With a Prospecting Tool
There are tons of LinkedIn automation tools out there.
I personally use LaGrowthMachine.
![How To Use Sales Navigator For Recruiting? [2026 Tutorial] 25 mutichannel prospectin recruiting](https://evaboot.com/wp-content/uploads/2022/07/mutichannel-prospectin-recruiting-1024x663.png)
I like it because you can launch multichannel outreach sequences using:
The interface is straightforward, and it allows you to visualize what your campaigns look like.
![How To Use Sales Navigator For Recruiting? [2026 Tutorial] 26 personalize messages at scale](https://evaboot.com/wp-content/uploads/2022/07/personalize-messages-at-scale-1024x490.png)
Like most prospecting tools, they allow you to add custom variables to your messages to personalize at scale.
Import your Evaboot file into LGM, and you are good to go.
LinkedIn Sales Navigator VS Recruiter: What Is The Best Option?
If you are a recruiting business, use Sales Navigator.
Here’s why you should consider Sales Navigator vs LinkedIn Recruiter:
- A Unique Tool to Find Candidates and Clients
- Sales Navigator is a Cheaper Alternative
1. A Unique Tool to Find Candidates and Clients
LinkedIn Sales Navigator will allow you to find clients and candidates simultaneously.
LinkedIn Recruiter only allows you to find candidates.
![How To Use Sales Navigator For Recruiting? [2026 Tutorial] 27 sales navigator vs linkedin recruiter](https://evaboot.com/wp-content/uploads/2022/07/sales-navigator-vs-linkedin-recruiter-1024x564.png)
Plus, Sales Navigator is more efficient for finding candidates as it has more filters than Recruiter (29 vs 21 for Recruiter)
2. Sales Navigator is a Cheaper Alternative
There is a huge difference between the cost of Sales Navigator and LinkedIn Recruiter.
Here are the different pricing (monthly payment):
- Sales Navigator: $99/month
- Recruiter Lite: $170/month
- Recruiter Corporate: $835/month
The ROI on Sales Navigator is 10 times higher, as you can also use it for the sales operations of your recruiting business.
Conclusion
If you know how to use LinkedIn Sales Navigator for recruiting, this tool will become your best friend. Your ROI on it will be much higher than on LinkedIn Recruiter.
Now you have a whole lotta techniques and strategies as a recruiting business to make the right choice and go with Sales Navigator.
FAQ
Can I use LinkedIn Sales nNavigator for recruiting?
Yes, LinkedIn Sales Navigator can be used for recruiting. It’s a powerful tool for generating leads and recruiting.
Sales Navigator offers advanced search features that help find candidates with specific skills and experience, even globally.
How can LinkedIn Sales Navigator help streamline the recruitment process?
LinkedIn Sales Navigator helps streamline the recruitment process in several ways:
- Advanced Search: Find candidates with specific skills and experience, even globally.
- Customizable Filters: Refine searches to match job requirements precisely.
- Job Alerts: Stay updated on new opportunities and candidate profile changes.
- Expanded Network: Connect with professionals worldwide to access a global talent pool.
- CRM Integration: Integrate with CRM systems to track and manage candidates efficiently.
What Is The Difference Between LinkedIn Recruiter And Sales Navigator?
LinkedIn Recruiter is built for hiring. LinkedIn Sales Navigator is built for sales.
But both can be used for recruitment.
Recruiter gives access to more profiles, deeper filters, and candidate tracking tools.
Sales Navigator is better for outreach and lead generation, but also works well for sourcing passive candidates.
If you need full recruiting features, go with Recruiter. If you want outreach + search power, Sales Navigator is a great alternative.


![17 LinkedIn InMail Templates for Recruiters [+ Examples] 55 inmail templates for recruiters](https://evaboot.com/wp-content/uploads/2024/02/INMAIL-TEMPLATES-FOR-RECRUITERS-768x431.png)


![Actively Recruiting On LinkedIn: Hiring Made Easier in [year] 58 actively recruiting](https://evaboot.com/wp-content/uploads/2024/04/ACTIVELY-RECRUITING-768x432.png)

![How To Find Candidates On LinkedIn ? [Complete Guide [year]] 60 find open to work candidates on linkedin?](https://evaboot.com/wp-content/uploads/2024/05/Find-Open-To-Work-Candidates-on-LinkedIn-768x432.jpg)