How To See More Than 2500 Leads in Sales Navigator Searches?
Contents
LinkedIn Sales Navigator limits your search to 100 pages with 25 results in each.
That means you or your sales team can only access 2500 leads in LinkedIn Sales Navigator.
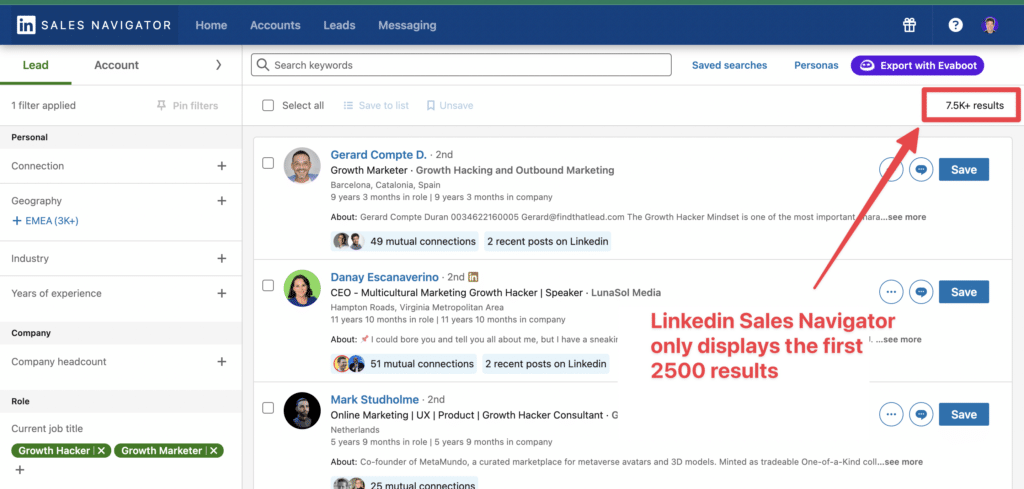
However, sometimes your searches are bigger than that, and you would like to access all the leads in the list.
After testing some tricks on Sales Navigator, I’ve found ways to bypass this search limit.
In this article, I’ll show you how to get the most out of LinkedIn Sales Navigator search results by answering these questions:
- Why is LinkedIn Sales Navigator Limited to 2500 Leads?
- How To Split Your Sales Navigator Lead Searches?
- How To Split Your Sales Navigator Account Searches?
- What To Do With The Exported Leads And Accounts?
So, let’s get into it!
Why Is LinkedIn Sales Navigator Limited to 2500 Leads?
LinkedIn Sales Navigator limits search results to 2500 leads (100 pages of 25 leads) to improve the user experience and search accuracy.
This cap ensures you get relevant results based on your criteria without overwhelming the system or the user.

It helps provide accurate insight into your immediate network while maintaining the quality of 2nd and 3rd-degree connections.
To see beyond this limit, special techniques must be used to refine and segment searches effectively.
And one of those techniques is to split your Sales Navigator searches into several chunks.
How To Split Your Sales Navigator Lead Searches?
Your step 1 is to split your Sales Navigator searches with 5 steps:
- Use the right Sales Navigator search filters
- Copy-paste the link into a spreadsheet
- Exclude the filters you used
- Repeat the process
- Export your leads to CSV
1. Use the right search filters
There are 3 filters you can use to split your Sales Navigator searches quickly:
- Seniority Level
- Function
- Industry

Do not use the Company Headcount filter, it will delete leads from your search and harm your B2B lead-generation strategy.

All these people without company pages attached to their profiles (gray logos) will be excluded from the search.

This way, you lose potential good leads.

So, to build my first chunk of 1000 leads, I’ll select seniority-level filters.
2. Copy-paste the link into a spreadsheet
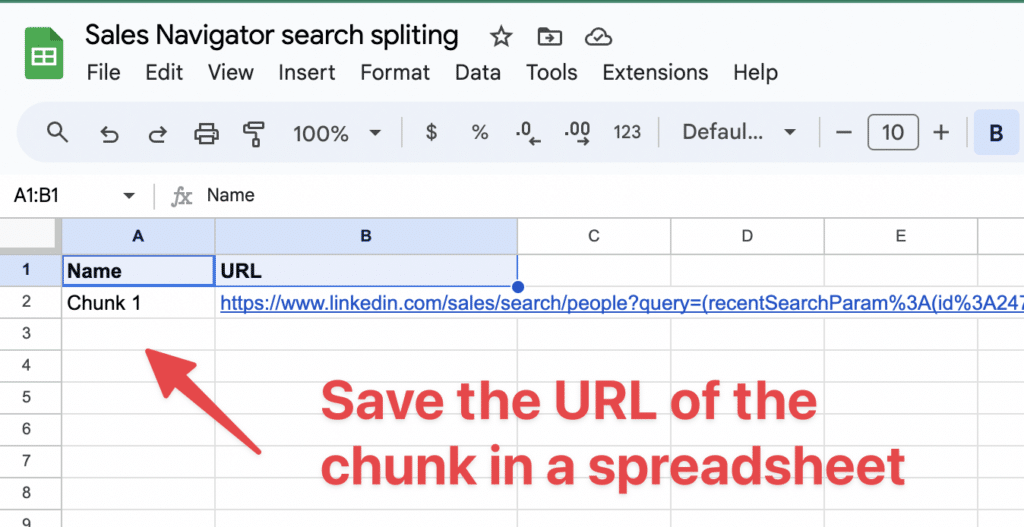
The second step is to copy the URL of this first chunk and paste it into a Google sheet.

We will modify this search to continue splitting it, so you must save the chunks somewhere.
3. Exclude the search filters you used
Once you save the URL, you can exclude all the search filters you used.

That way, you delete all the leads in the first chunk from the search.

When you exclude leads from your search results, you access new people who are not on your lead lists with filters.
4. Repeat the process
Now you need to repeat the process using the filters at your disposal.

Here, I made a 2nd chunk using the Function filters. Copied this URL into the spreadsheet.

Then, I excluded the Function filters I used and added a seniority-level filter to get a new chunk of 4K.
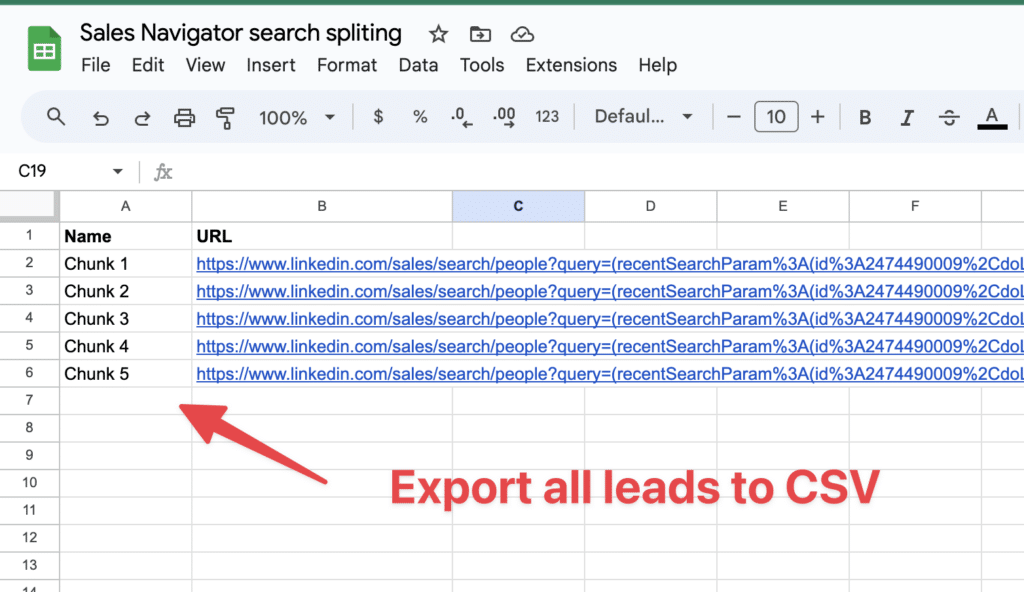
5. Export your list to CSV
Once you have the links of all your searches in your spreadsheets or Excel file, it’s time to see how to export leads into a CSV file.
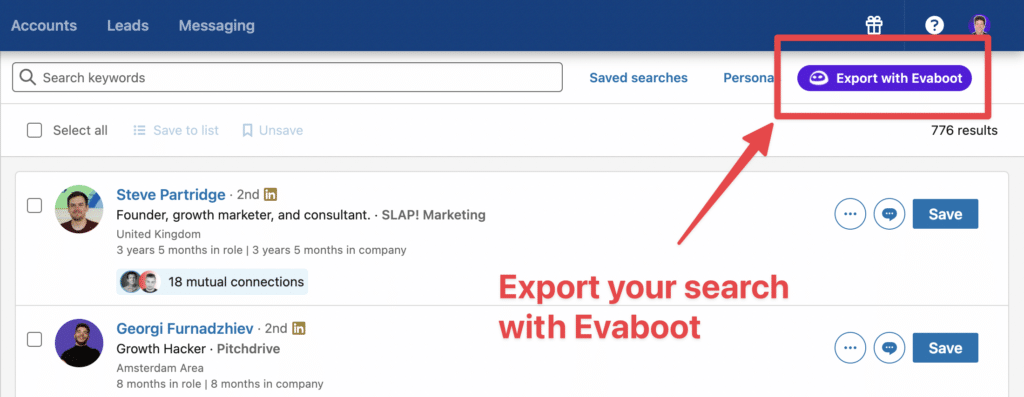
You can use the Evaboot Chrome extension.
Once installed, the “Export with Evaboot” button will be added to your Sales Navigator.
Evaboot is a smart LinkedIn Sales Navigator scraper and email finder that extracts, cleanses, and improves your lead list data with one click.
It also provides you with proper contact information, like emails, company name, title

Here is a tutorial on how this tool helps export LinkedIn Sales Navigator Lead lists:
In this part, we talked about lead searches.
Now, let’s see how to split account searches.
How To Split Account Searches?
Usually, I use 2 techniques to split Sales Navigator account searches:
- Use search filters
- Use account lists
1. Use Search Filters
I use a 6K account search with 3 filters: Company headcount, Headquarters location, and Industry.

To split Sales Navigator account searches, you can use:
- Company Headcount
- Headquarter Location
- Industry
- Number of Followers
- Company Headcount Growth
In this case, there is a simple way to split the search using the “Number of Followers” filter, which usually works with small searches.

For larger lists, you can use the “Company Headcount Growth” filter, which will always allow you to split the search regardless of size.
For example, here we can split it like this:
- All the companies with a negative growth rate (-100% to 0)
- All the companies within 1-10%
- All the companies above 10% (11% to 100%)

If your list is large, you must split it into smaller chunks.
From the 6K results, I got 2K.
2. Use Account Lists
You can also split your account searches by creating an Account list on Sales Navigator.
The process is simple.
First, you add all the available searches to an account list. You can add up to 999 accounts to a list, so that’s almost perfect.
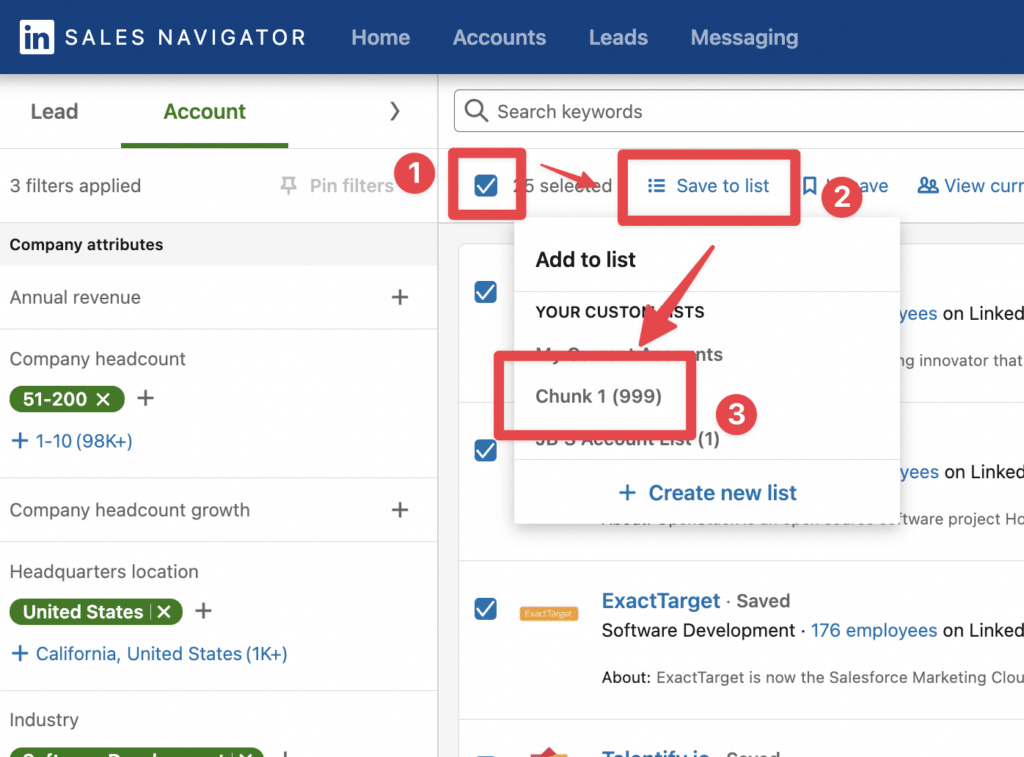
Then, exclude the list from your search results using Account Lists > Your List > Exclude.
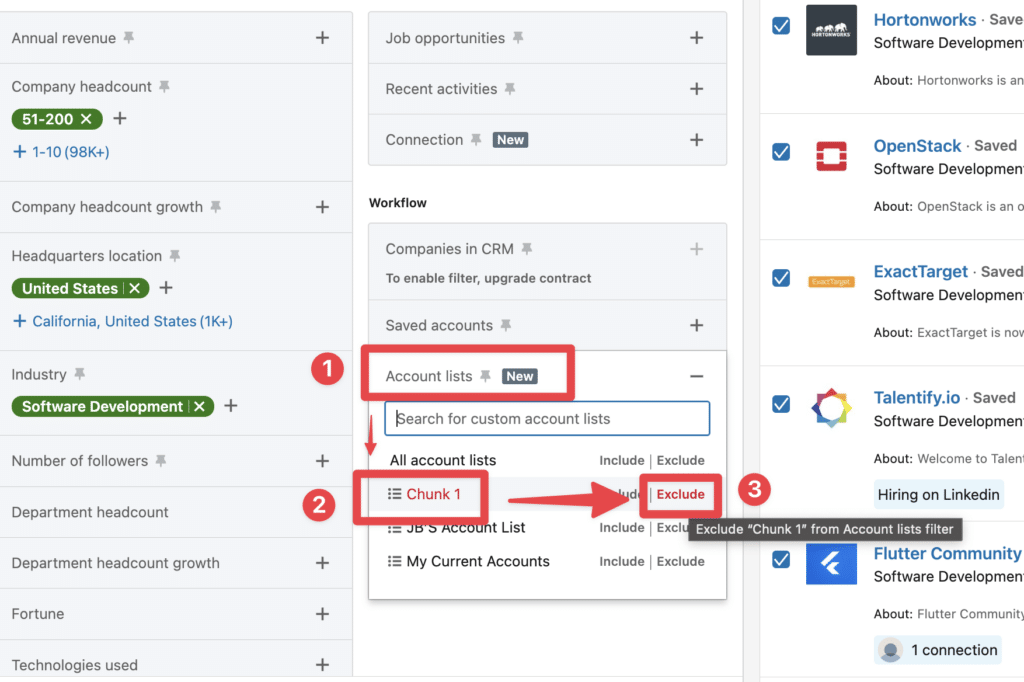
Then, build a new list of 999 accounts.
Repeat the process until there are fewer than 1000 accounts in your search results.
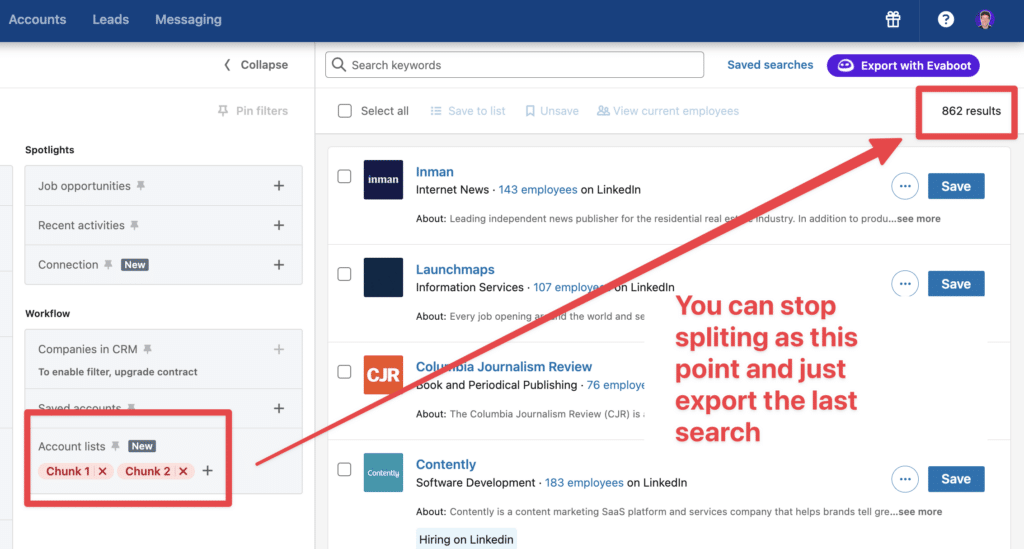
This process is efficient but a bit painful, as you need to manually add all the accounts in lists 25 per 25.
Unfortunately, there is no way to automate this process.
However, imagine how many hidden accounts you will find and target with this strategy.
Common Challenges And Solutions
As you know, Navigating LinkedIn Sales Navigator often brings challenges that can hinder efficient lead management and prospecting.
In this case, common issues can be:
- Duplicate leads
- Data overload
1. Duplicate Leads
Duplicate leads can clutter your lead lists, later tour CRM, and waste valuable outreach efforts. To minimize duplicates:
- Refine Search Filters: Use specific criteria, such as job titles, industries, or geographic locations, as I did in the previous examples.
- Deduplication Tools: Use CRM features or external tools that automatically identify and merge duplicate records based on set parameters, ensuring a clean and organized lead database.
2. Data overload
Dealing with large amounts of lead data can be overwhelming and counterproductive. To manage data overload:
- Segment large data sets: As I showed, breaking down large lead lists gives you smaller, manageable chunks based on relevant criteria such as seniority level, industry, or company size.
- Prioritize leads: Focus on leads with high potential value based on company size, decision-making authority, or past engagement.
- Leverage automation tools: Implement tools to organize leads, schedule follow-ups, and integrate data with your CRM.
What To Do With The Saved Leads And Accounts?
After you’ve put all the leads and accounts into different chunks and exported the lists into CSV files, you’re all set to level up your outreach campaigns.
Let me tell you how what to do with all your saved leads:
- Use Sales Navigator Alerts
- Get Emails From LinkedIn
- Send InMails
- Send Follow-ups
1. Use Sales Navigator Alerts
A great way to find leads on LinkedIn based on your search filters is to use Sales Navigator alerts.
These are notifications that inform you of any changes or updates on your saved leads or accounts, such as job changes, company news, mentions, shares, etc.

To use Sales Navigator alerts, follow these steps:
- Sign in to Sales Navigator and click on the Lists tab on the top menu.
- Select Leads or Accounts to see your saved lists of prospects.
- Click on the Alerts tab to see the latest updates on your leads or accounts.
- Review the alerts and take action accordingly, such as sending a congratulatory message, commenting on a post, sharing an article, etc.

Using Sales Navigator alerts can help you find leads who are more engaged and relevant to your business.
You can also use this feature to personalize your outreach and stay on top of mind with your prospects.
2. Get Emails From LinkedIn
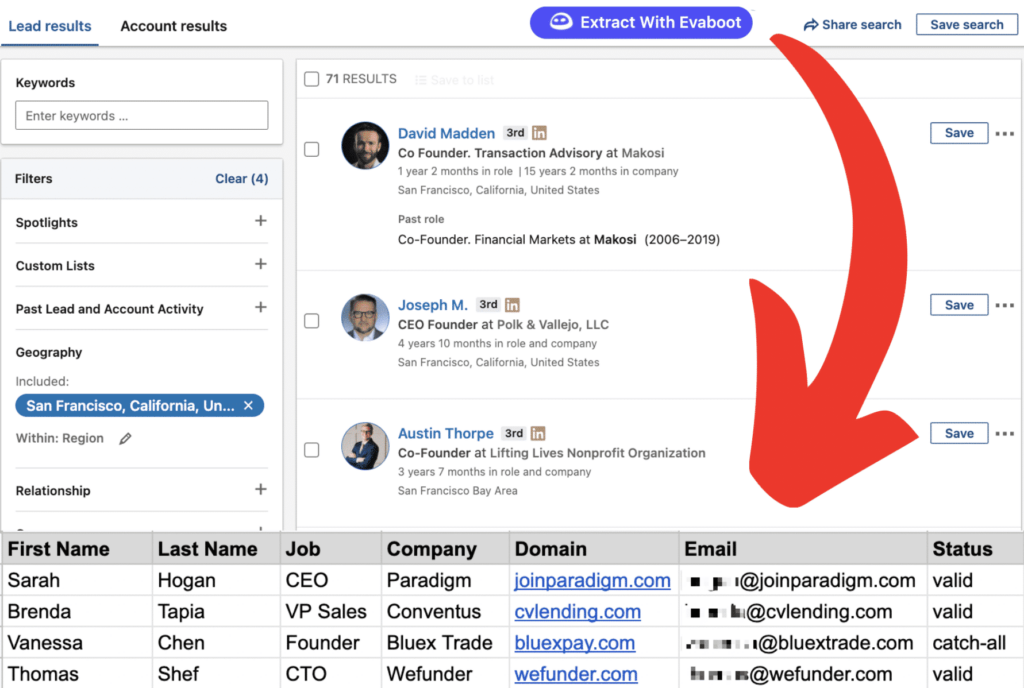
Once you have defined your target audience and built a list of qualified leads get the data out of LinkedIn Sales Navigator.
Evaboot will help you extract your leads and find emails, as I showed you before.
3. Send InMails
I’m sure you will export lists after saving your leads to contact them, right?
InMails, in this case, is the best solution.
Well, if you’re subscribed to one of the LinkedIn premium offers – LinkedIn Sales Navigator (this works also for LinkedIn Recruiter or LinkedIn Premium), you have between 10 and 150 InMails that you can send every month.
However, this number is not as high as you think.
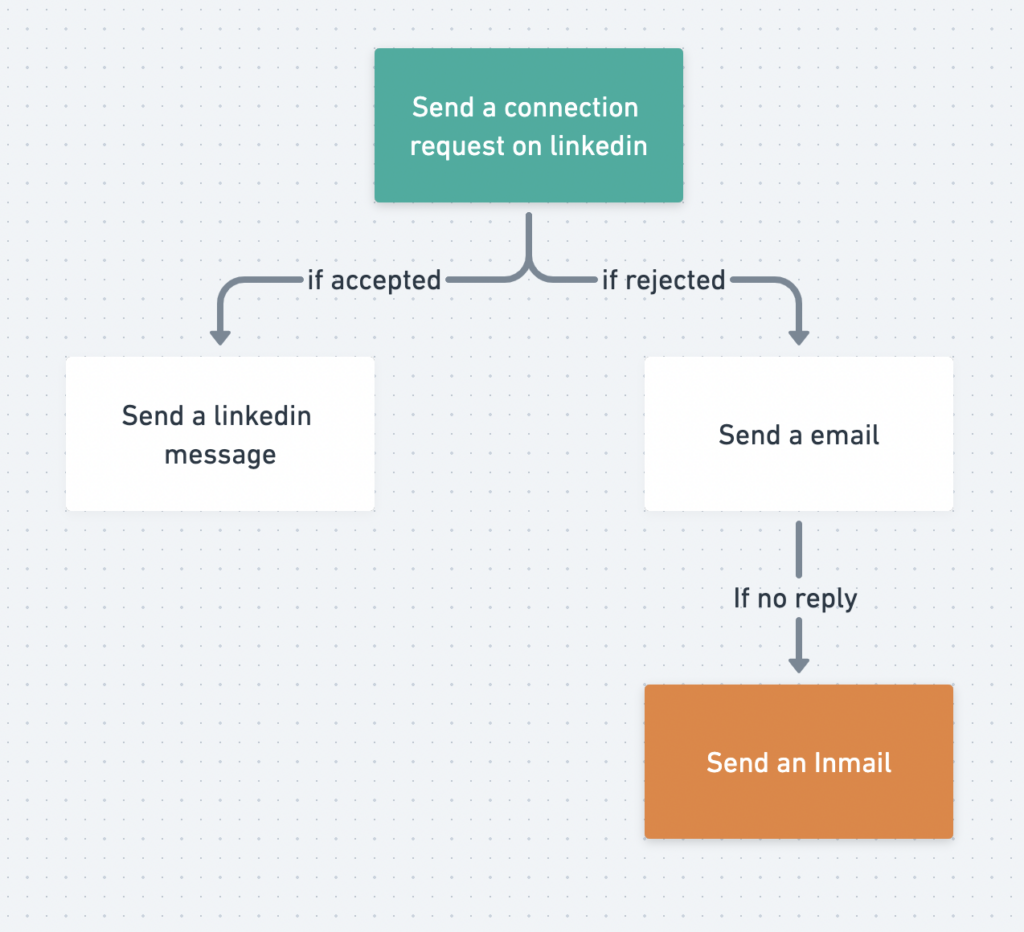
The best strategy is to keep InMail as a last resort if you fail to contact your prospects via email or classic LinkedIn message.
4. Send Follow-Ups
Make sure to add value every time you send a LinkedIn follow-up.
Most people repeat their proposition value and ask for a meeting again.
There is no added value for the prospect in this type of follow-up.
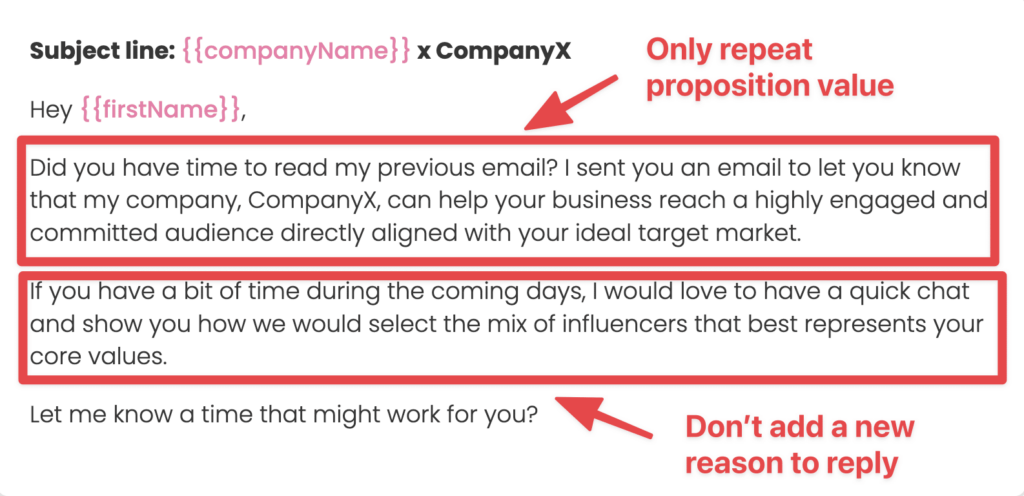
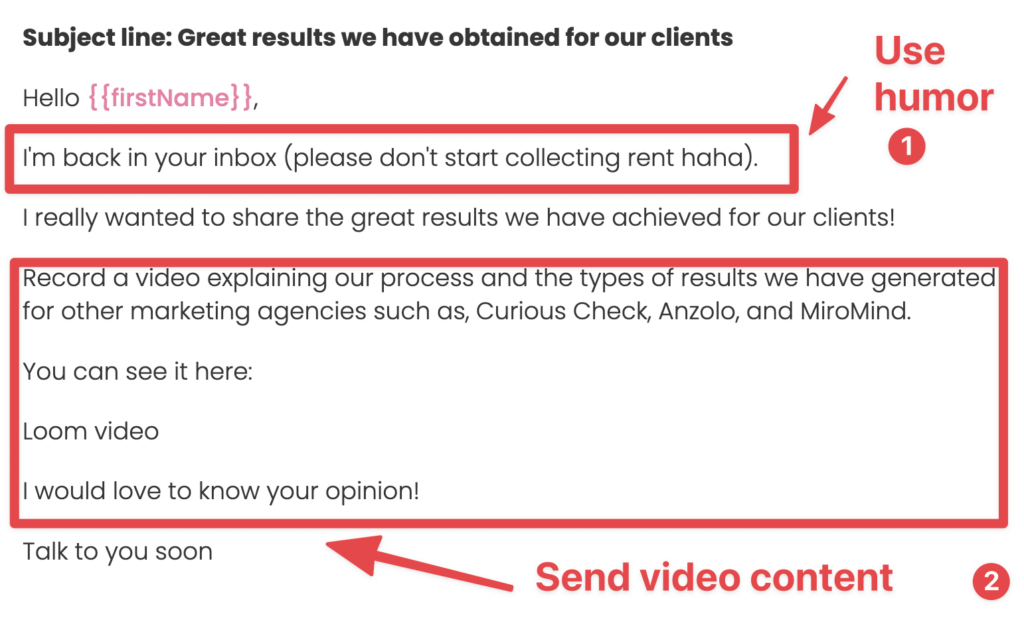
Instead of just repeating your proposition value, bring new arguments.
You can, for example, send:
- Contents you created
- Client testimonials
- Results obtained with similar clients
You are all set to estimate your lead gen and outreach efforts.
Conclusion
LinkedIn Sales Navigator limits search results to 2500 leads (100 pages of 25 leads) to improve the user experience and search accuracy.
This cap ensures you get relevant results based on your criteria without overwhelming the system or the user.
However, now you have the special techniques and know how to use LinkedIn Sales Navigator to refine and segment your searches, export lead lists, and improve your workflows.
FAQ
How do You Save More Than 25 Leads in Sales Navigator?
Unfortunately, you can’t save more than 25 leads at a time from the search results page in Sales Navigator. To save more, you’ll need to go through each page of results manually.
On each page, click “Select all” at the top of the leads list, then choose “Save to list”. Repeat this process for each page until all desired leads are saved.
What is the search limit on LinkedIn Sales Navigator?
Sales Navigator limits searches to 2,500 results and shows only the first 1,000 profiles, requiring focused filters for optimal results.
How many leads can you get from LinkedIn Sales Navigator?
LinkedIn Sales Navigator lets you view up to 2,500 lead results on 100 pages or 1,000 account results on 40 pages.
This limit helps ensure accurate connections and streamlines the display of 1st, 2nd, and 3rd-degree connections, making it easier to manage and engage with potential leads.
How to Export More than 2500 Profiles in a Sales Navigator Search?
To export more than 2500 Profiles in Sales Navigator:
- Use specific Search Filters: Focus on Seniority Level, Function, and Industry.
- Save and Copy the Search URLs: Paste them into a spreadsheet to save them for later.
- Adjust Filters: Exclude previous results and change filters to avoid duplicates.
- Repeat as many times as needed
- Export lead lists with Evaboot.


![11 Seamless.ai Alternatives and Competitors in [year] (Tried & Tested) 44 seamless ai alternatives](https://evaboot.com/wp-content/uploads/2024/03/SEAMLESS-AI-ALTERNATIVES-768x431.png)
![11 RocketReach Alternatives and Competitors in [year] (Tried & Tested) 45 rocketreach alternatives](https://evaboot.com/wp-content/uploads/2024/02/rocketreach-alternatives-768x432.png)
![What is LinkedIn Sales Navigator Team? [VS Professional Features] 47 linkedin sales navigator team](https://evaboot.com/wp-content/uploads/2021/11/linkedin-sales-navigator-team-768x432.webp)
