Export Leads From Sales Navigator
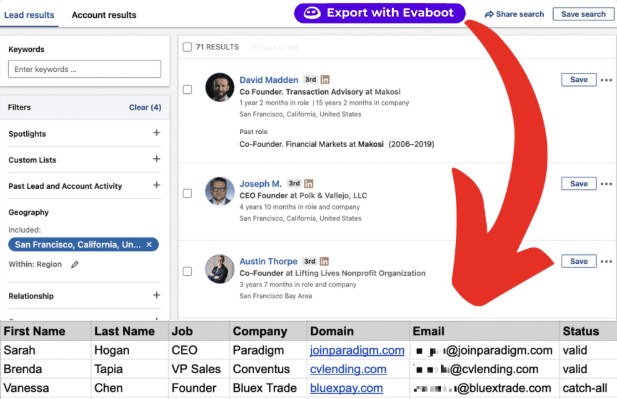
Create a clean B2B email list from LinkedIn Sales Navigator in just one click with the Evaboot Chrome Extension.

Create a clean B2B email list from LinkedIn Sales Navigator in just one click with the Evaboot Chrome Extension.
Contents
Do you want to manage and organize your lead lists in one place effectively?
Then, you only need to upload your lead list CSV files to LinkedIn Sales Navigator.
This feature saves you time and ensures your data is accurately mapped and ready to use.
In this guide, I’ll talk about:
Let’s see how you can get the most out of Sales Navigator using this advanced feature.
You’d need to upload CSV to Sales Navigator because you can import data from other B2B databases (Crunchbase, Wappalyzer, etc.), job boards, or CRMs (HubSpot, Salesforce, etc.) and put it in one place.
But this is only possible when you have a Sales Navigator Advanced account (Team).

If you have Sales Navigator Core (Professional), you must upgrade your subscription to use this feature.
Instead of using the search engine to find target companies one by one, you can bulk upload your Excel file or CSV and save a lot of time.
To upload a CSV to LinkedIn Sales Navigator, you need to:
In your LinkedIn Sales Navigator account, click Account List > Create an Account List > Upload and Account from CSV.

Don’t forget that this option will only be visible if you have a Sales Navigator Advanced subscription.
When you click on the button, а pop-up will appear.
Read the guidelines:
1. You can have a maximum of 1000 companies
2. Include at least the account name

3. The more details you add (ID, Website, etc.…), the more likely LinkedIn is to match your CSV with the right companies.
So, when you upload an account list on LinkedIn Sales Navigator, provide as much data as possible.
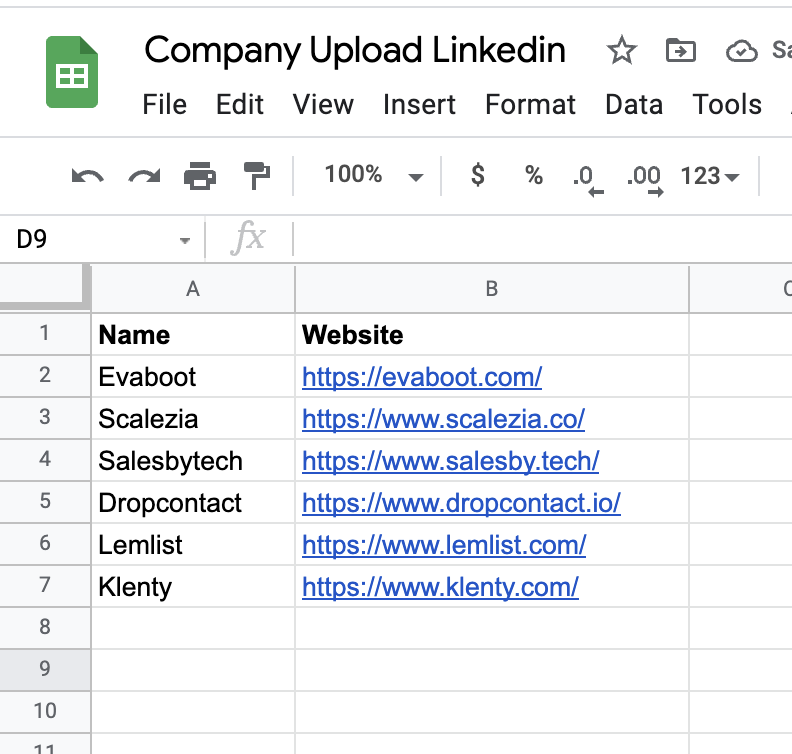
The best-case scenario is when you have the LinkedIn URL of the company page.
LinkedIn can easily retrieve the company in its database when you provide this information.
Once you upload your file, Sales Navigator will ask you to map its headers to the expected inputs.
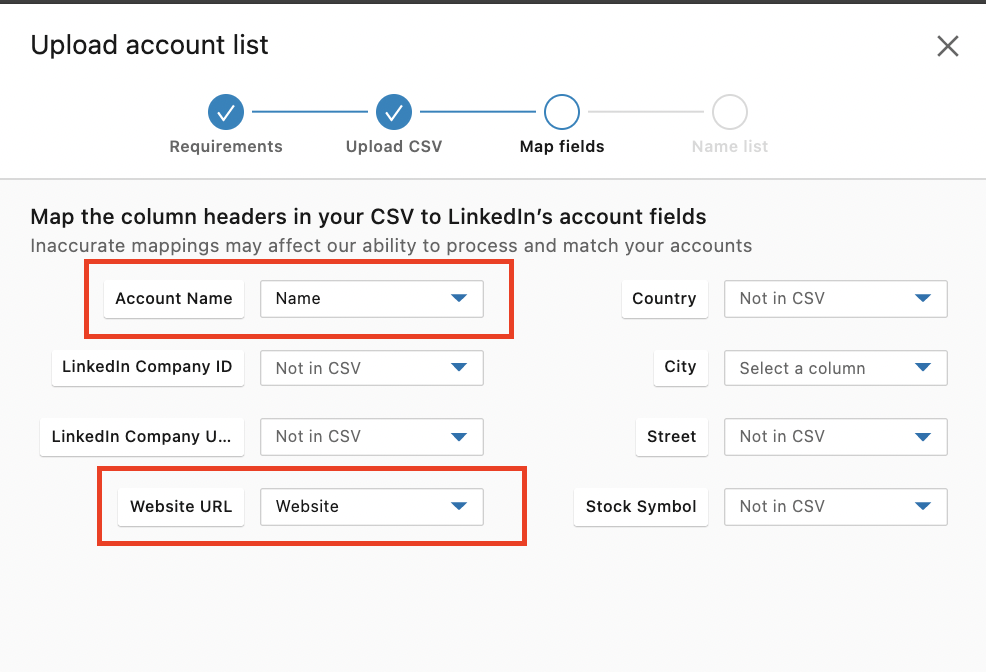
Associate the right column header with the right data and press launch.
LinkedIn often takes 5–30 minutes to retrieve the companies, depending on your file size.

When you launch a CSV upload, a little tag “CSV” will appear next to the list’s name.
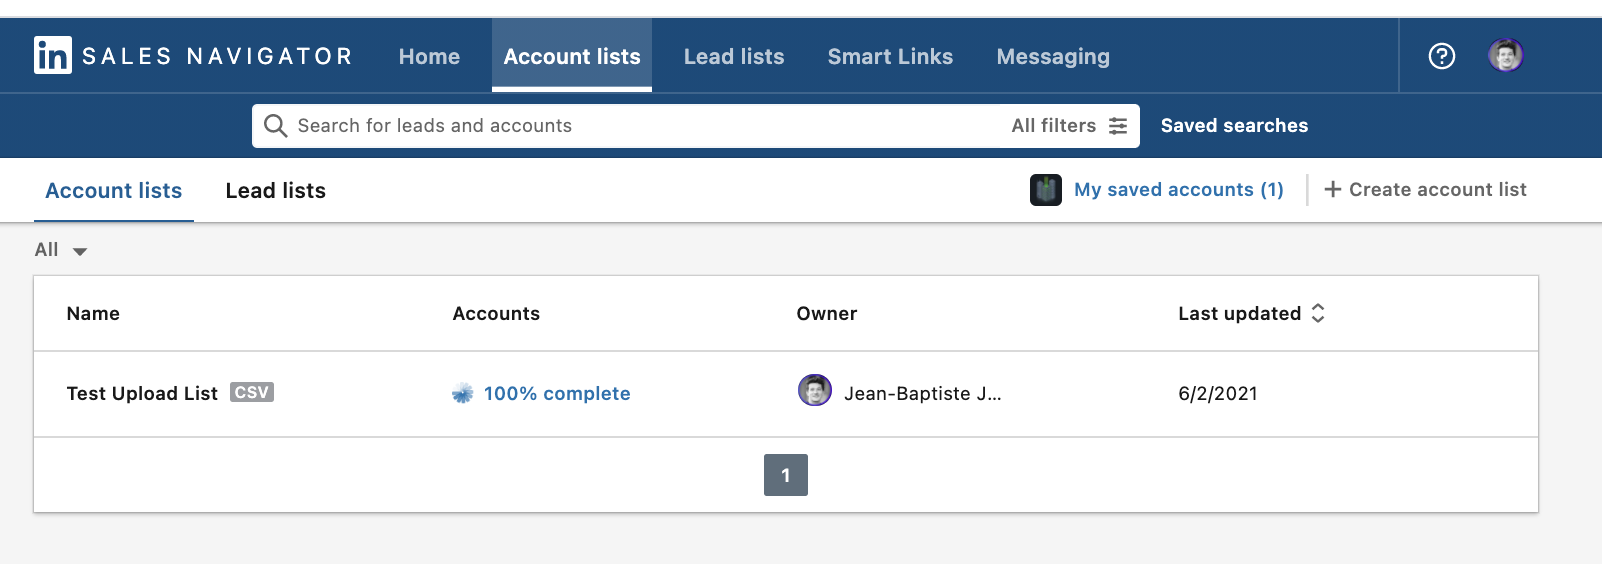
Once you get the list, you can start your LinkedIn outreach.
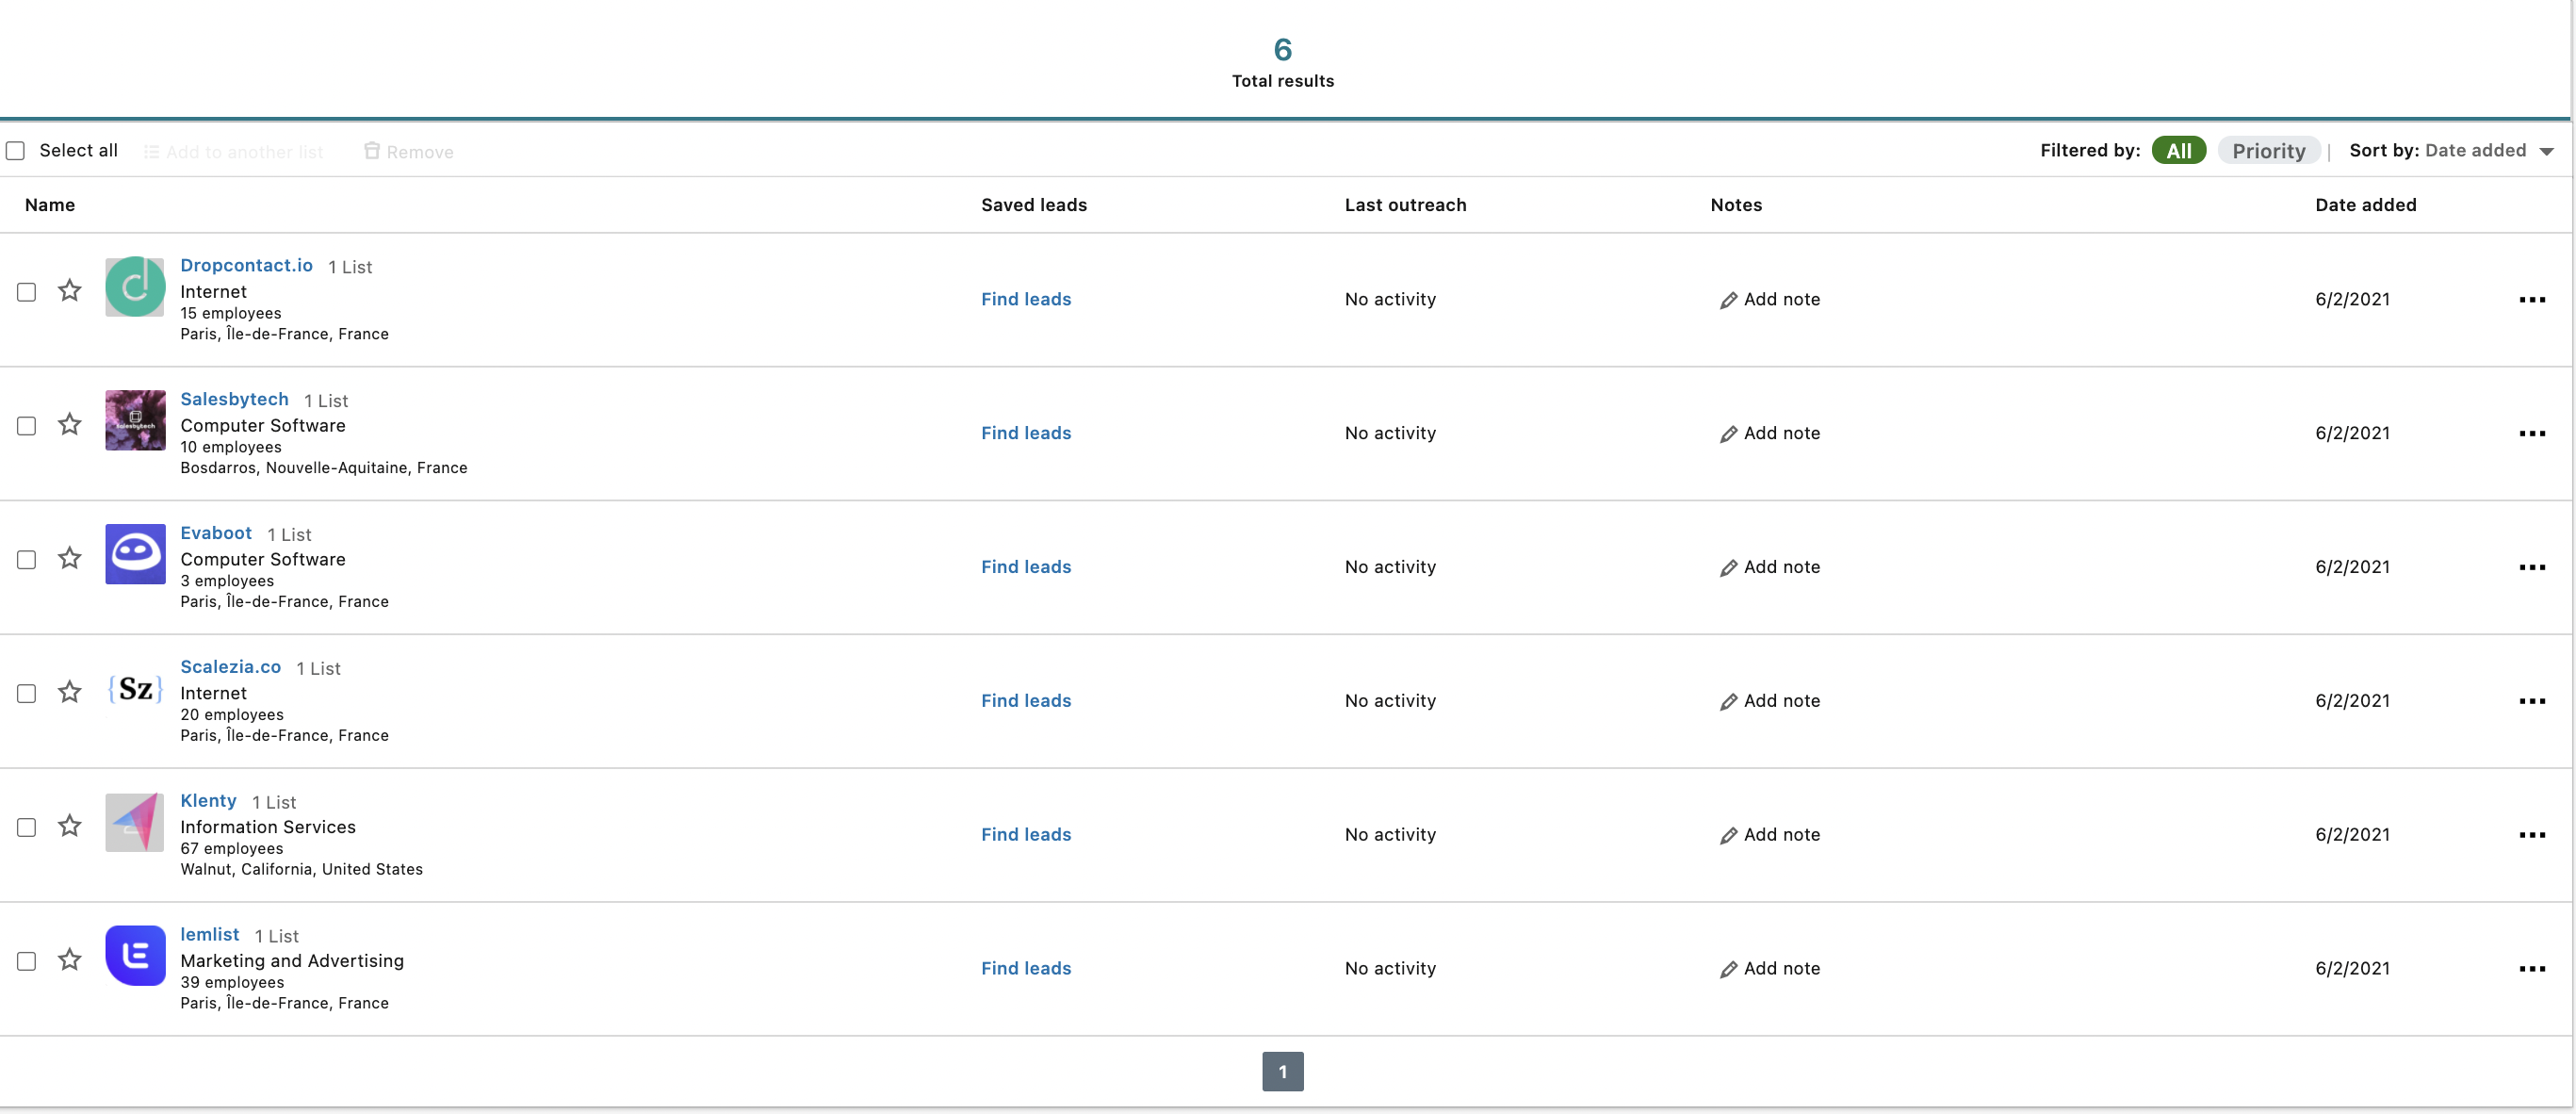
This example shows that the matching is perfect only by providing company names and websites.
However, Sales Navigator can make mistakes and associate companies in your list with the wrong LinkedIn company pages.
2 options here:
Personally, I prefer option 1, as double-checking data is painful.
Once you’ve uploaded your CSV file to LinkedIn Sales Navigator, the next step is identifying key decision-makers within those companies. Connecting with the right people ensures that your outreach efforts are targeted and effective.
Here’s how you can do it:
Once you’ve uploaded your target companies, Sales Navigator’s Relationship Maps help you quickly find relevant stakeholders.
These maps highlight key employees within each company, allowing you to filter out those with buying power.

Sales Navigator’s Advanced Search Filters enable you to find decision-makers based on job titles, seniority levels, and industry-specific keywords.
Here’s the exact process:

Apply filters and review results. You’ll now have a list of decision-makers within the companies from your CSV file, making your outreach more targeted and effective.
Watch this step-by-step video tutorial to see exactly how it’s done:
Sales Navigator limits the number of profile searches you can perform each month. If you hit your search cap, you may have to wait until the next cycle to access more leads.
To bypass these limitations, consider saving key leads into custom lists as you find them and using filters strategically to avoid unnecessary profile views.
For more ways to find decision-makers on LinkedIn, check out this guide on finding decision-makers on LinkedIn.
The CSV upload is not the only feature LinkedIn Sales Navigator Advanced (Team) offers.
This video compares Sales Navigator Advanced VS Core in detail.
It offers other features that can be useful for LinkedIn prospecting, like:
Sales Navigator SmartLink allows you to create Sales presentations and easily share and track your prospects’ interactions with this content.
When sharing Smartlinks, you can track your viewers’ behavior and gain insights into what your prospects and customers are most interested in.
LinkedIn Sales Navigator TeamLink allows sales teams to view their teammate’s connections.
TeamLink shows if people in your search results are among your teammates’ first-degree connections.
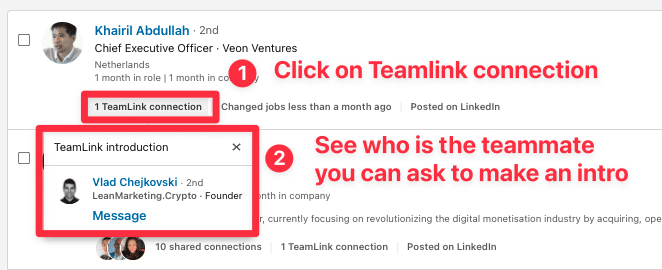
TeamLink harnesses the power of your entire team network to help you find the best path to a lead.
Other common questions that people ask are:
You can’t import lead lists on LinkedIn Sales Navigator; Sales Navigator only allows Account lists.
This feature would violate privacy rules, so LinkedIn can’t offer it.
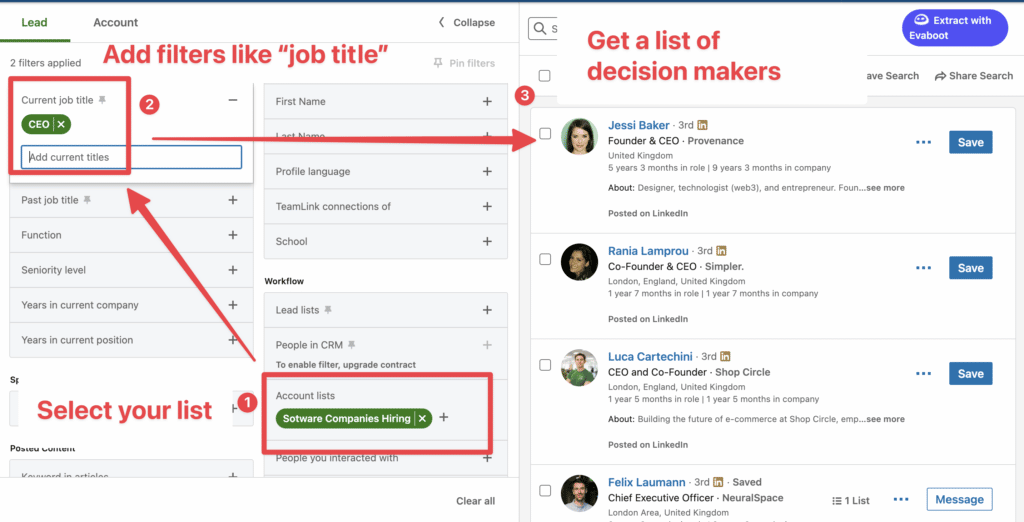
Once you have uploaded your CSV file, the best thing to do is to find the decision-makers inside the companies in your list.
For that:
Here is an example in which I’m retrieving all the CEOs of the companies in my CSV file.
If you don’t know how to use all the Company and Lead Data you found on LinkedIn Sales Navigator, I have a hint: LinkedIn Lead generation.
These LinkedIn Accounts of all the leads and companies are a golden key for your prospecting game.
Here are several tips to consider if you decide to go further:
When working with LinkedIn Sales Navigator, the quality of your uploaded CSV data directly impacts your prospecting success. Many sales professionals upload raw contact lists without proper preparation, leading to inefficient outreach and poor conversion rates. Artificial intelligence can transform this process, helping you prioritize the right prospects.
LinkedIn Sales Navigator’s CSV upload feature is a game-changer for efficient lead management and generation.
Following the simple steps to upload and map your CSV files, you can ensure that your contact data is accurately imported and ready for immediate use.
Use these insights to streamline your lead generation process, save time, and achieve your sales goals.
Open LinkedIn Sales Navigator and go to the “Account Lists” tab. Click “Upload accounts” in the right corner and choose your CSV file.
This feature is only for Sales Navigator Advanced subscribers.
LinkedIn’s CSV file upload feature in the Admin Center helps Recruiter and Talent Hub admins manage users in bulk.
Admins download a template or existing user list, update it, and upload it back to the Admin Center.
You can use CSV file uploads in the LinkedIn Admin Center to add or update users on your account. You can also add users manually.
Use the included CSV template to create your file, making the process convenient and efficient.
To upload a CSV file to LinkedIn Recruiter, follow these steps: