Export Leads From Sales Navigator
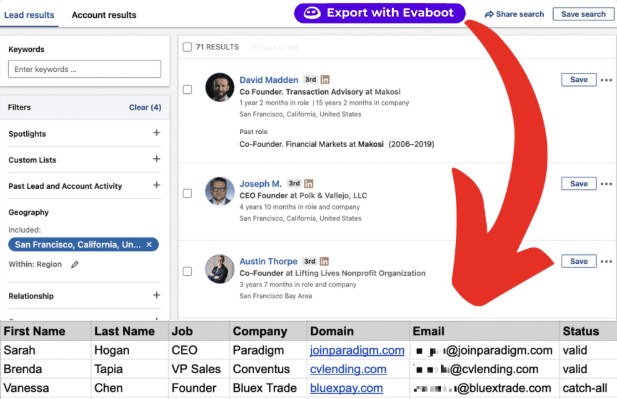
Create a clean B2B email list from LinkedIn Sales Navigator in just one click with the Evaboot Chrome Extension.

Create a clean B2B email list from LinkedIn Sales Navigator in just one click with the Evaboot Chrome Extension.
Contents
LinkedIn Sales Navigator is by far the best B2B database for finding leads. But it only provides email addresses for about 4% of profiles.
This means most leads do not have visible contact information.

That’s why finding emails on Sales Navigator is not as easy as it seems.
You must know the right techniques and tools.
If you are a recruiter, a founder, or a sales rep, keep reading.
You are going to learn how to use LinkedIn Sales Navigator to get the email of any decision-maker.
Let’s boost the results of your email campaigns.
No, LinkedIn Sales Navigator does not display email addresses. Occasionally, you might find them in the “Contact Info” or “About” sections of profiles, but this method is not enough.
For large amounts of leads, we recommend using bulk LinkedIn scraping tools.
The best way to find emails from LinkedIn Sales Navigator is to use a Chrome Extension like Evaboot. This tool lets you quickly pull up to 2,500 leads, complete with their LinkedIn profiles and confirmed work emails, with just one click.
Let’s see how the manual and scraping techniques work.
3 places to manually get emails from LinkedIn Sales Navigator profiles:
Contact info section is the number one place to go to find emails of your prospect profiles, along with their website and Twitter account.
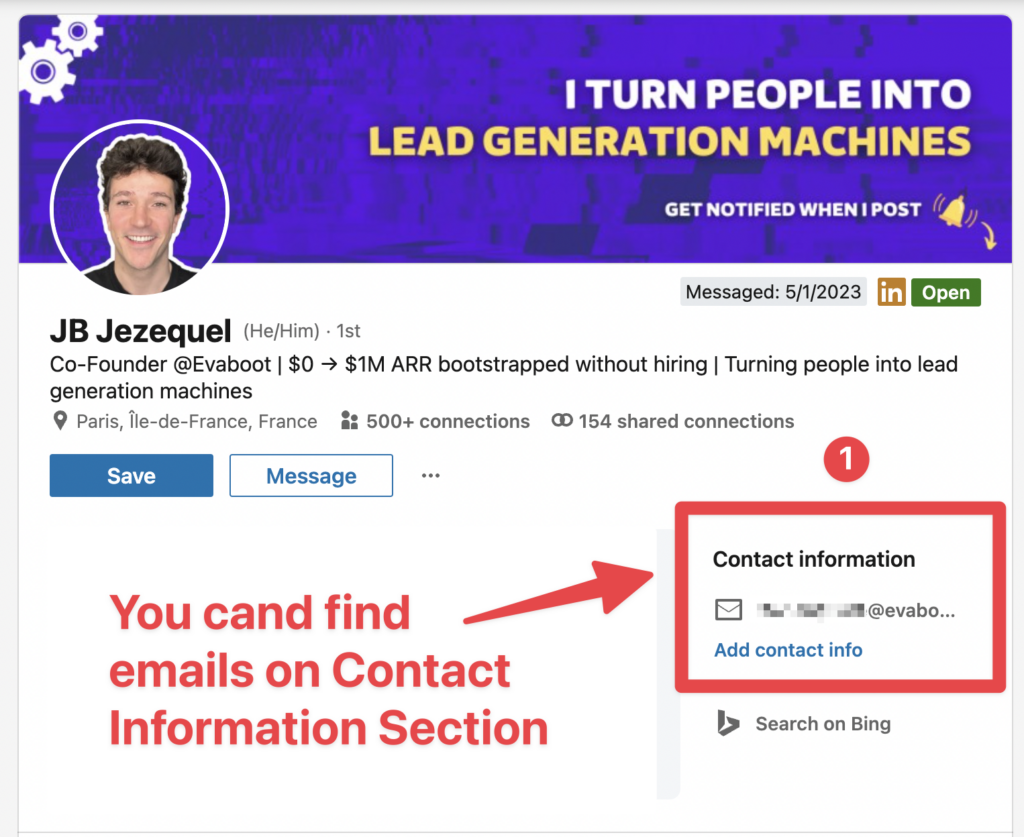
Most of the time, the profile must be part of your LinkedIn connections so you can get access to it.
If you can’t find the email in the Contact Information Section, you can try to look inside the About Section.
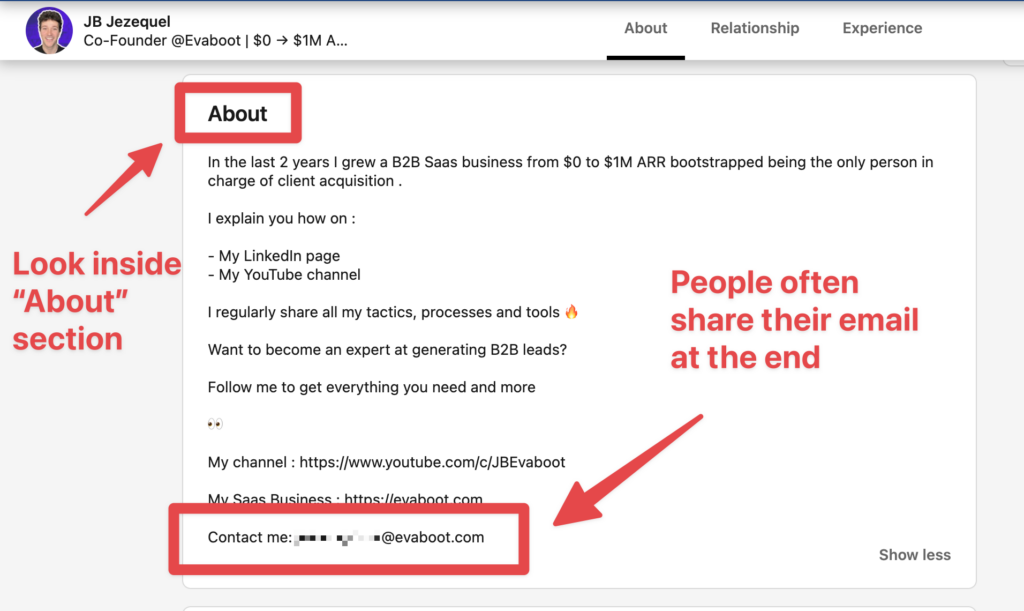
Some people tend to share their email at the end of that one, especially if they have something to sell.
If you are lucky, you might also find emails on LinkedIn banners, usually on consultants’ profiles or other people that have something to sell.

These techniques are useful if you are manually looking for emails. However, in addition to being time-consuming, they have a lot of limitations.
The limits to look for emails manually on Sales Navigator:
Few people make the choice to share their contact information publicly.
Based on a study led on +100K Sales Navigator profiles, we were able to confirm that only 30% of users share their emails with their 1st degree connection.

So if you take LinkedIn as your unique source to find emails, you will only find them for a third of your lead list.
The discovery rate is pretty low for 1st degree connections, but it’s much worse for 2nd and 3rd degree connections.

Regarding on people that you’re not connected with on LinkedIn, the discovery rate is 5% for email and 0.5% for phone numbers.
You can see that being connected on LinkedIn is almost mandatory to optimize your chances to get the email of your prospect.
Your ability to find emails on LinkedIn is therefore heavily connected to the number of connection of your LinkedIn account.
You obviously don’t want to send a connection request every time you want someone’s email, right?
Most of the emails you will find on LinkedIn Sales Navigator won’t be professional emails; they will be personal emails (Gmail, Yahoo, etc.).

That can be a big problem because prospecting using personal email addresses is not GDPR-compliant.
They also need to be extracted in real-time and not come from databases.
If your potential EU customers use personal emails, your business could face a fine. This fine can reach up to 4% of your total annual revenue.

Plus, your prospect won’t appreciate that you used their personal email addresses for B2B data prospecting.
The email added in the contact details section are often given when you create your LinkedIn profile.
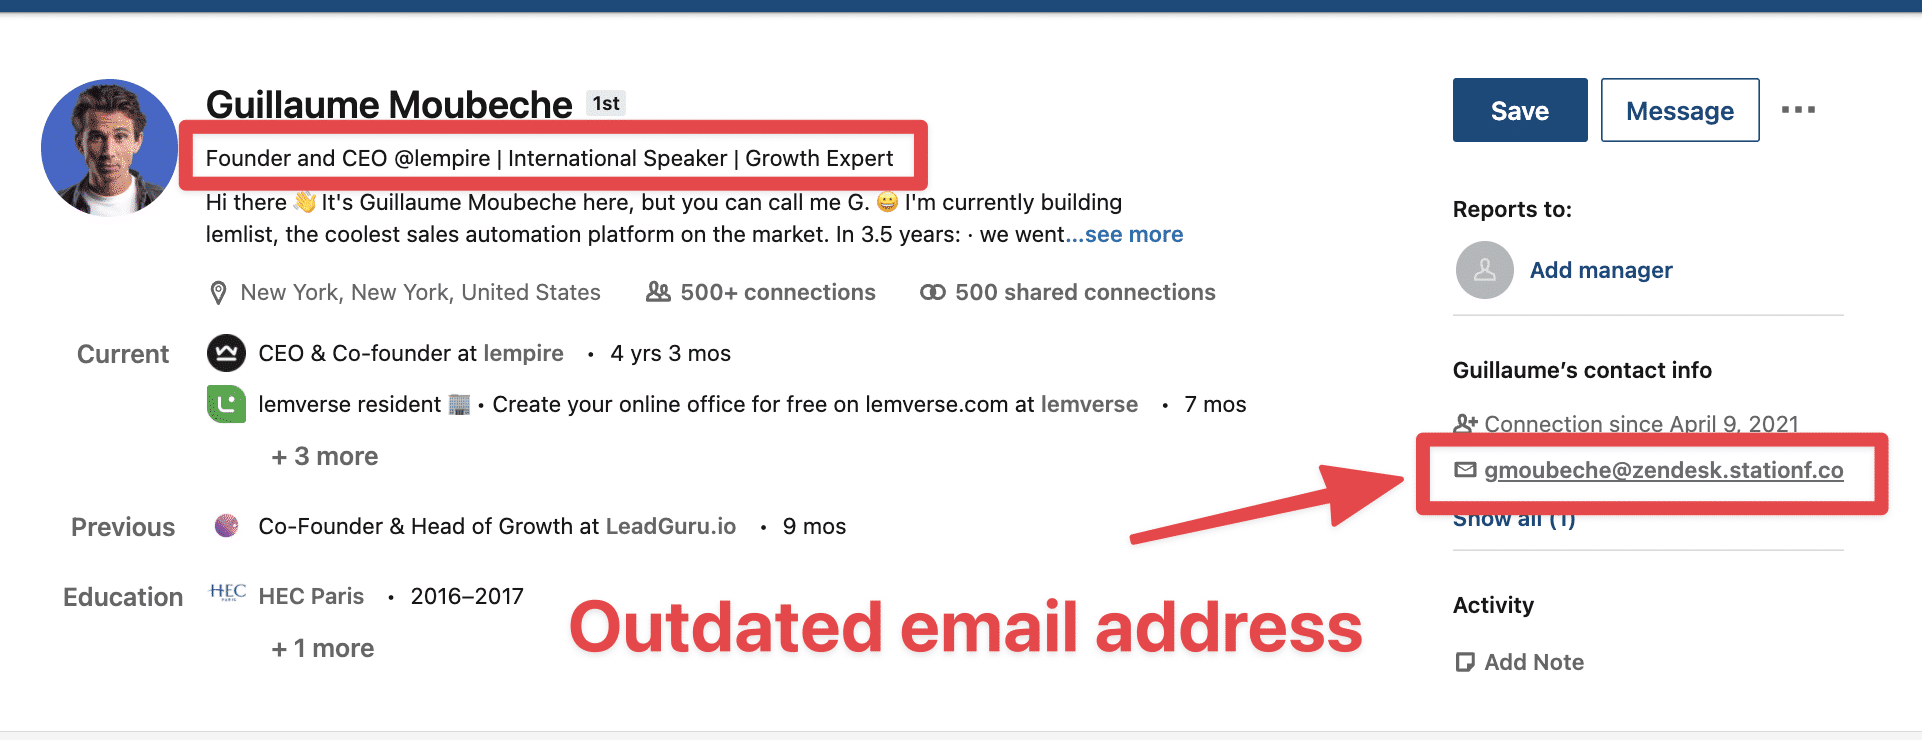
As the LinkedIn profile gets older, the more chances that the email provided is outdated or not from the right company.

In this example, the real email address is in the about section. It is different from the ones in the contact details.
LinkedIn Sales Navigator does not verify emails. All the data is added manually by it users. That exposes the data to a lot of outdated data, errors, typos, etc.
It means that finding an email on LinkedIn Sales Navigator is not guaranteed to have the right emails.

If you shoot LinkedIn emails without verifying them first, you expose yourself to getting bounced emails. That may affect the reputation of your email domain in the long run.
Better be careful and always verify the email adresses found with tools like Zerobounce or Neverbounce which will tell you if the emails really exist.
You have just seen that Sales Navigator email extraction has a lot of limitations.
If you just extract emails from LinkedIn Sales Navigator, you won’t go far.
Let’s see a much more efficient technique.
Sales Navigator email finder uses 3 techniques to get emails:

Most Sales Navigator emails will automate the tasks you do to find emails on LinkedIn.
That is to say:

Usually this technique won’t get so much emails.
That is why Sales Navigator email finders also use Pattern Matching.
All the emails in a company follow the same structure:

Once you found one, you found them all.
That’s how most email finder algorithms work.
In order to maximize their efficiency, you must provide 3 things:
With these 3 data points, they will be able to test all the combination that are possible for the email of your LinkedIn leads.

That’s why LinkedIn Sales Navigator is a great source for email finder tools as it provides exactly the data they need:
If the company website can’t be foudn on Linkedin, the email finder will to guess it from the company name
That generally gives less good results as they will try to guess the company website using Google.
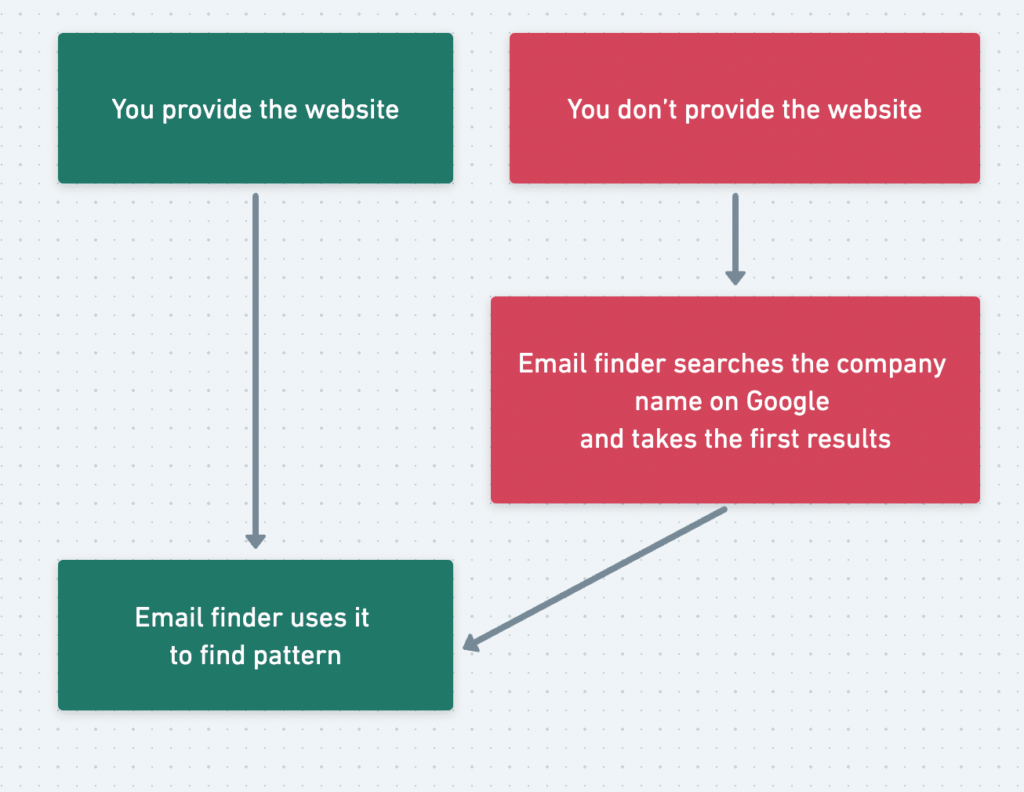
This works for unique company names like Welcome To The Jungle. Because obviously you don’t have dozens of website named like.
But imagine you look for emails in a company name AB consulting. There will be dozens of websites like:
Email finder can have trouble identifyion the right domain.
That is why it’s always better to provide the email finders with the right company names.
The last technique find emails is to use web scraping to get emails on:
It’s usually done through Google scraping.

Evaboot uses theses techniques.
Let’s see how it works right now.
How to find emails from Sales Navigator in bulk:
Go to evaboot.com, signup and download the Evaboot Chrome Extension.
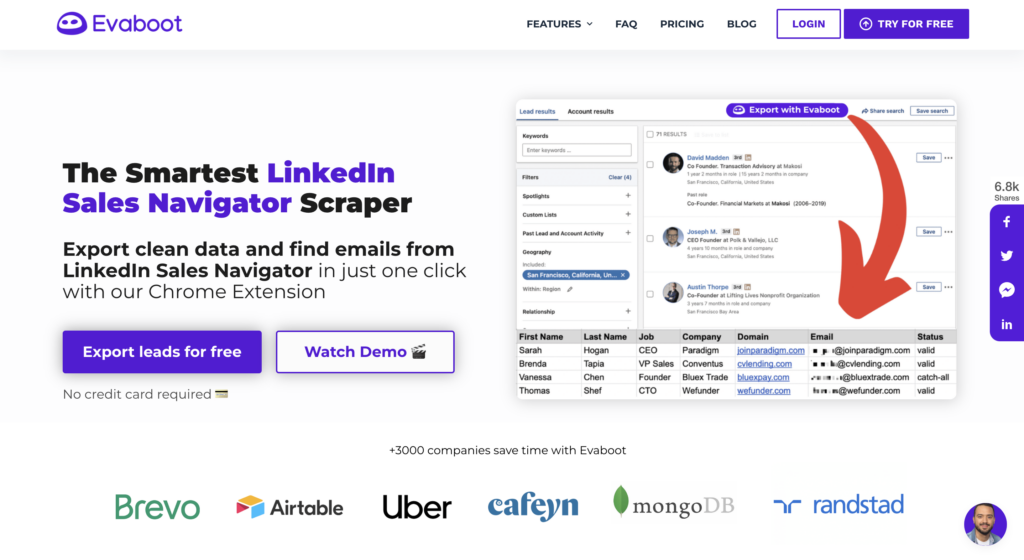
Once you have the extension installed, you will get a new button “Export with Evaboot” integrated in your LinkedIn Sales Navigator.
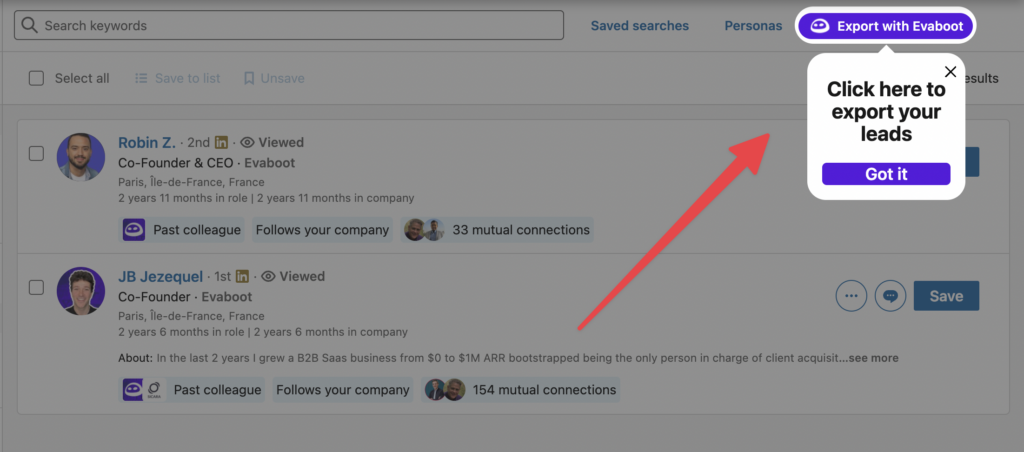
Note that you can only export Sales Navigator searches with Evaboot, it won’t work with basic LinkedIn search.
You must have a Sales Navigator account to use this technique.
Once you create your lead lists with advanced search filters like job titles and company size, you can go to any lead list. Then, click on “Export with Evaboot”.
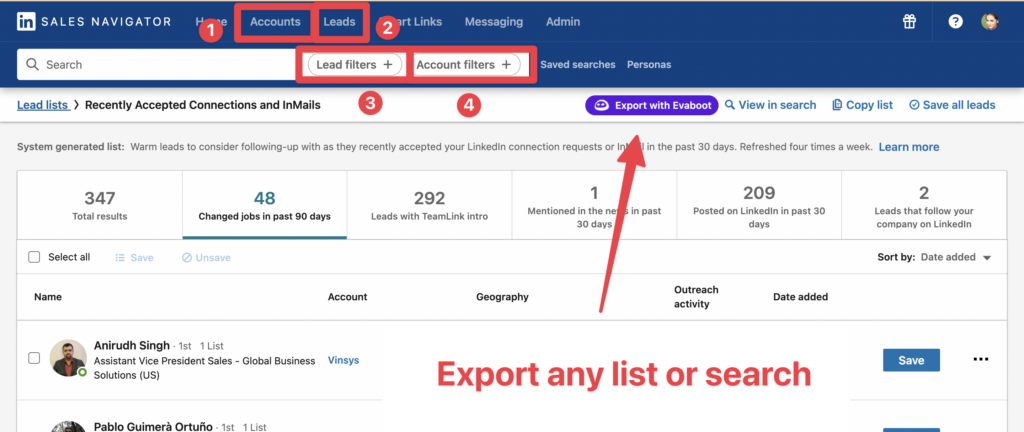
Then select if you want to export your leads with or without emails.

Name your search and launch your export.

Wait for the export to be completed. You will receive an email when it’s finished.

You can then click on download to get all these leads into a clean CSV file.
You will send all the profile URLs of your LinkedIn leads along with all their LinkedIn data (profile and company page data)
Even if you selected to exported Sales Navigator leads without emails, you can still add them after the export step.
To add them, simply click on the button “Find Emails” that you can see next to your export name.

Once the email finder has runned on your lead list, you will get access to the email finder stats.
On the column “Email” you will able to see the number of emails found.

If you click on this number you will get the details of:

To get the full list of emails, you just have to download the CSV file.
In terms of pricing, Evaboot charges:
It means 1 lead exported with an email = 2 credits.

We have a volume-based pricing with different credit amounts:
There are other LinkedIn email finders that can do the same thing as Skrapp, GetProspect, or Snovio. Feel free to make your benchmark.
That being said, lead data is not static.
B2B data decays by 2.1% per month, meaning 22.5% of your exported leads could be outdated within a year. Job titles change, companies evolve, and outdated information leads to wasted outreach efforts.
To solve this, Evaboot offers URL Enrichment: a tool allowing you to upload Linkedin URLs stored in your CRM to enrich your LinkedIn contacts with Sales Navigator data.
How it works:
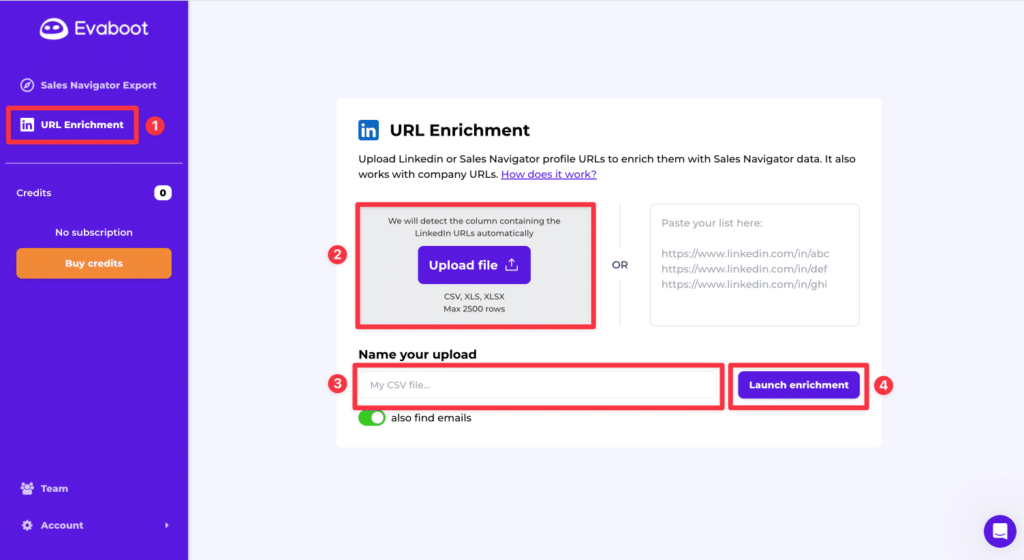

And here you go!
We recommend updating your lead lists every 3-6 months to maintain accuracy. This ensures your database stays fresh, relevant, and effective—so your sales efforts never go to waste.
For a visual step-by-step guide, check out the video tutorial:
3 types of emails you can get from Linkedin Sales Navigator:
An email is marked safe when it has been successfully validated by our email verifier.

It means we sent a request to the server and the reply was positive.
There is 99% chance the email exists.
Riskier emails are catch-all emails.
Catch-all emails servers capture emails sent to any invalid email addresses of the domain.
When configured, the emails sent to any email address related to the domain will not be bounced back.

It means this email can’t be verified as we can’t get a YES/NO reply from the server.
The only way to verify catch-all emails is to shoot them.
We advise you maintain a 30-40% of riskier email in your list maximum to control your bounce.
Let’s see several reasons that can explain a low discovery rate:
If your targets usually don’t share their email on their LinkedIn profiles.
That is a first element that can explain a low discovery rate.

This happens for most profiles though so we are used to managing these uses cases.
That is why we also use pattern finding techniques using:
– first name
– last name
– company website
The better the input data, the easier it will be to find the right pattern.
Let’s take the example of this user.
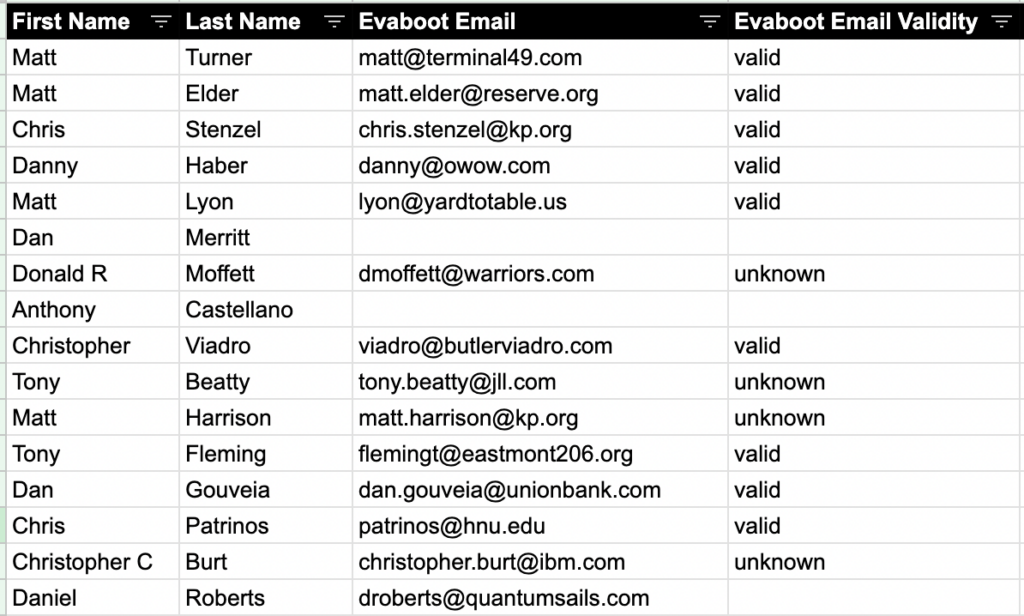
In this search there were a lot of leads with missing websites and/or with missing family names;

If your Evaboot file look like this, you will probably get a low discovery rate.
Before you launch the Evaboot email finder on your list, make sure these elements are presents:
If they are not, take the time to complete this information first and then re-upload it into an email finder.
The email finder don’t have good results on not digital industries like:

If you recognize your market in that list then you should focus on finding specialized databases instead of finding emails from Linkedin.
You can still use LinkedIn to contact these people via DM though.
Evaboot is great to find emails from Linkedin Sales Navigator in bulk.
However it’s not the best tool to get emails one-by-one from specific profiles.
If you want to find emails from specific Sales Navigator profiles:
Go to Chrome Web Store to install Lusha Chrome Extension.
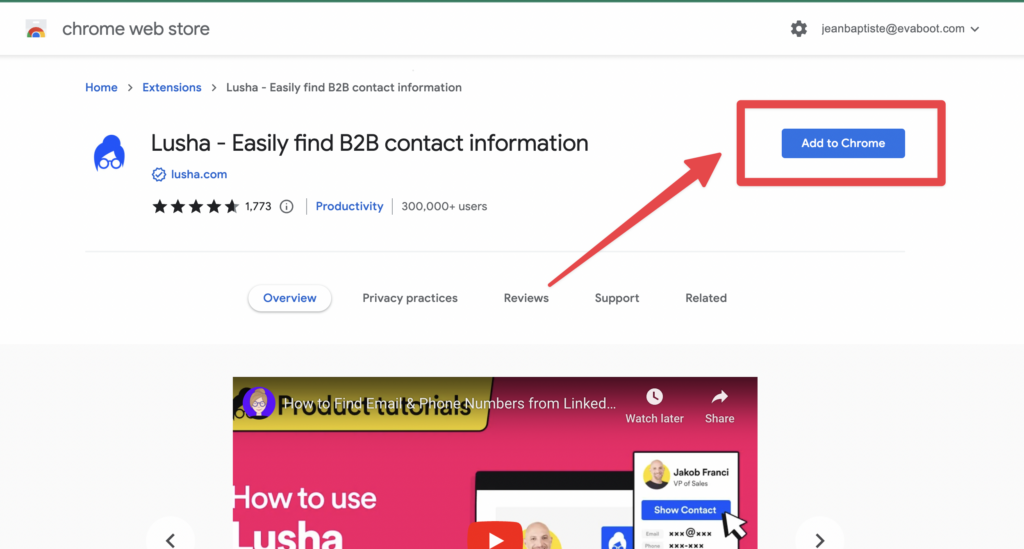
After you install the Lusha Chrome Extension, a blue button will appear on the right side of your screen. This happens whenever you visit a LinkedIn or Sales Navigator profile.
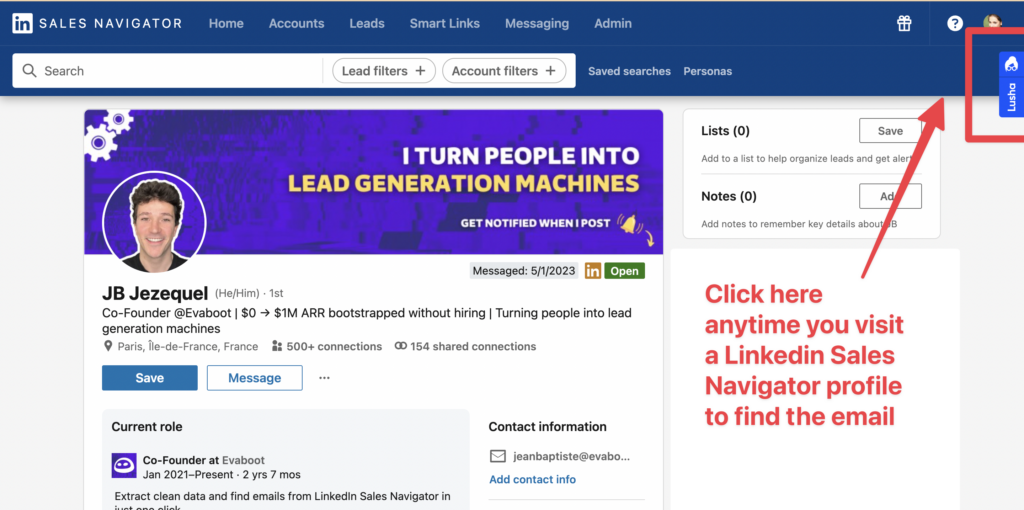
This is really convenient if you’re looking for leads and prospects manually without using any LinkedIn automation tools.
When you find a lead you want to contact, click on Show Contact. Lusha will provide the email for this lead.
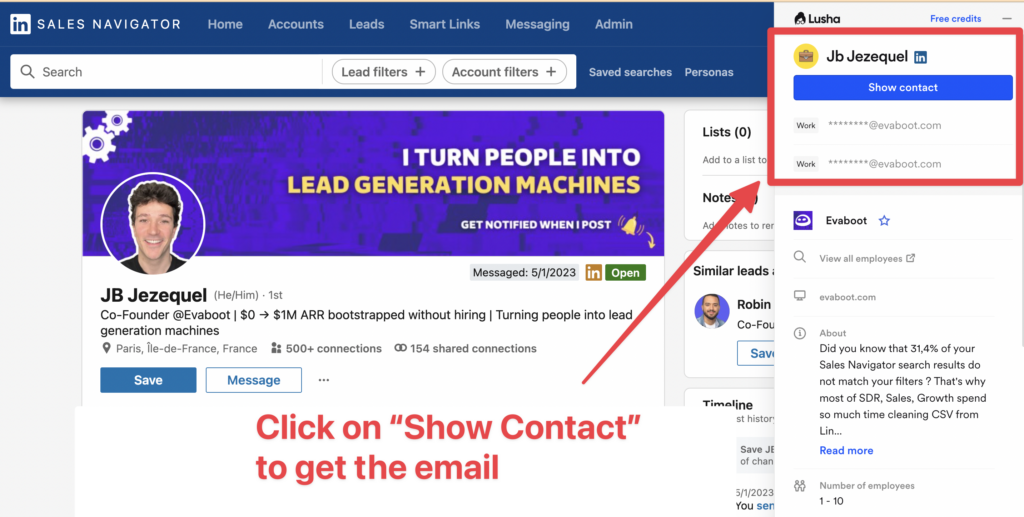
It’s possible that Lusha may find several emails for the same lead.
In that case you can use an email verification tool like Zerobounce or Neverbounce to know which ones really exists.
There are other various apps that do the same thing as Datagma or Kaspr. You can do your benchmark to see which is the most efficient on your specific target.

Some services, like Surfe, offer CRM integrations. This lets you connect LinkedIn with your CRM database, such as Salesforce or HubSpot.
If Evaboot or other LinkedIn Sales Navigator email finders can’t find the emails of your prospects, you can still send LinkedIn InMails.
LinkedIn InMails are premium LinkedIn messages allowing you to bypass the LinkedIn connection request step to land directly into the inbox of your prospects.
It’s exactly like an email, but on LinkedIn.
If you can’t find the Sales Navigator email of your prospect, InMails are a good workaround.
There are even some techniques to send unlimited InMails on LinkedIn.
Here’s a tutorial:
If you also want to get phone numbers from sales navigator, you can combine Evaboot and Datagma: here is a tutorial.
You get 15% discount on your first phone credits purchase with the code: EVABOOT.
While extracting emails from LinkedIn Sales Navigator is essential for prospecting, the reverse process can be just as valuable.
Finding a LinkedIn profile from an email helps verify a prospect’s job, personalize outreach, and uncover mutual connections for warmer introductions.

Here are a few ways to match an email address to a LinkedIn profile:
For a detailed step-by-step guide on how to do this, check out our dedicated article: How to Find a LinkedIn Profile from an Email.
Extracting emails from LinkedIn Sales Navigator is an essential step of any B2B sales process. But you can’t do much more with Sales Navigator.
If you really want you and your sales team to perform, you must combine Sales Navigator email extraction with other techniques like web scrapping or pattern matching.
The Sales Navigator email finder tools we mentioned in this article are perfect for that, as they combine the 3 techniques and can save you a lot of time.
If you want to learn how to use Sales Navigator efficiently to generate leads, make sure to check this video. It contains everything you need to get the most out of the tool.
Once you know how to create list of prospects and get their emails, you can start prospecting doing LinkedIn cold outreach or cold email.
Here is another video that will help you with that:
You can get emails from LinkedIn by either:
Sales Navigator users can build lead lists and export them with email finder tools for bulk email extraction.
Yes, you can export emails in bulk from LinkedIn by using third-party Chrome extensions and scrapers.
Tools like Evaboot allow you to export up to 2,500 leads per day from Sales Navigator, enrich them with verified emails, and download the data in a clean CSV format.
Evaboot is one of the best tools specifically optimized for LinkedIn Sales Navigator. It offers clean extractions, automated email finding, and advanced filtering.
Other top tools include Hunter.io for domain-based email search, Apollo.io for large databases, and Snov.io for verification and campaign integration.