Export Leads From Sales Navigator
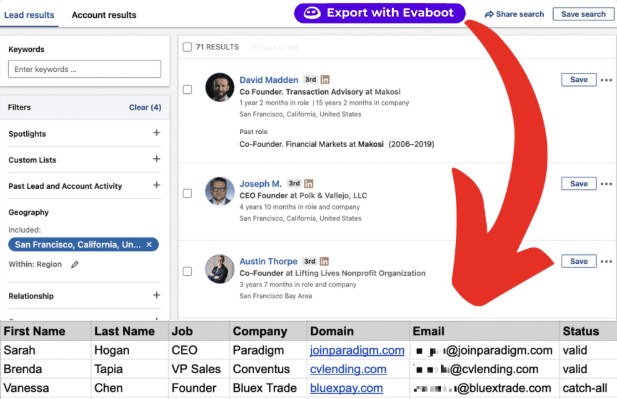
Create a clean B2B email list from LinkedIn Sales Navigator in just one click with the Evaboot Chrome Extension.
Export Leads From Sales Navigator

Create a clean B2B email list from LinkedIn Sales Navigator in just one click with the Evaboot Chrome Extension.
Contents
Running an agency means one thing: you need a constant flow of qualified clients.
Traditional prospecting methods eat up your time. Cold calling feels outdated. Email lists get stale fast.
Sales Navigator for agency owners changes the game completely.
This powerful LinkedIn tool helps you find decision-makers at companies that actually need your services. No more guessing. No more wasted outreach.
Want to build laser-targeted client lists? Looking to scale your agency’s lead generation?
This guide shows you exactly how to use Sales Navigator for agency owners to fill your pipeline with qualified prospects. I’ll be providing practical tips and insights on:
Let’s dive in.
Agency owners face unique challenges. You’re not selling a simple product. You’re selling expertise, results, and long-term partnerships.

LinkedIn Sales Navigator for agency owners solves three critical problems:
The result? More qualified conversations. Higher close rates. Predictable revenue growth.
Getting started with Sales Navigator for agency owners requires strategic setup.
Here’s how to optimize your account:
There are 3 LinkedIn Sales Navigator plans: Business (Core), Advanced (Team), or Advanced Plus (Enterprise).
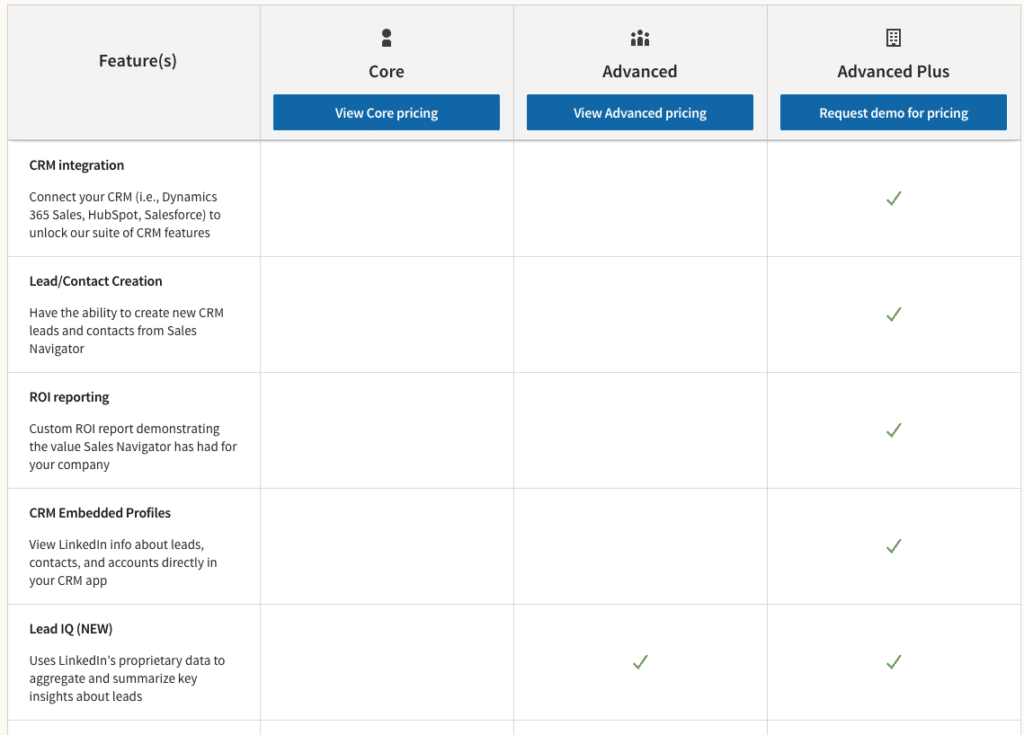
Most agency owners start with Core and upgrade as they scale.
Your prospects will check your profile before responding. Make it count.

Here are a few key elements to optimize on your LinkedIn Profile:
Want more tips to optimize your LinkedIn profile? Watch the video I made here:
Before searching, know exactly who you’re targeting.

Clear targeting makes your Sales Navigator for agency owners strategy much more effective.
Sales Navigator for agency owners shines with its advanced search capabilities.
Here’s how to find your ideal clients:
Start by finding the right companies, then identify decision-makers within them.
For that, you need to use company filters strategically.
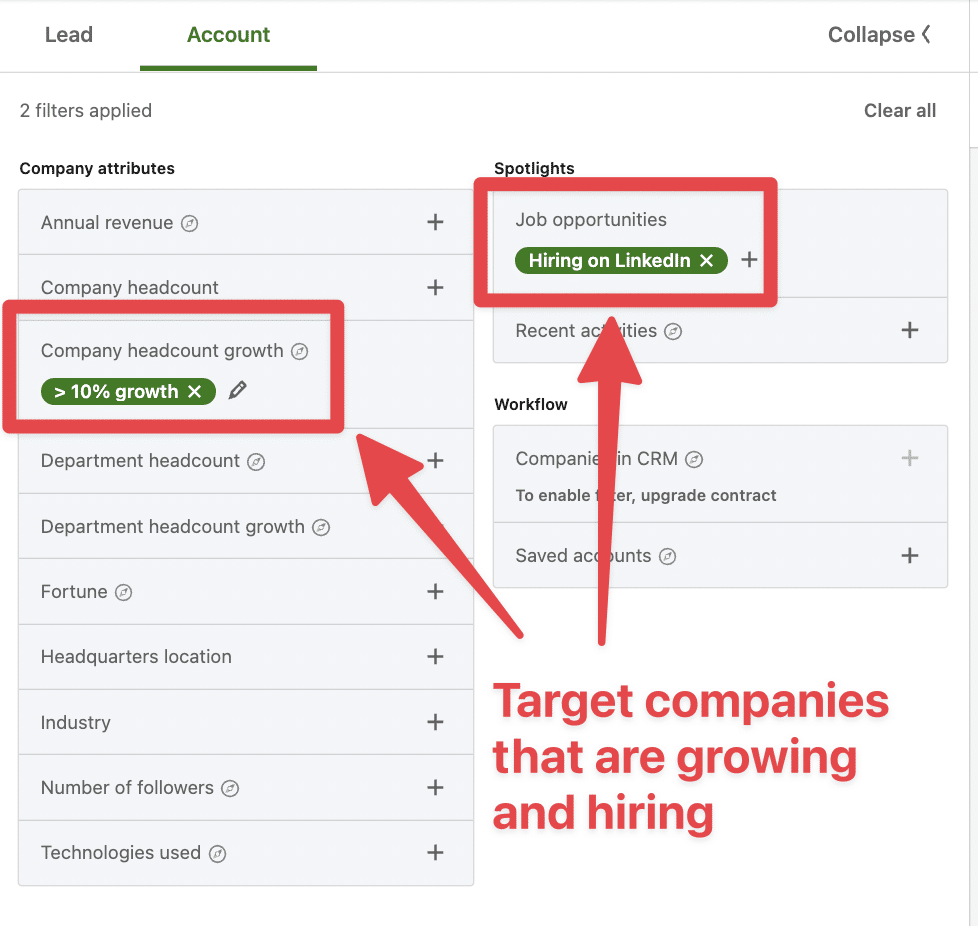
Sales Navigator offers 14 search filters for accounts that would be perfect clients for your business.

You can filter by:
The headcount growth and hiring filters allow you to target growing companies.
In terms of event detection, LinkedIn allows you to detect companies with recent funding events on Crunchbase.
LinkedIn also detects when they are a Senior Leadership change in the last 3 months in a company.
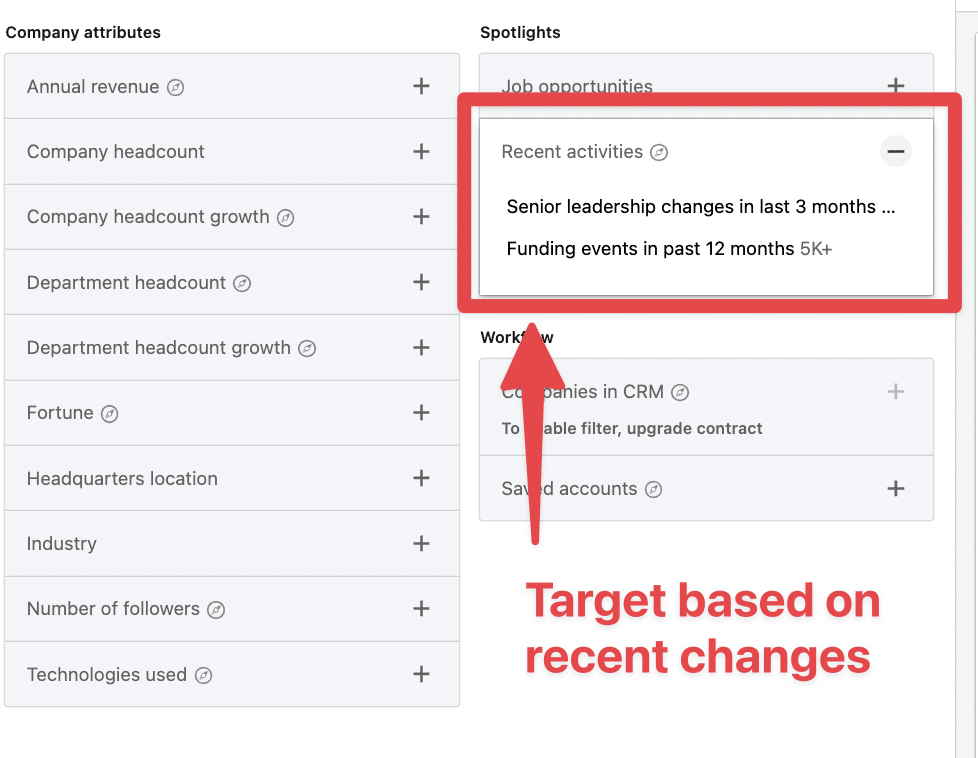
The arrival of a new top decision-makers is a great opportunity to launch a conversation with the account.
Newcomers tend to come up with new ideas, requiring products and services.
The next step?
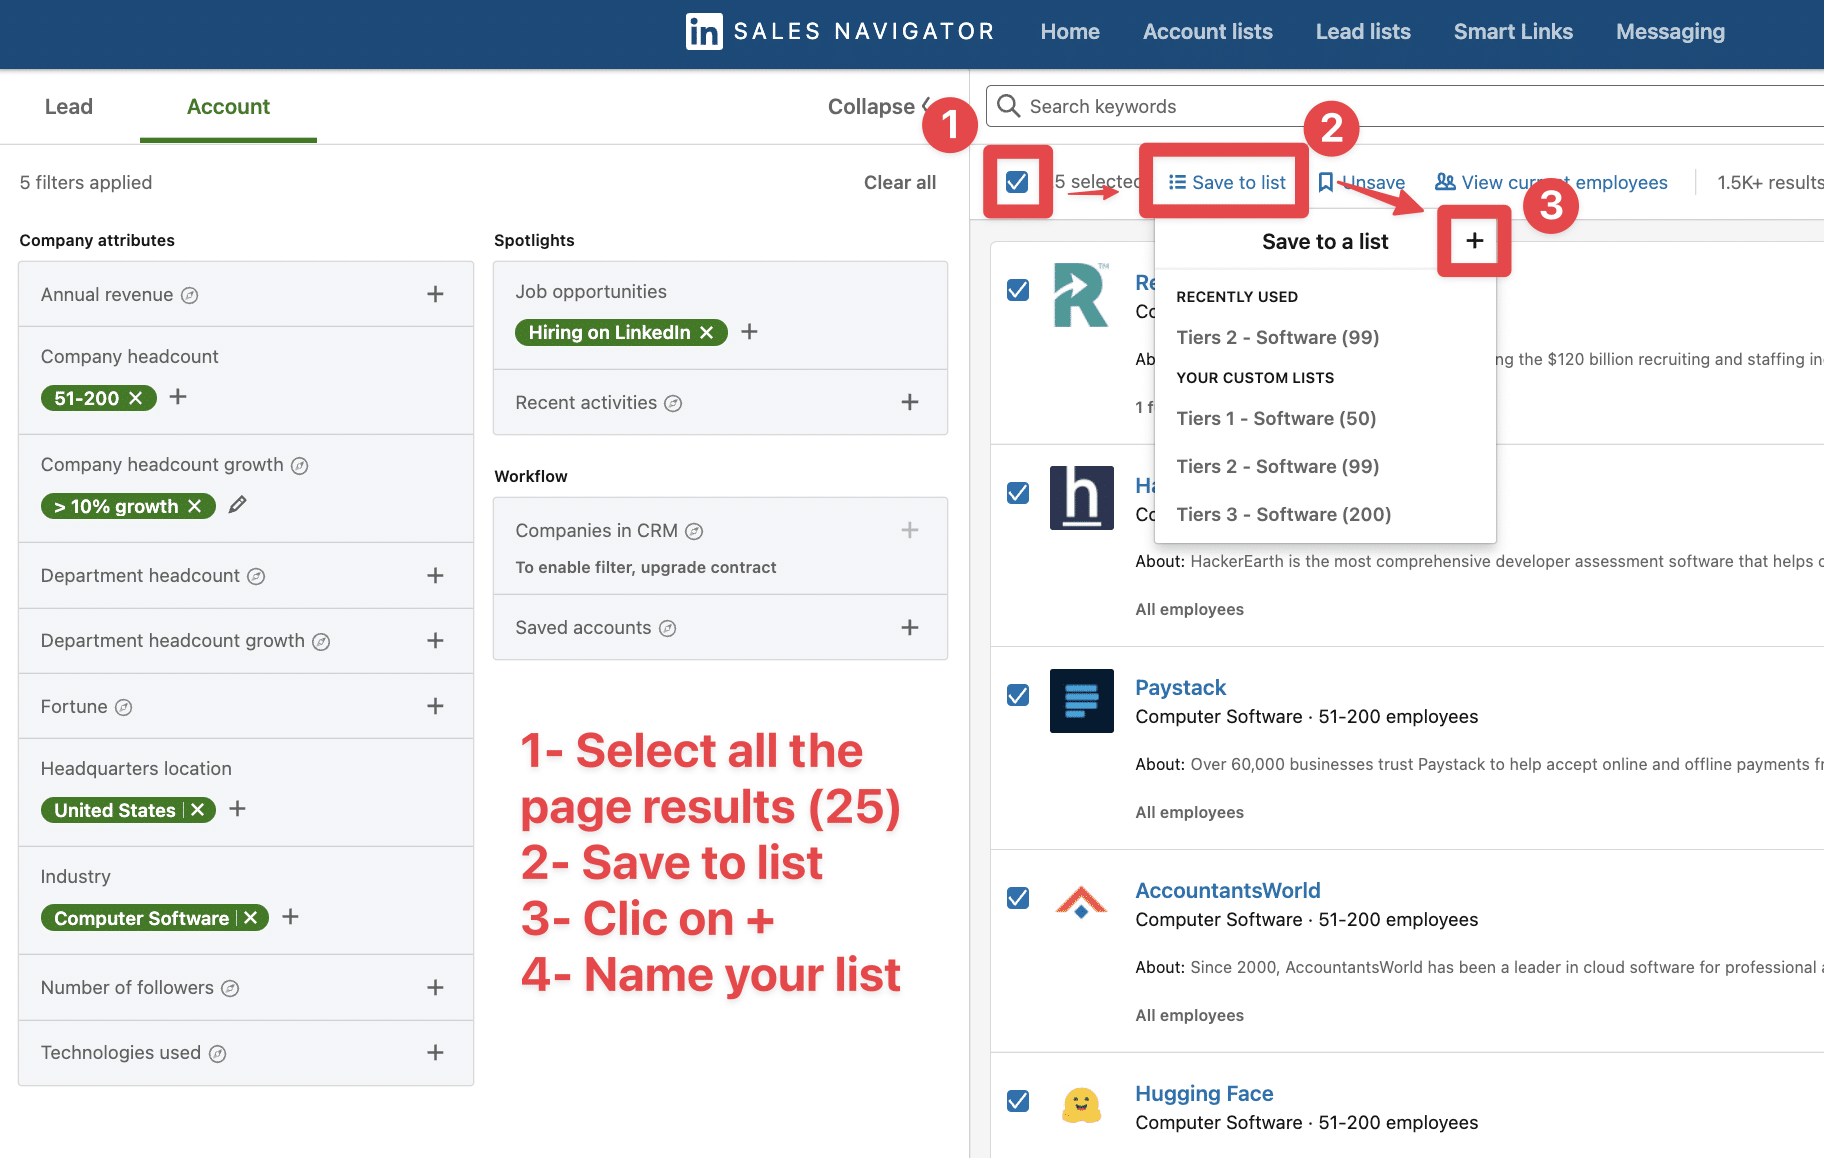
It’s to create account lists.
Once you have target companies, it’s time to find the right people.
To create an account list on Sales Navigator:
Once the account is added to your list, you will be notified when the company:
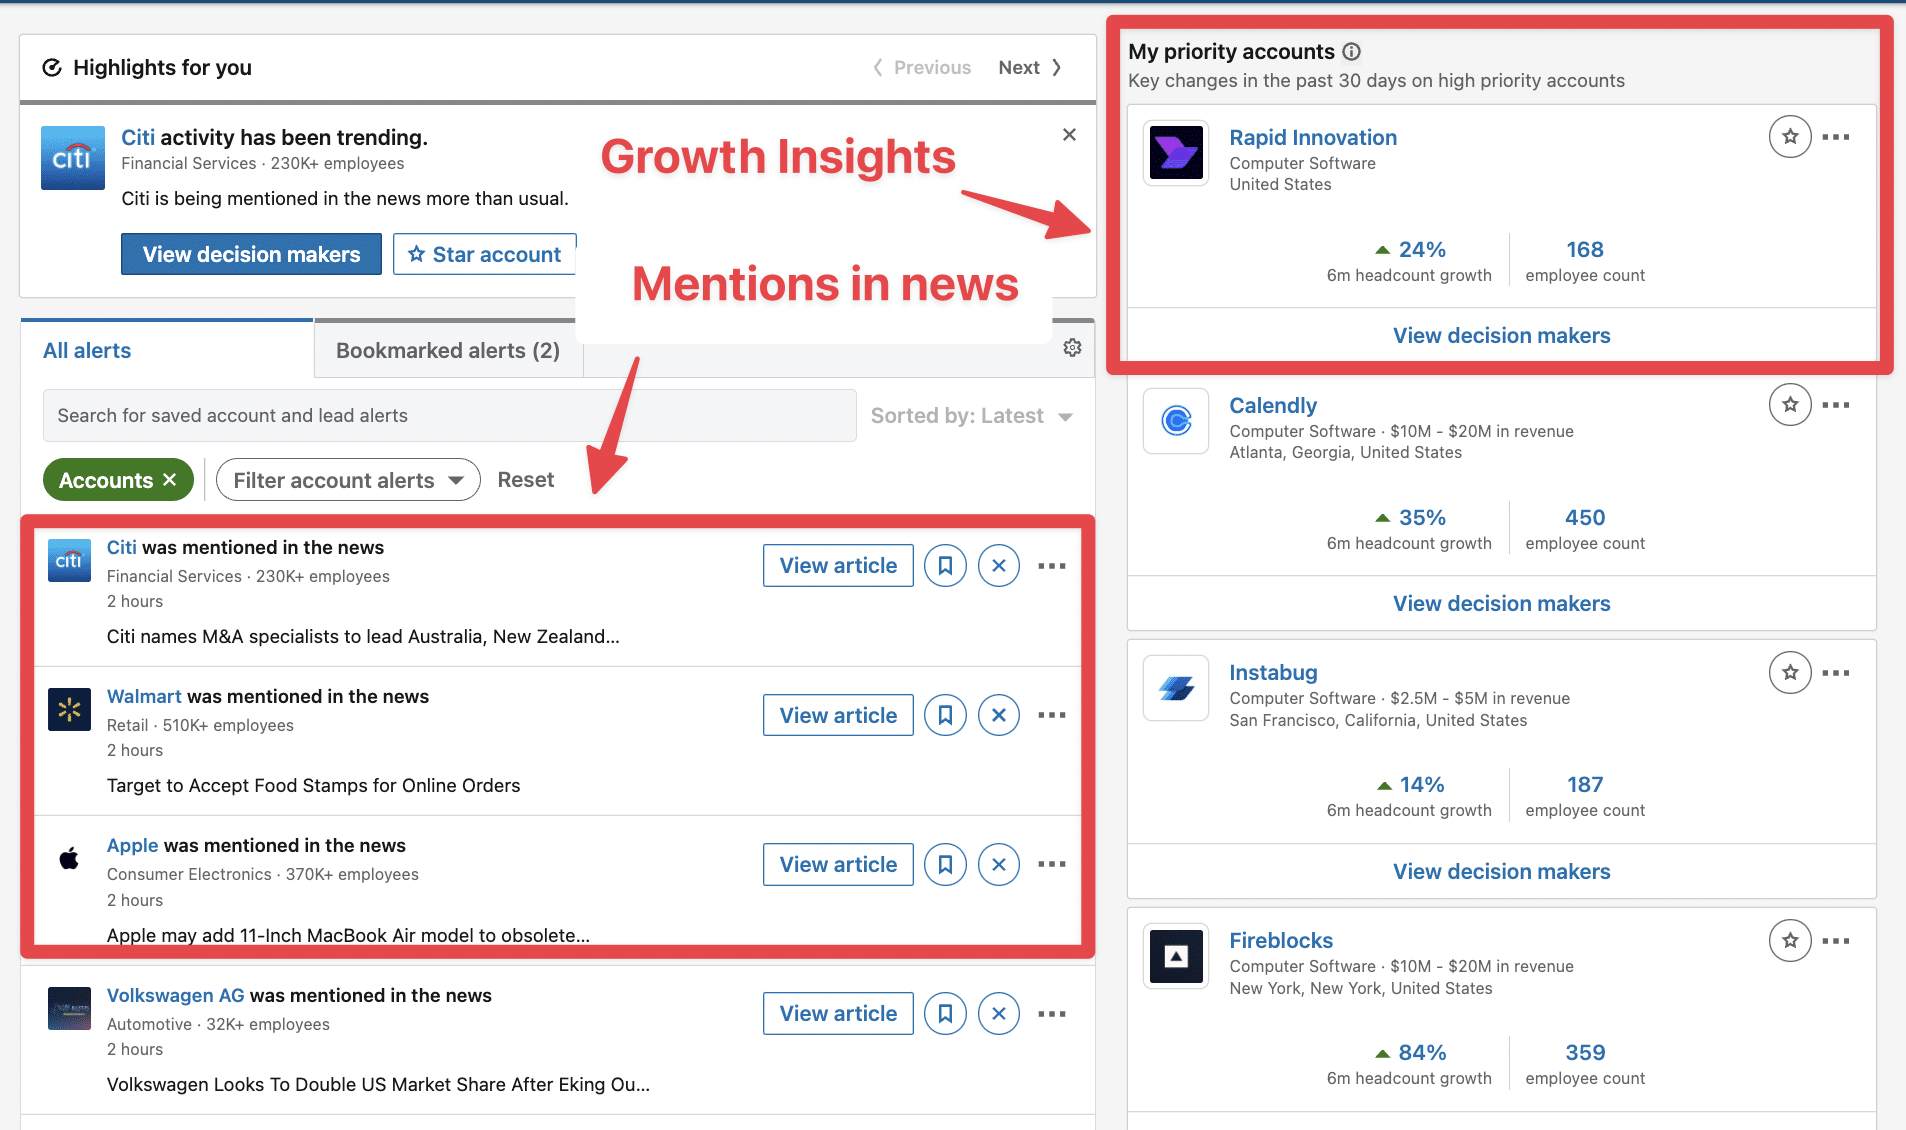
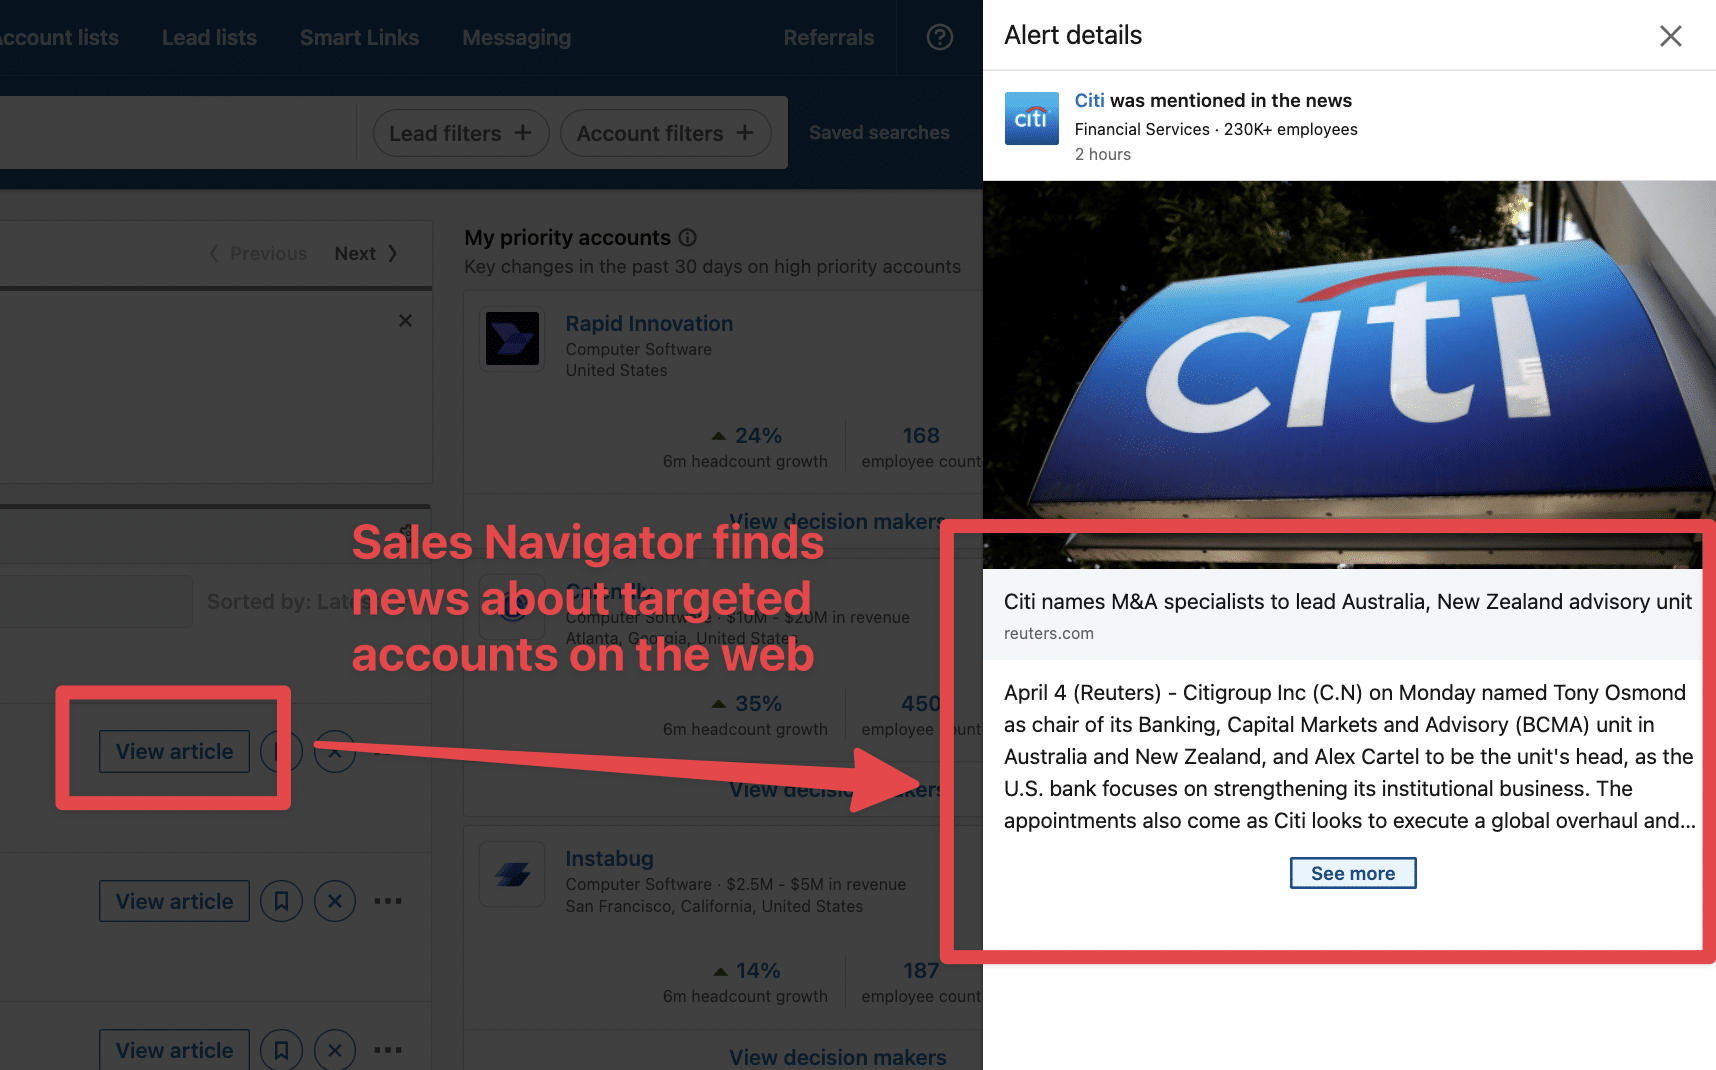
LinkedIn will also track your targeted companies online and send you a blog post mentioning them.
If you click “View article”, you can see an abstract and read the post.
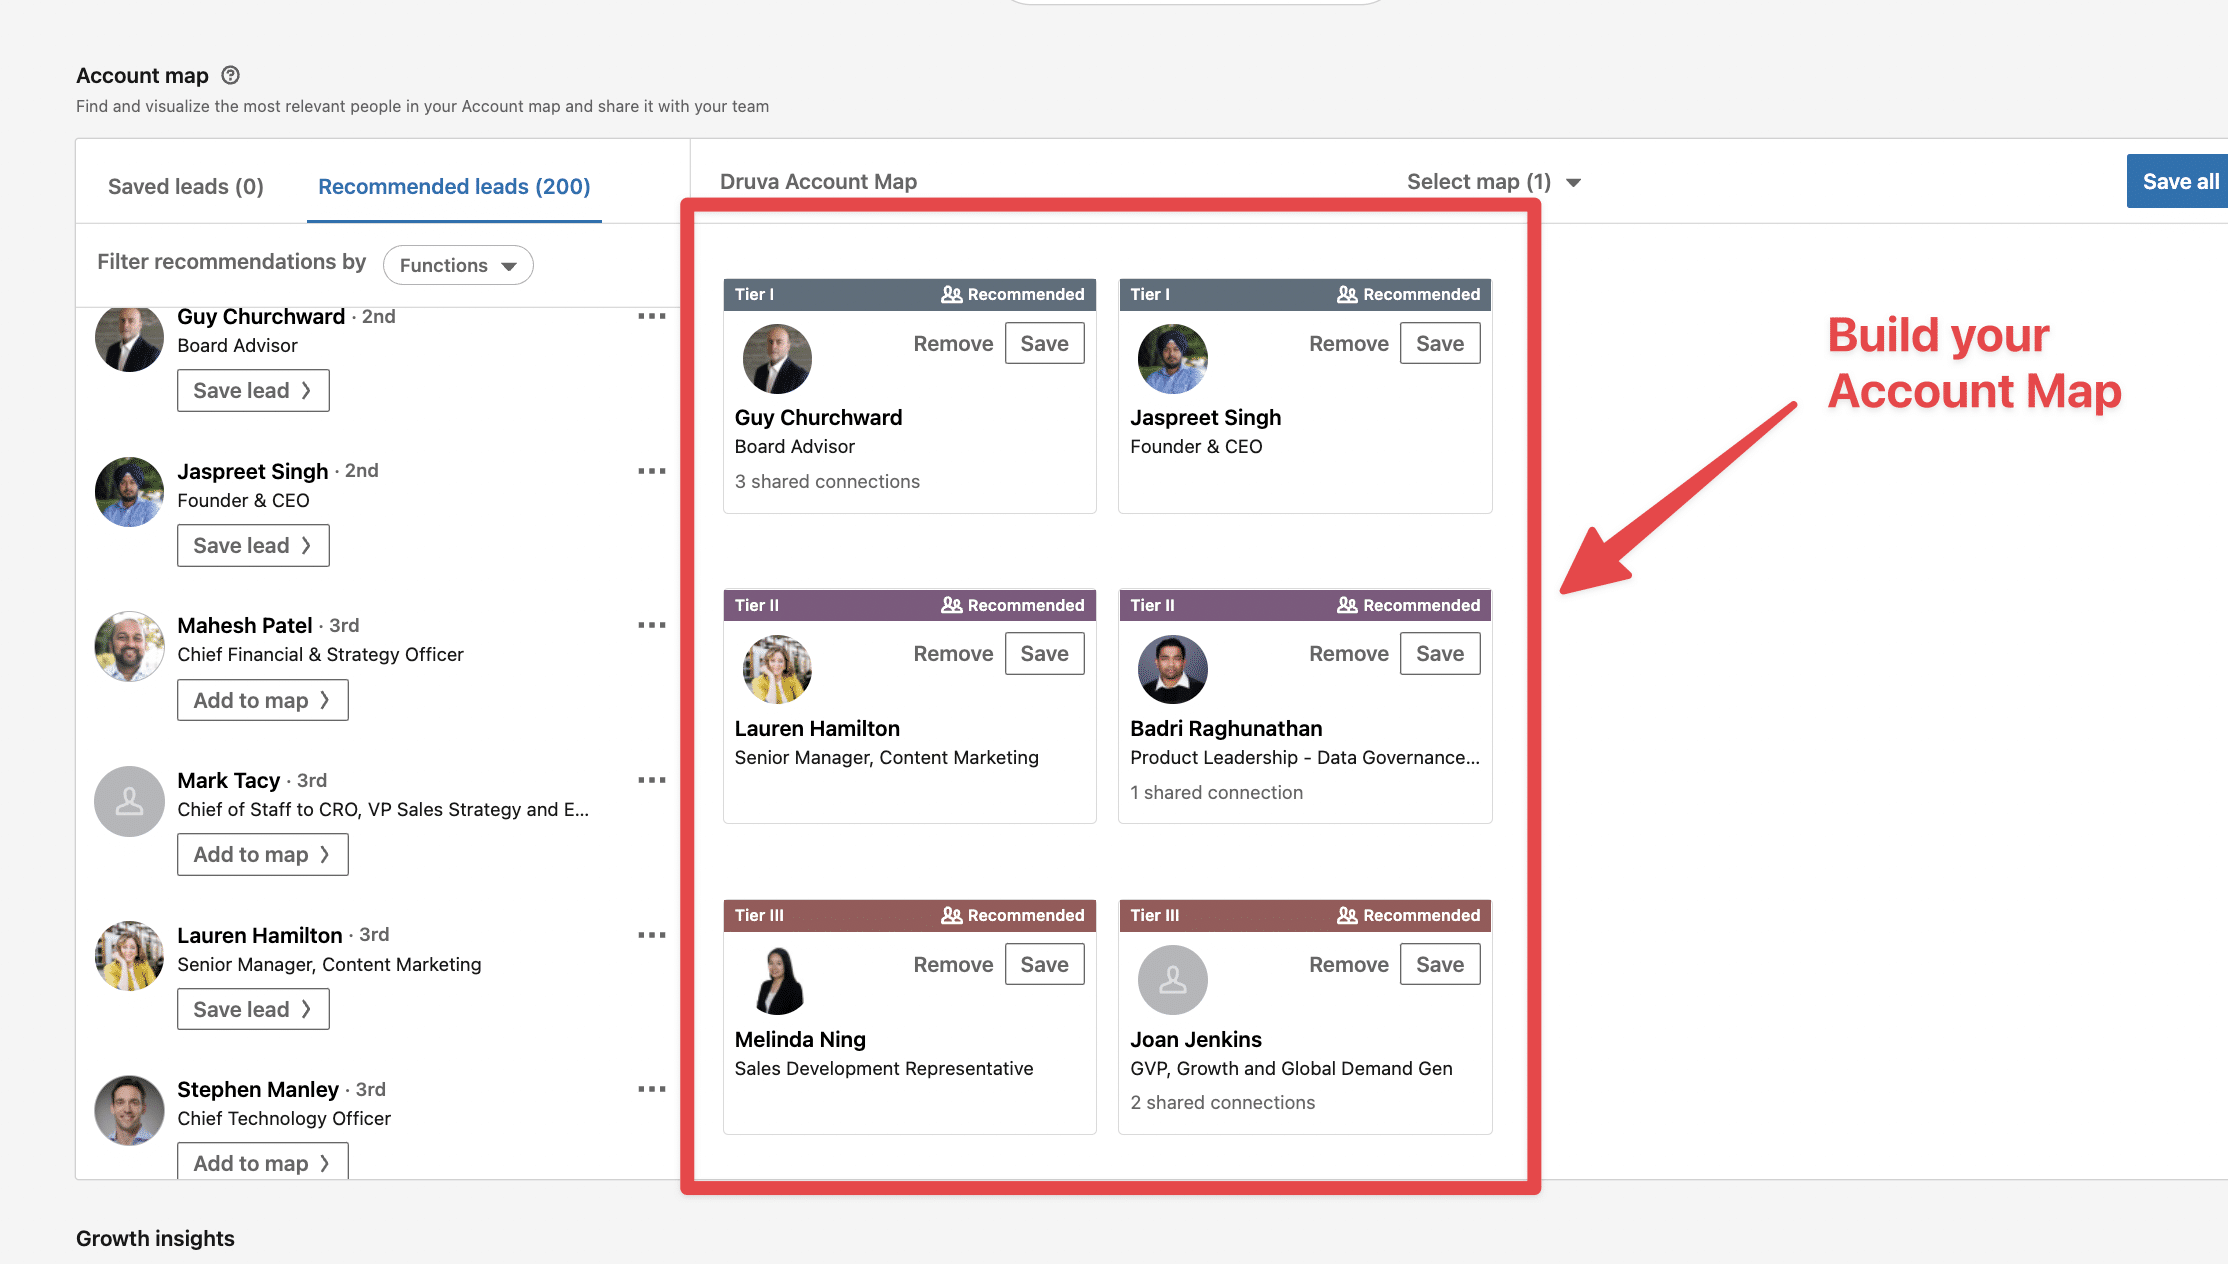
Another useful tool for is the LinkedIn company page.
You can build your relationship map there by dragging and dropping leads into several categories (Tiers 1, Tiers 2, Tiers 3).
On LinkedIn, you can get some insights about growth, the size of the department, the hires, and job openings.
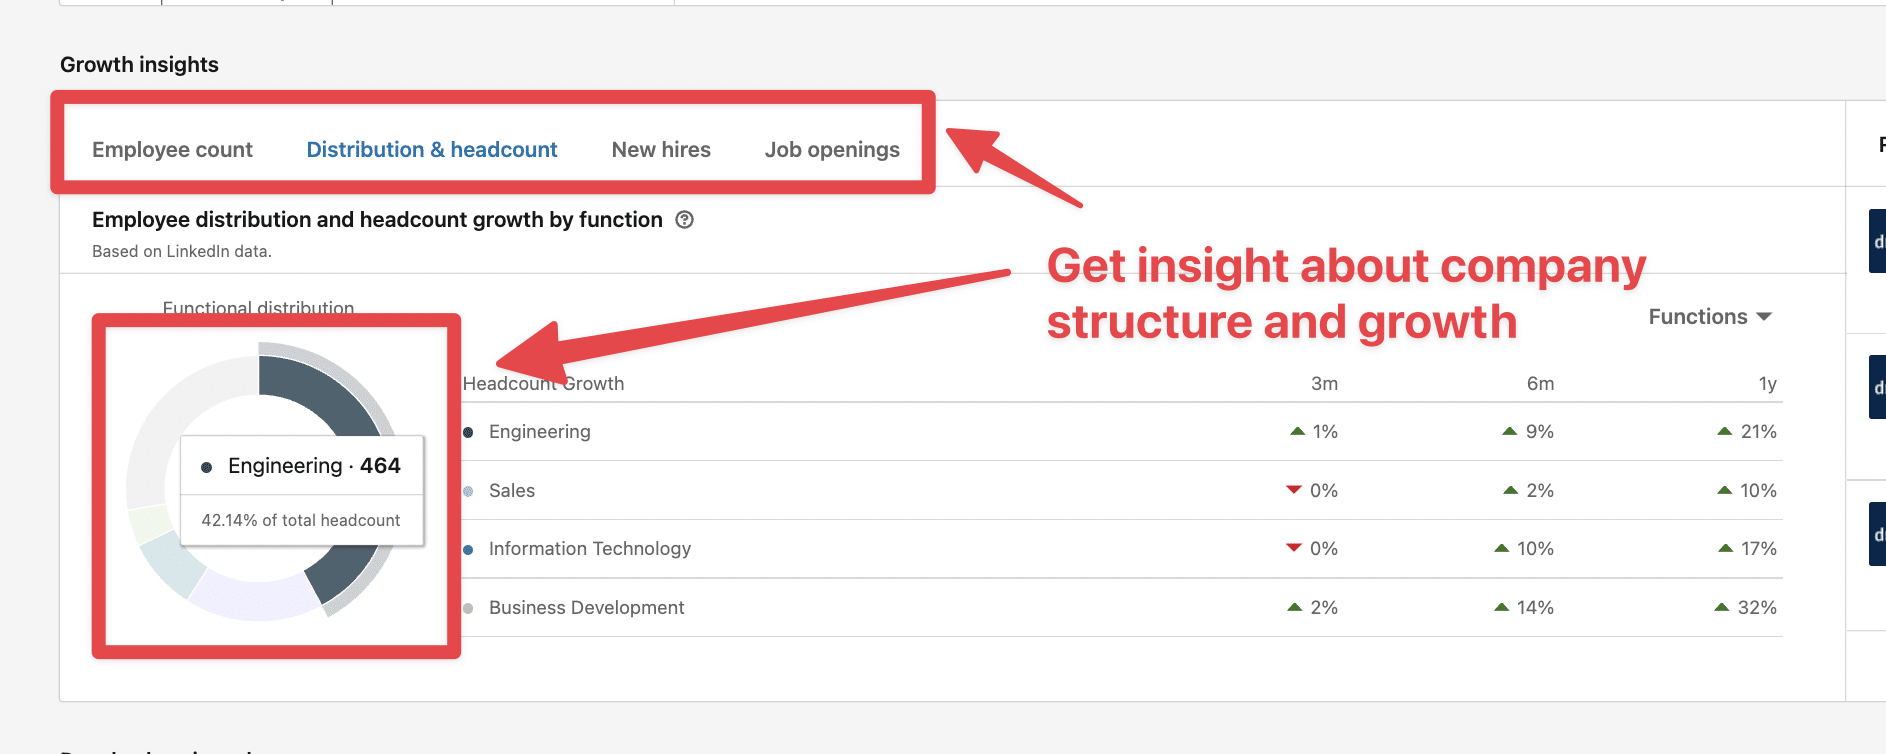
This is useful to get to know your account to write super personalized sales prospecting messages.
But to whom should you send the messages?
How do we find the decision-makers?
Here is how to find decision-makers within an account list using Sales Navigator:
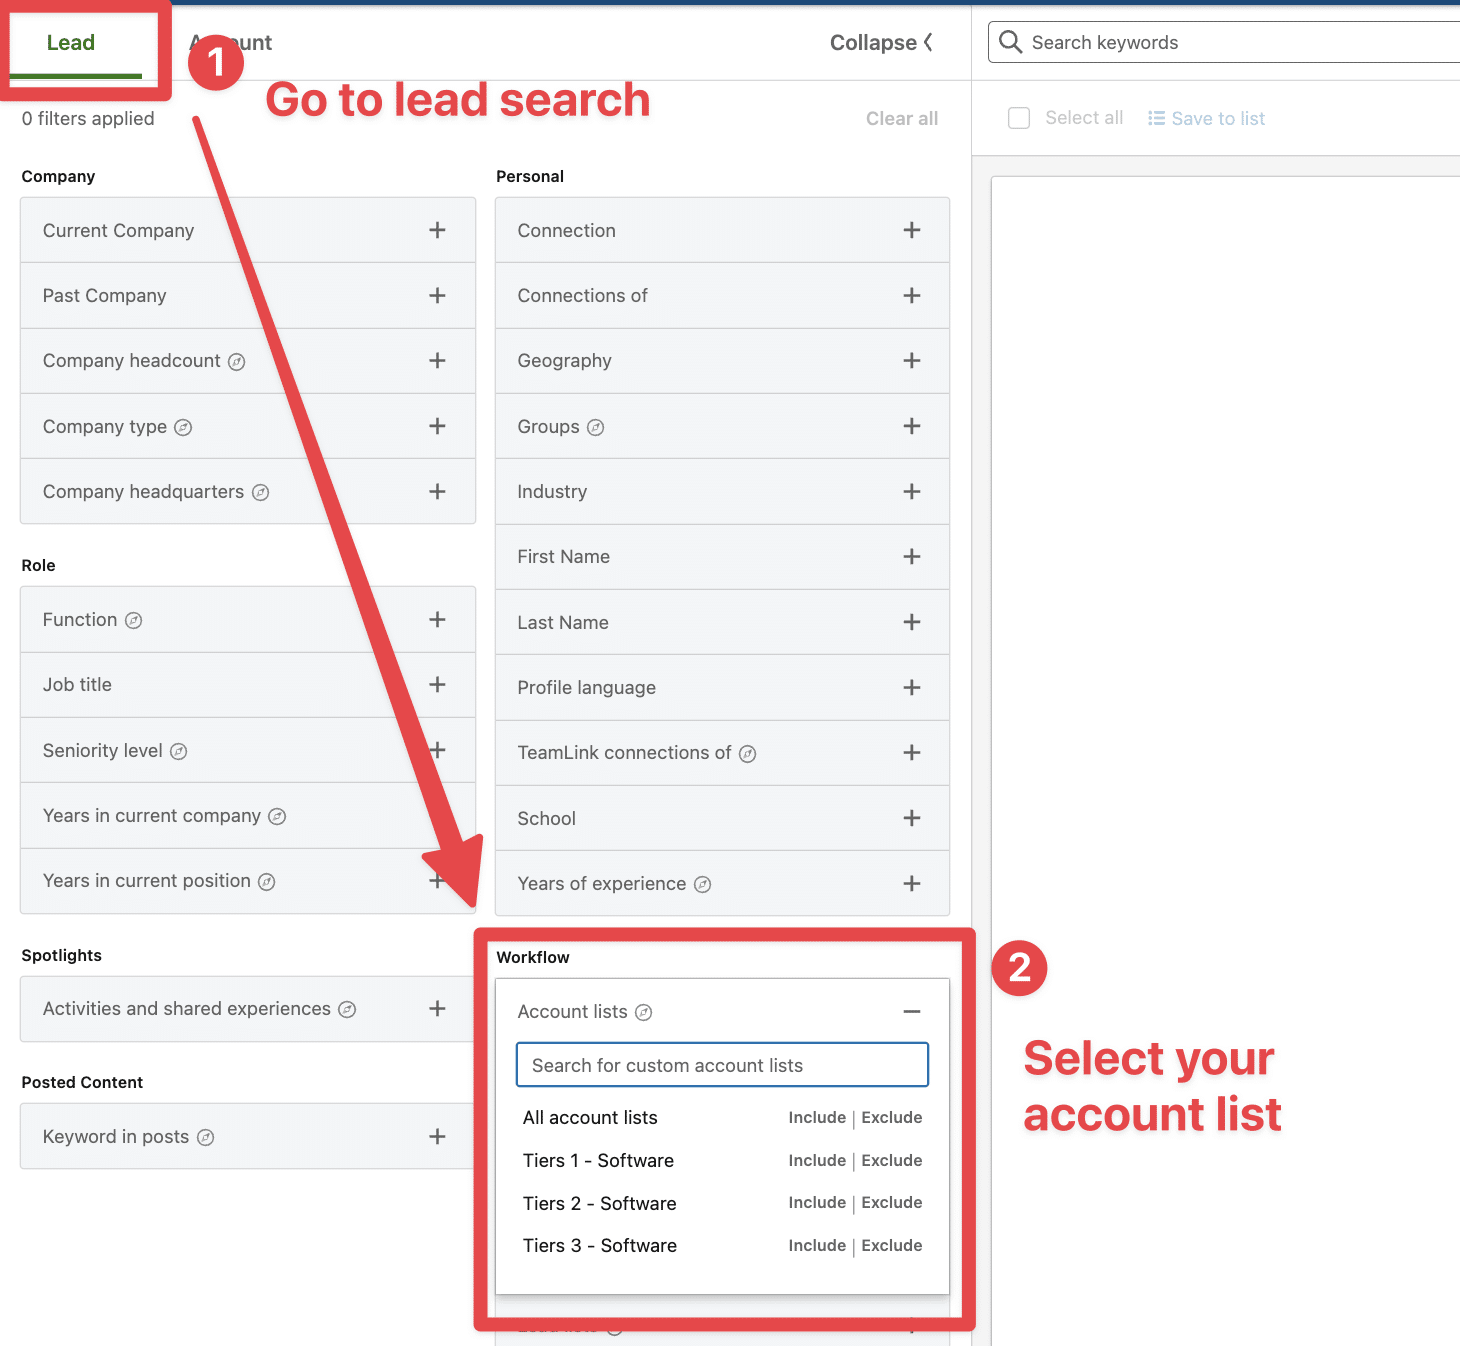
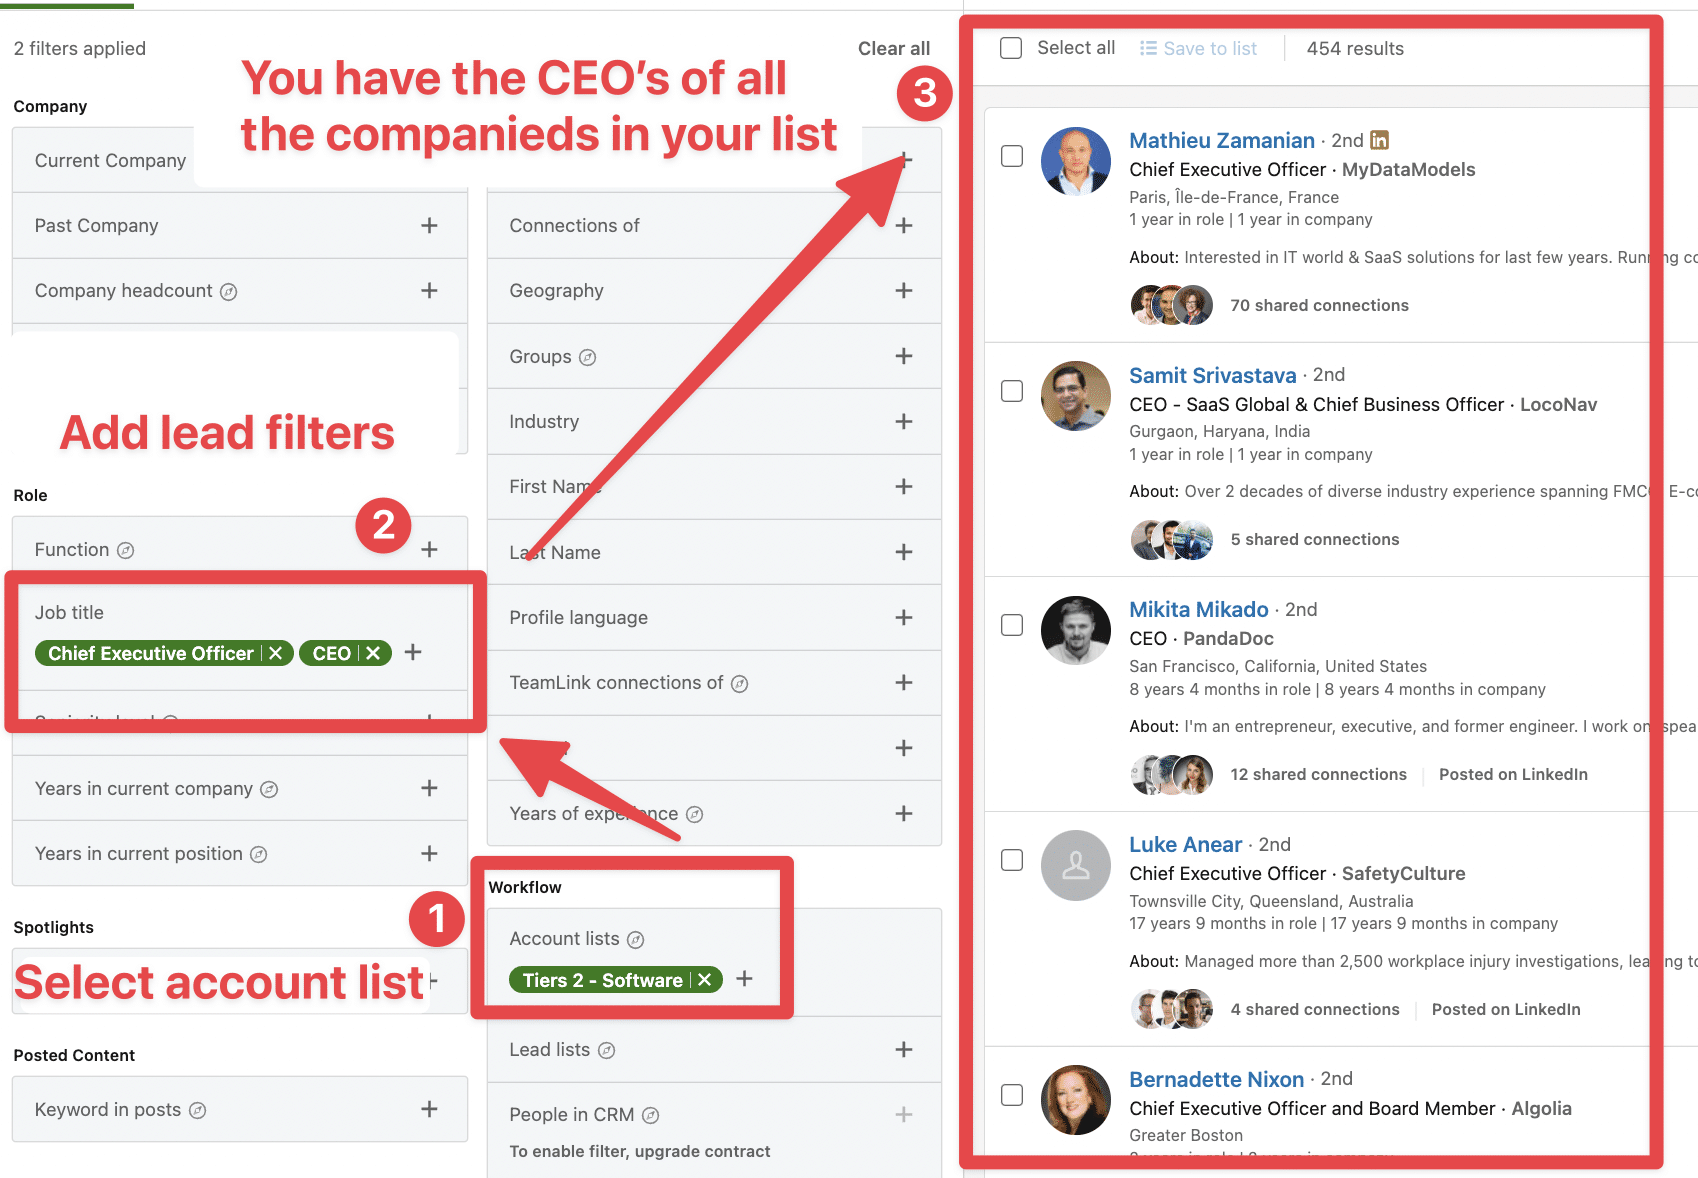
Once you have selected your account list, all the people working at these companies will appear in the search results.
Now you need to add filters to get the right decision-makers. The job title filter is a great way to do that.
Once you’ve saved target companies in your account list, click into any company page to activate LinkedIn Account IQ — a powerful AI feature that summarizes everything you need to know before reaching out.
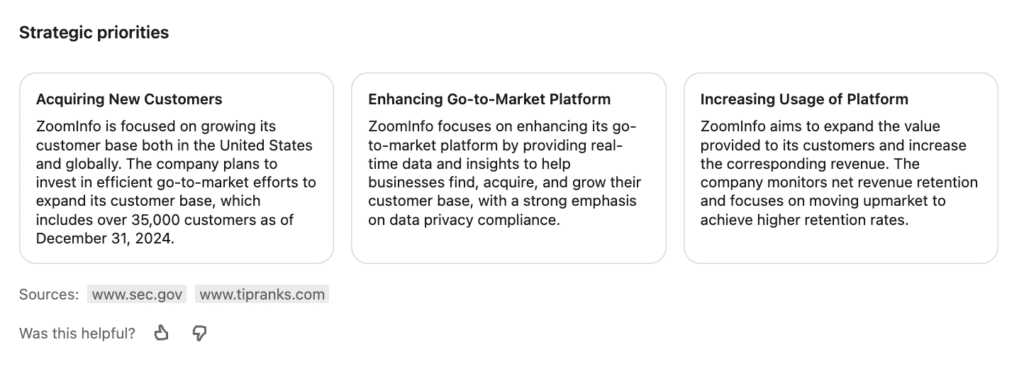
Here’s what you get in seconds:
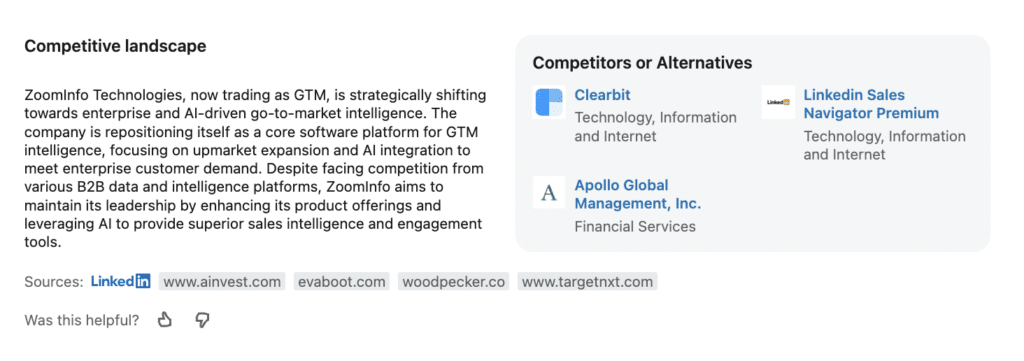
Pro tip: Use the AI-generated insights to write hyper-personalized cold emails with ChatGPT.
Simply click on “Generate insights” to see a detailed list of different ways you could help the company you’re targeting:
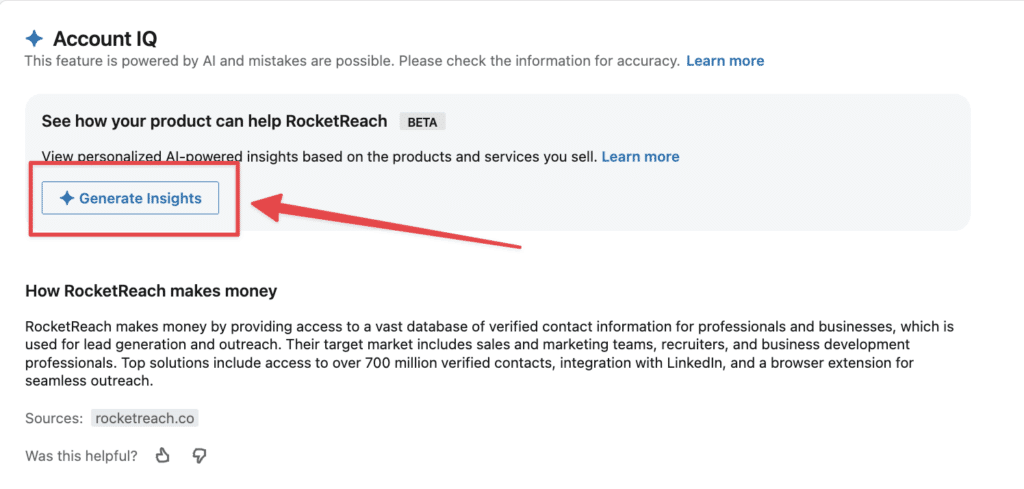
Copy the “3 ways your product can help” block…
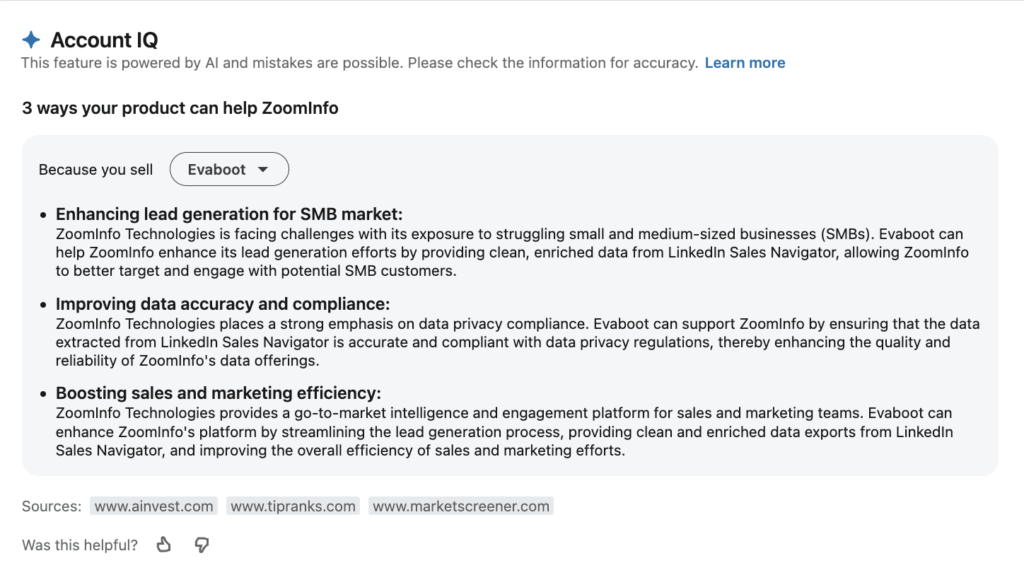
And prompt ChatGPT like this:
Write a short cold email to ZoomInfo, pitching Evaboot. Use the RABT framework:
– Reason for outreach
– Ask a qualifying question
– Backup with data
– Tease the solution
Tailor the message to ZoomInfo’s challenges based on the following insights:
[Insert your insights here]
Example output:
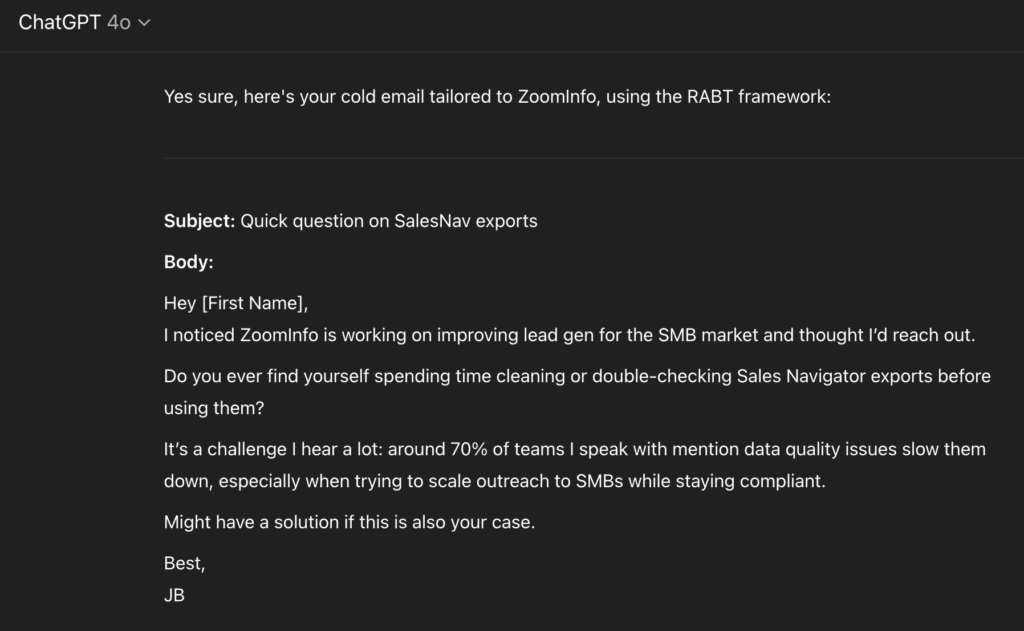
That’s how you turn AI insights into high-performing cold messages in seconds.
The efficiency of your LinkedIn prospecting strategy can be boosted by LinkedIn marketing using LinkedIn Ads.
There’s a hack to create super-targeted LinkedIn ads with your Sales Navigator extractions.

Instead of trusting the LinkedIn Algorithm, you provide LinkedIn with the exact list of people to target.
When choosing your audience, click List Upload > Contact List or Company List.
I’ve explained the entire process in this video:
By running ads to the people you are prospecting, you multiply the touchpoints your prospects have with your agency and increase the chances of getting a reply.
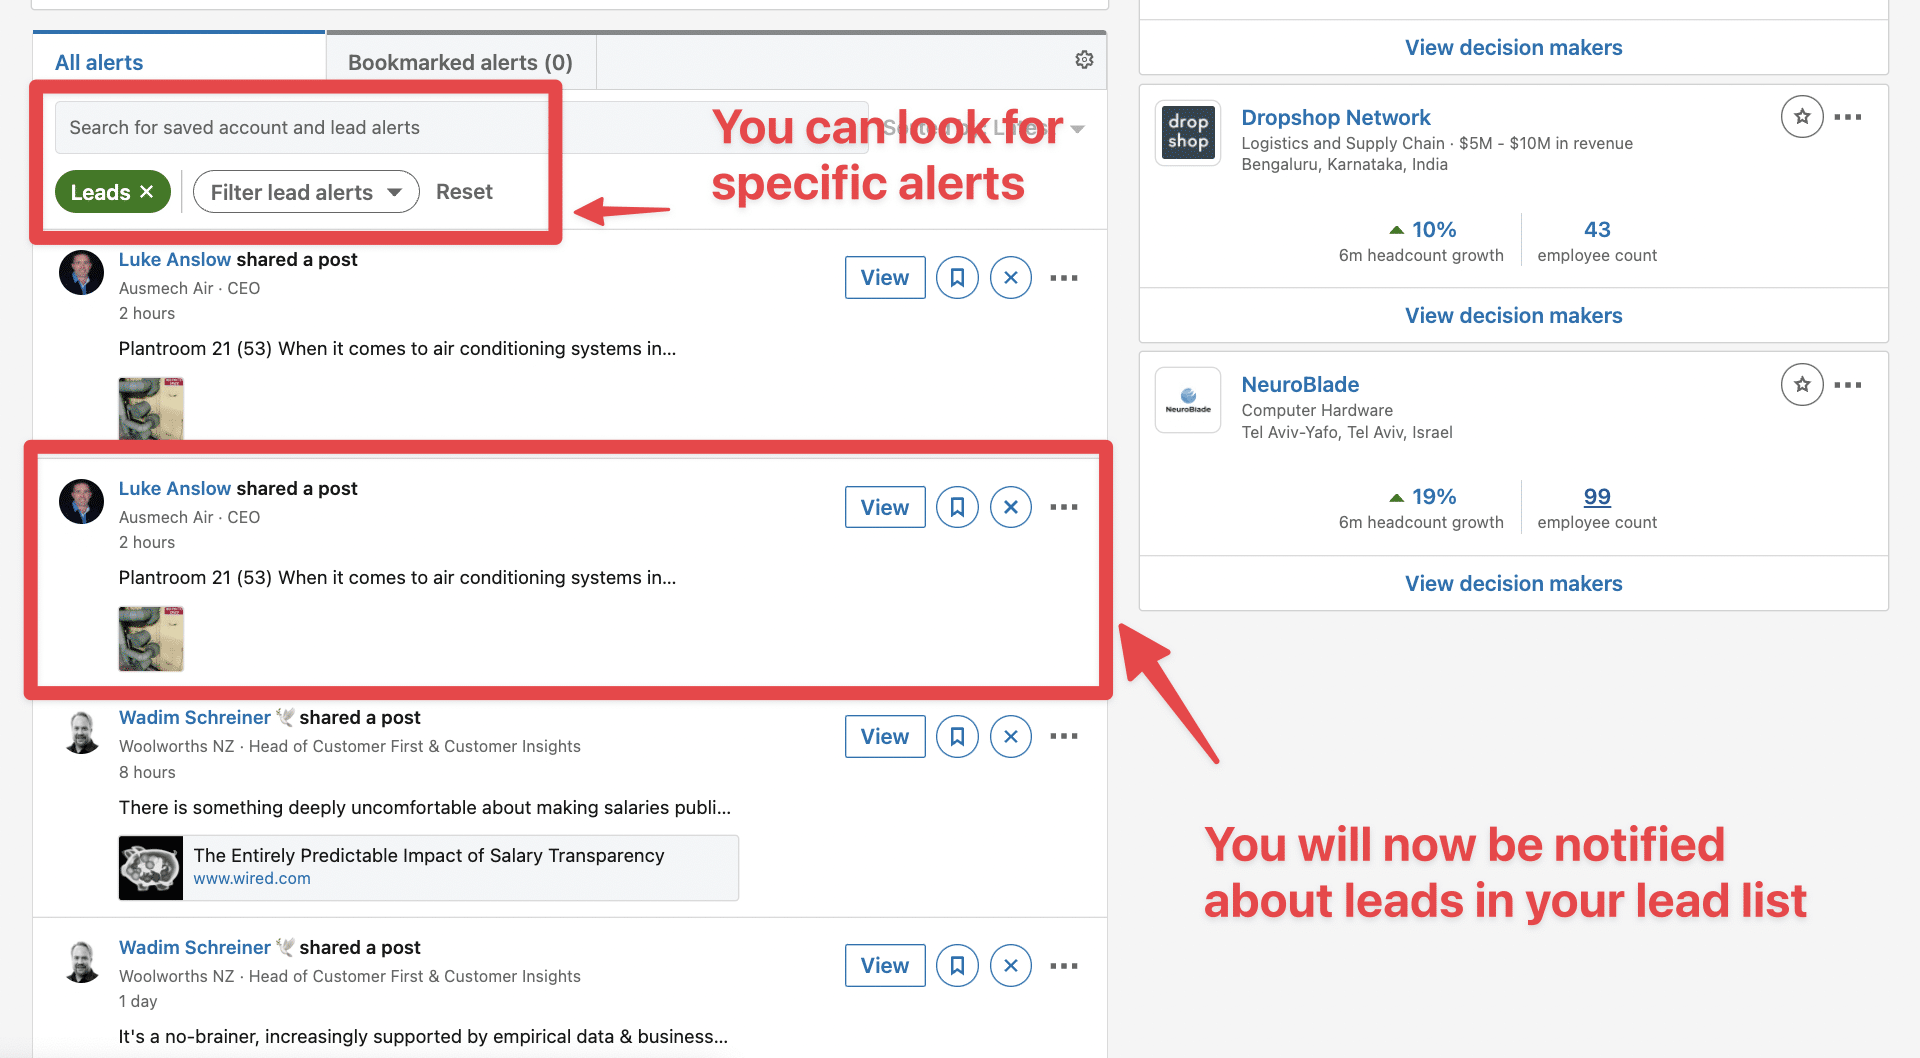
Once you add a lead to a list, Sales Navigator alerts will track their activity on LinkedIn and send you updates like:
This social selling feature is really valuable for sending personalized follow-up messages.
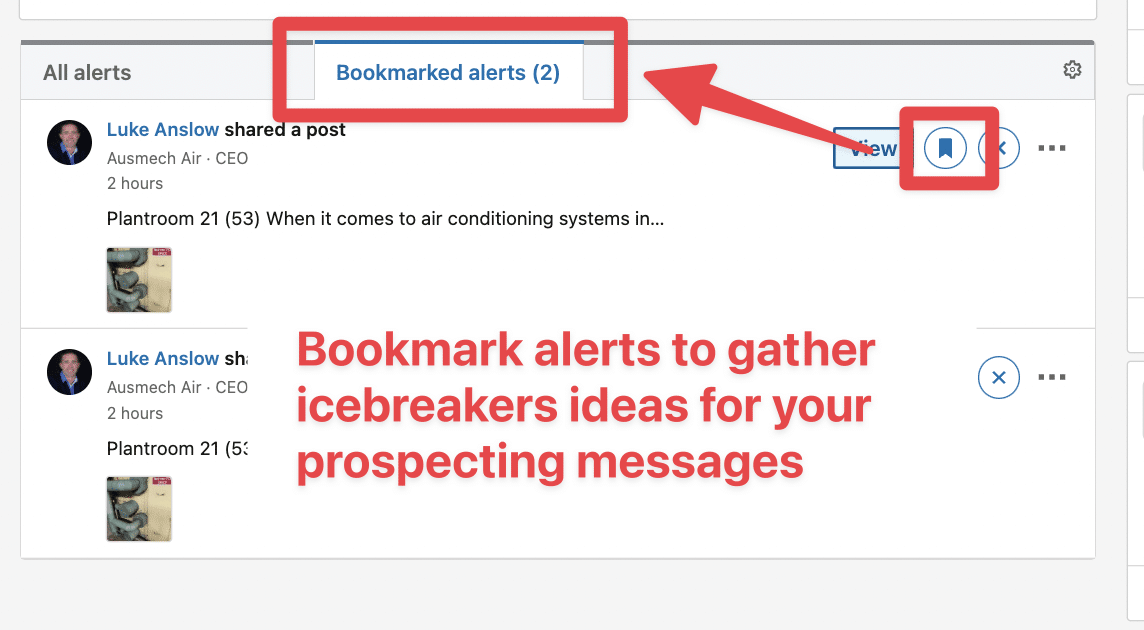
You can bookmark alerts to save them for later.
If you click View, the LinkedIn post will open on the left, and you can like and comment directly from LinkedIn Sales Navigator.
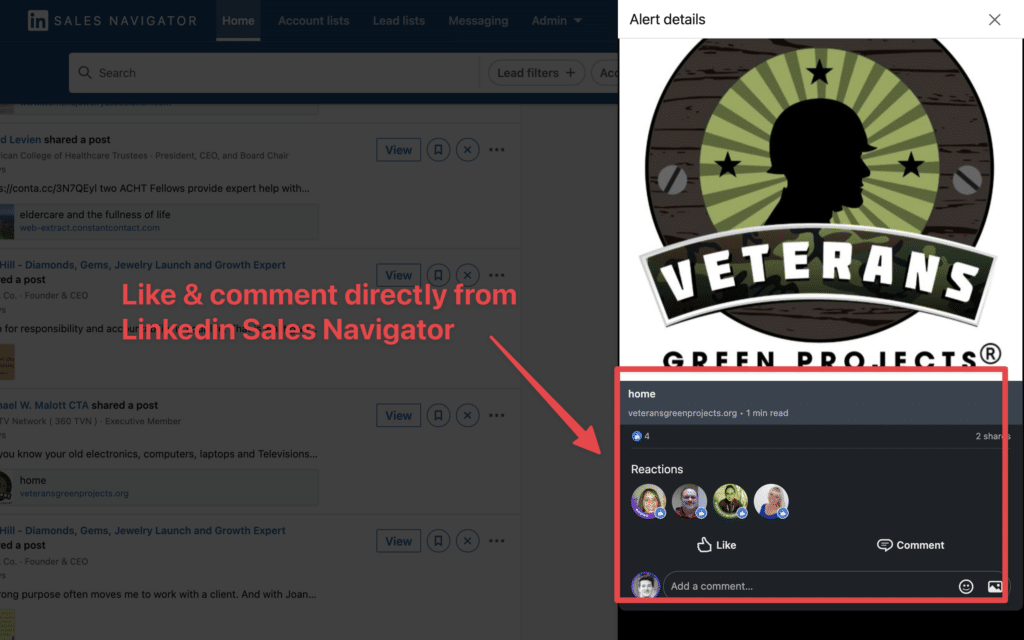
This is convenient for B2B sales if you want to break the ice or follow up with your prospect by commenting on the content they publish.
Building lead lists lists is a significant step.
But the true value of using Linkedin Sales Navigator for your agency is unlocked when you export this data and integrate it with your broader sales prospecting workflow.
Comment
byu/Neither-Raspberry-60 from discussion
inagency
To export leads from Sales Navigator, follow this step-by-step guide:
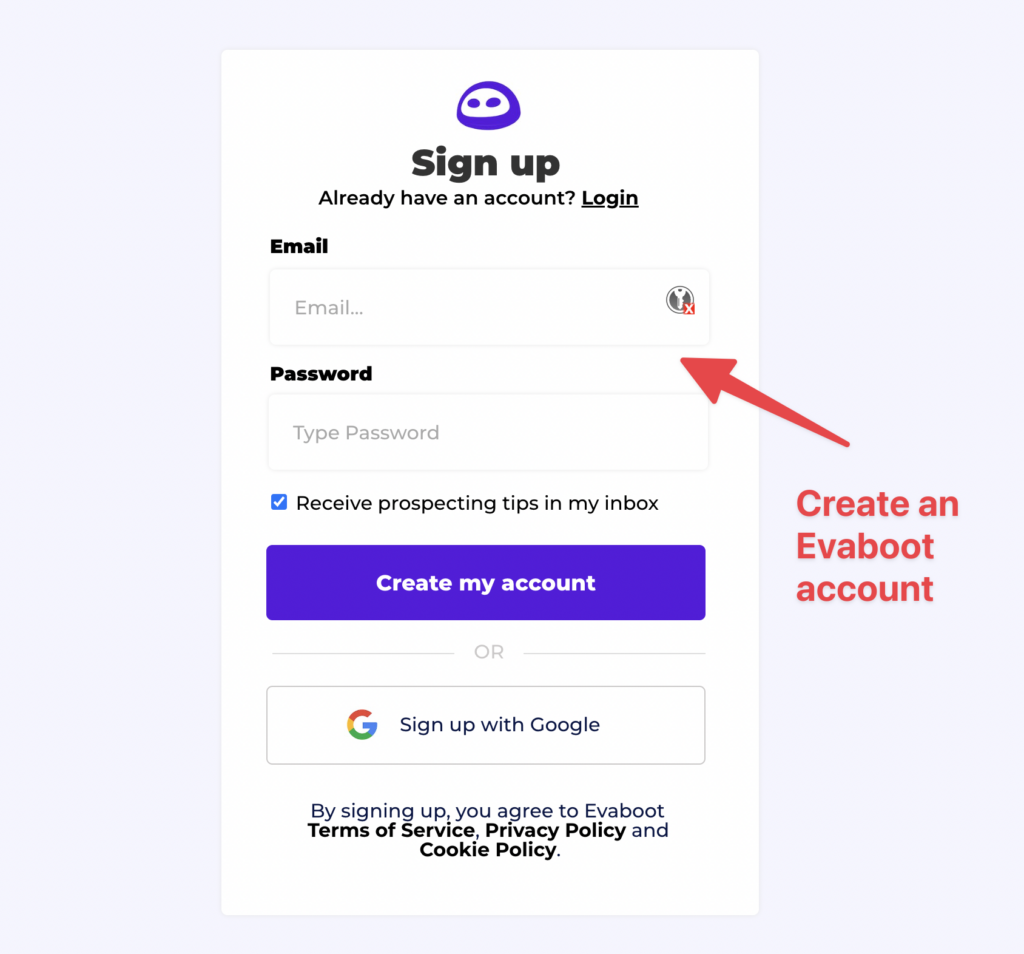
Step 1 is to go to Evaboot and click “Sign up”. Then, create an account.
Once you’ve created your account, click on “Get Chrome Extension” to download it from the Chrome Web Store.
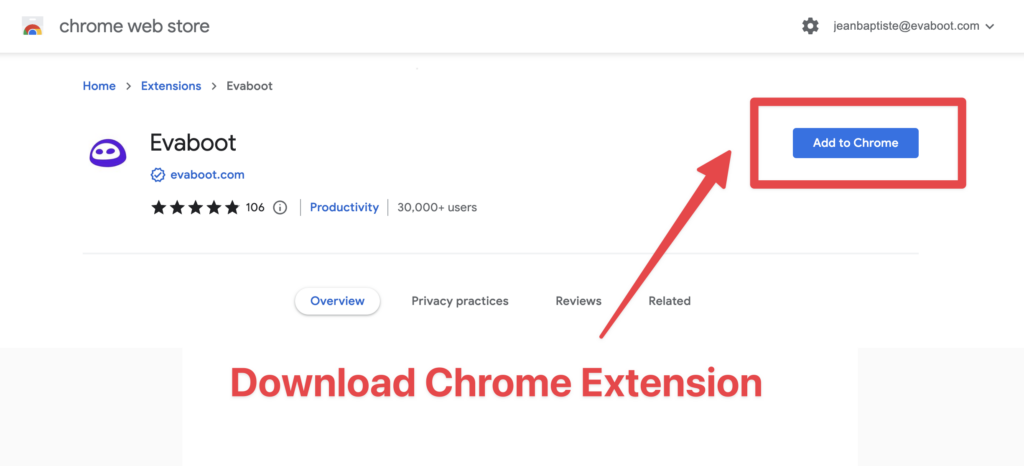
When on the Chrome Store page, click “Add to Chrome” to install the extension.
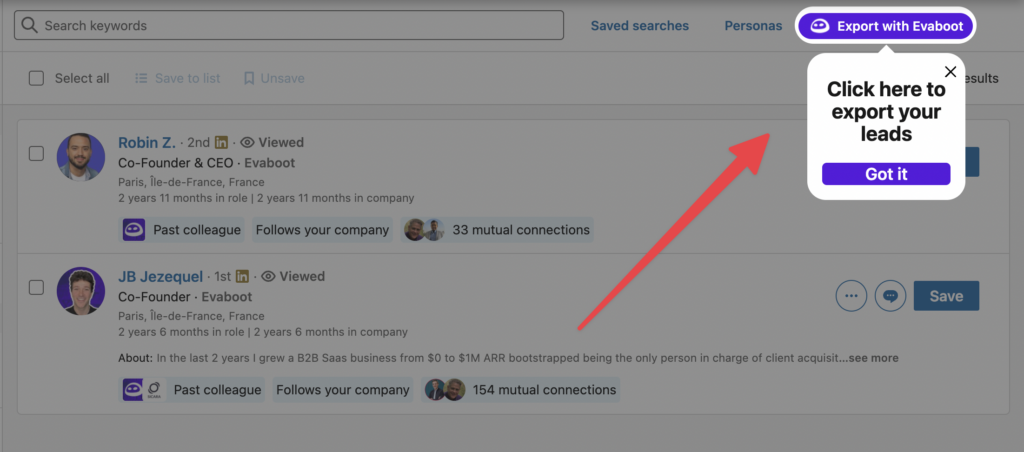
You’ll be automatically redirected to Sales Navigator. A popup will show you where the button is located.
Once the Chrome extension is installed, go to the list of leads or accounts you want to export. It can be:
Evaboot handles all the use cases.
The “Export with Evaboot” button is at the top of these LinkedIn Sales Navigator pages.
This is what it will look like for lead lists:
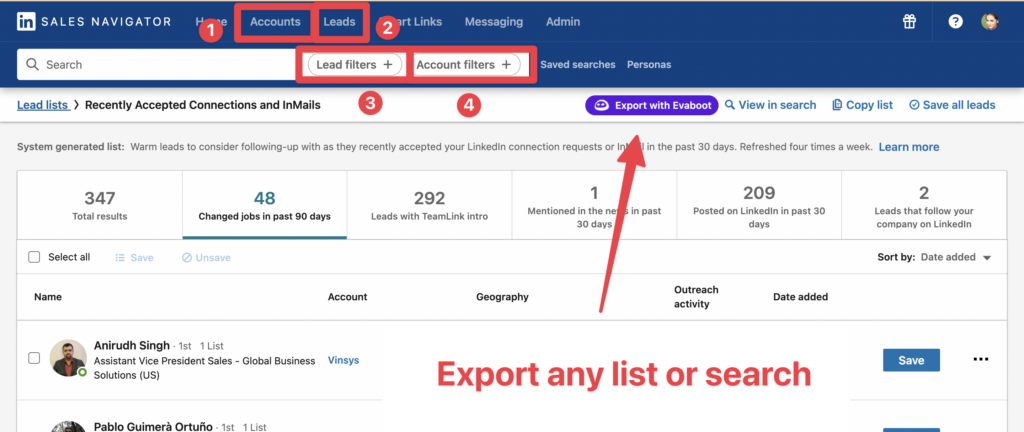
You can export specific tabs in your lead lists, such as “Changed jobs in the past 90 days.”
And this is what it will look like for account lists:

When you export account lists from the Sales Navigator with Evaboot, you get the following:
Evaboot’s cleaning and filtering algorithms also clean and filter all this data.
When you click “Export with Evaboot” you will be redirected to the Evaboot app.
Choose whether you want to find emails for these leads.

Give a name to your export and click on “Export leads”.
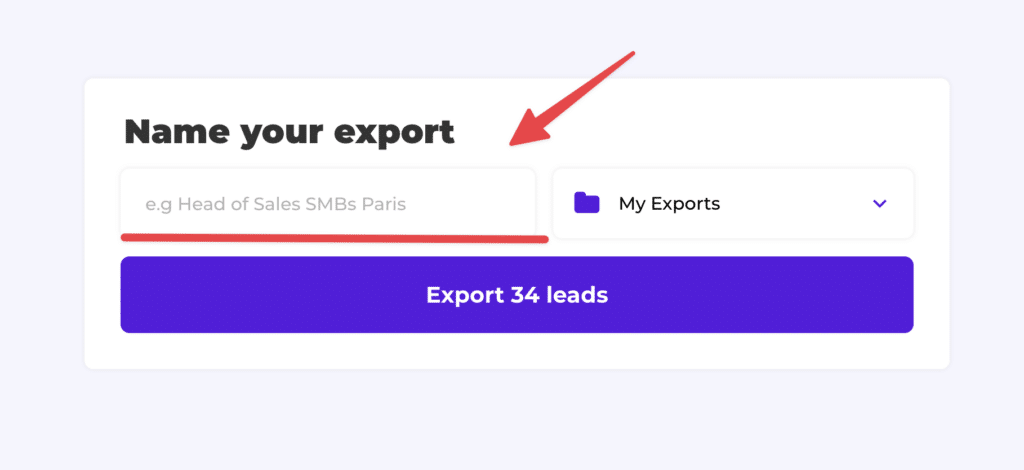
The estimated end date will appear on the left right after launching the export.

Evaboot will export all these leads in real-time.
That makes your lead generation process GDPR-compliant, in opposition to using databases.
After the extraction is done, you will get an email. This email will have a link to download your lead list in a CSV file.

Choose the list type that you want to download. And you’re done.
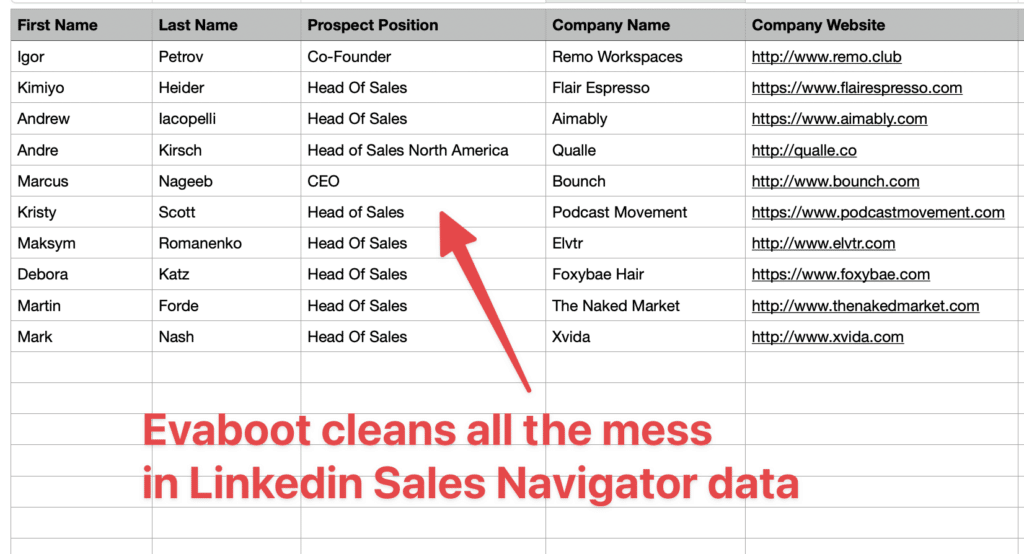
Evaboot does much more than export your list. It also cleans all the names and company names of your LinkedIn contacts.
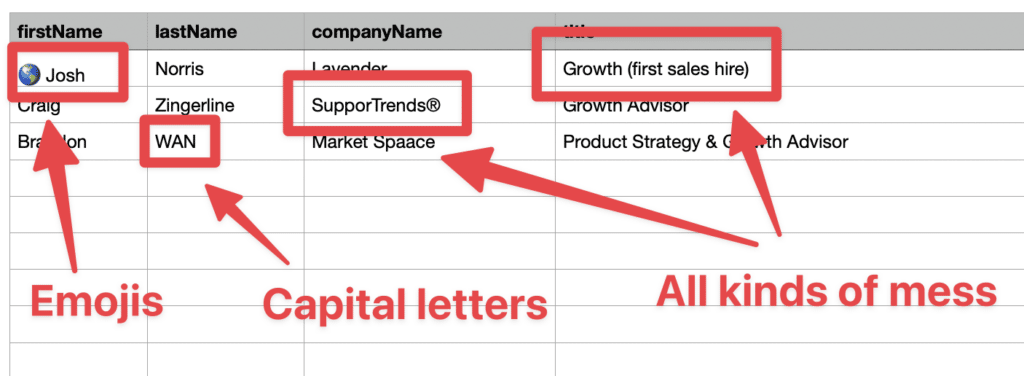
The data on LinkedIn is not clean.
Cleaning data from your sales navigator export can take hours if you do it manually.
Hopefully, the Evaboot cleaning algorithm takes care of all this work for you by automatically cleaning:
Nobody wants to spend hours cleaning Excel files. Better let robots do this boring job.
You will often find false positives in your LinkedIn Sales Navigator search results.
Even if you’re using super precise LinkedIn boolean search operators.

You will frequently find leads that don’t match the search filters you chose in the Sales Navigator search engine.
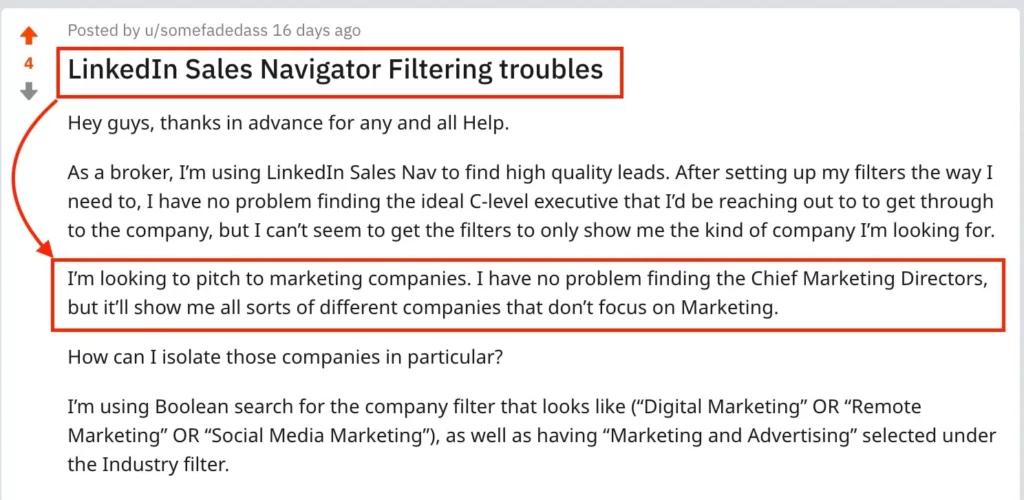
That’s why many people spend hours double-checking their search results manually.
This is a painful task, but it’s no problem.
Evaboot is the best Sales Navigator scraper.
Our algorithm checks your leads twice to make sure they fit your search filters.

In this export, there’s a column named “No Match Reasons.” This column tells you if your leads really match your search filters.
If they don’t, we will explain why. In this example, the leads have the wrong title. The initial search was for growth marketers.
To reduce false positives in your Sales Navigator searches, check out our full Sales Navigator tutorial.
And here you go!
With this data, you can use multichannel outreach.
This will help you reach new prospects in many ways.
Sales Navigator for agency owners provides the data. Your outreach strategy determines results.
Here’s how to write personalized LinkedIn messages that get you leads:

Before anything else, if you’re not already connected to your lead, send them a connection invite – with or without a personalized message.

Expanding your network boosts the likelihood of accepted requests.
Make your approach intentional by referencing something specific and relevant to the prospect (custom visuals like gifs or tailored screenshots can help here).

This shows you’re not spamming them with mass messages but are genuinely reaching out based on their context.
Your reason should connect directly to their job role, recent updates in their company, trends in their industry, or challenges they’re likely experiencing.

Then, you can start the conversation by mentioning a post they published, a shared professional interest, or a strategic opportunity that fits their business goals.
Keep the conversation going by asking a thoughtful question that encourages your lead to engage and share more about their objectives or pain points.
The best questions are open-ended, specific to your message, and encourage discussion.

You could ask about their opinion on a topical issue or their experiences, discuss a current dilemma, or explore their ambitions.
Add value by introducing data or proof points that illustrate your experience and the value you can offer.
Credibility and trust are established when you share relevant and impactful data.

Consider adding:
Now it’s time to introduce how you could help, tailored to their business or goals.
Piquing their curiosity about your offer could motivate them to engage further.

Ensure your suggested solution is directly linked to their needs and presents clear advantages.
You could:
Completing our five-step framework is the crucial follow-up stage.
Your task is to keep in contact with your potential customer by consistently reaching out until you receive a response or secure a meeting.

This tenacity keeps you fresh in their memory and demonstrates your dedication and professionalism.
An effective follow-up strategy is characterized by timeliness, courteousness, and customization.
For instance, if you haven’t heard back after several days, you might consider sending a thoughtfully crafted reminder, an enticing value proposition, compelling social proof, or an engaging call to action.
But here is another tip.
To boost your response rates even further, don’t hesitate to send an InMail message, which is more effective than a simple cold message.
1. Keep your InMail messages under 400 characters, as shorter InMails achieve a 22% higher response rate.

This is because today people are busy!
This way, you respect the recipient’s time and increase your chances of getting a reply.
2. Write short subject lines.
Your profile picture and InMail subject lines are the first things people see in your InMail.
The average email open rate is about 21.6%, and LinkedIn InMail has a 57.5% open rate, which can be further optimized with the right subject line strategy.

Here are a few tested angles:
3. Use InMails as your backup channel.
LinkedIn InMails should be your strategic option rather than your first choice when connecting with prospects.
Only send an InMail when your emails and LinkedIn messages don’t generate a response.
Here’s why: Sales Navigator accounts typically include just 50 InMail credits per month.
Meanwhile, you can send up to 200 emails and 150 LinkedIn messages daily.
Here’s an effective Multichannel outreach strategy to use:
Now you have a clear game plan for writing targeted LinkedIn messages, and boosting responses with a multichannel outreach strategy.
Sales Navigator for agency owners transforms how you find and connect with potential clients.
The platform gives you laser-focused targeting. Advanced search filters help you find companies that actually need your services.
Start with clear targeting criteria. Build organized prospect lists. Export your leads. And develop personalized outreach sequences.
Ready to scale your agency’s client acquisition?
Your next high-value client is waiting to be discovered on Sales Navigator.
Most solo agency owners start with Core and upgrade as they scale.
Most agencies see initial responses within 1-2 weeks.
Qualified opportunities typically develop within 4-6 weeks.
Full ROI usually becomes apparent within 2-3 months of consistent use.
Start with connection requests for most prospects.
Use InMails for high-priority targets or when connection requests aren’t being accepted.
InMails have higher open rates but cost credits.
Stay within LinkedIn’s limits: 100 connection requests per week, personalize all outreach, avoid automation tools that violate terms of service, and focus on building genuine relationships.
Sales Navigator doesn’t have native export functionality.
You’ll need third-party tools like Evaboot to extract prospect data and contact information for use in your CRM or email marketing tools.