What Are Bounced Emails And How To Fix Them?
Contents
You hit send. You wait. Then… nothing.
Instead of landing in your prospect’s inbox, your email bounced.

Welcome to one of the most frustrating parts of email marketing: when your perfectly crafted message never makes it past the gatekeepers.
Bounced emails don’t just ruin your open rates, they tank your deliverability, hurt your sender reputation, and waste your time.
Here’s what we’ll cover in this guide so you can diagnose, fix, and prevent email bounces once and for all:
- Bounced Email Definition And Meaning
- 7 Common Reasons Why Emails Bounce
- How Email Bounces Impact Sender Reputation
- How To Fix And Prevent Bounced Emails
- 5 Tools To Verify Email Addresses
Let’s dive in!
Bounced Email Definition And Meaning
A bounced email is a message that fails to reach the recipient’s inbox.
The email is either rejected by the recipient’s server or fails due to a delivery issue—and it comes back with an error message (aka a bounce notification).
There are two main categories of bounces:
- Soft Bounces → Temporary issue. Might succeed on retry.
- Hard Bounces → Permanent issue. Never going through.
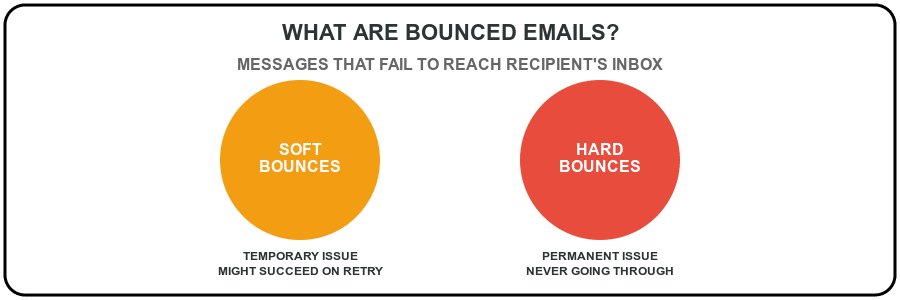
Think of it like this: soft bounce is like knocking on someone’s door when they’re out. Hard bounce is like knocking on a house that doesn’t exist.
Your email service provider (ESP) usually tells you when an email bounces and gives a reason—like “mailbox full” or “address not found”.
These bounce reasons are critical. They help you decide whether to retry, clean your list, or fix a technical issue.
7 Common Reasons Why Emails Bounce
Bounces aren’t random, they always have a reason. The key to fixing them is knowing why they happen.
Here are the most common causes behind both soft and hard bounces, and what they really mean.
- Non-Existent Email Address
- Mailbox Full
- Blocked Email
- Email Server Issues
- Content Filters
- Authentication Problems
- Too Many Emails At Once
1. Non-Existent Email Address
You’re sending to an address that doesn’t exist.
Maybe there’s a typo (john@gmial.com), maybe the person left the company, or maybe someone gave you a fake email to get your lead magnet.
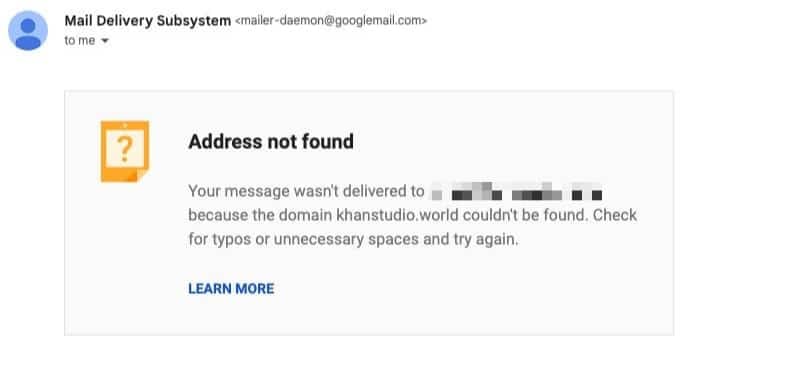
Type: Hard Bounce
Fix: Remove it from your list. Always validate emails at the point of collection.
2. Mailbox Full
This means that the recipient has no storage left.
Their inbox is overflowing and can’t accept new messages.
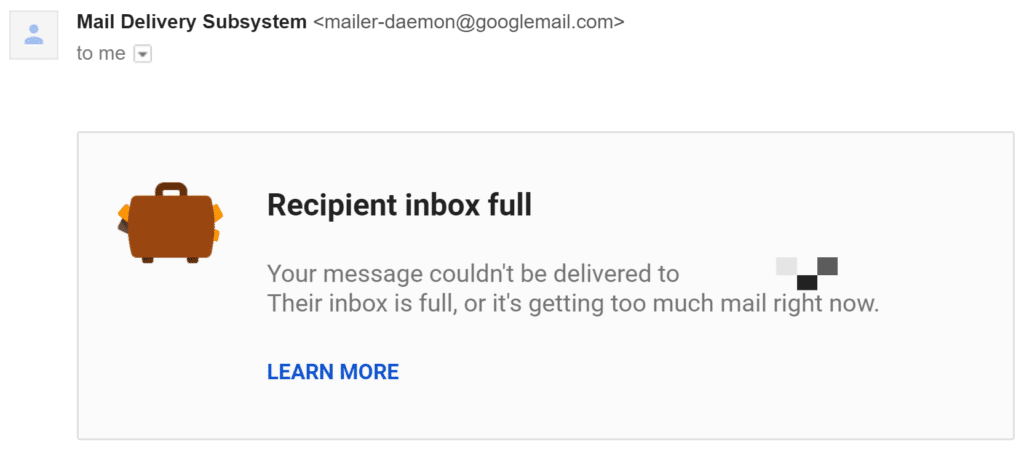
Type: Soft Bounce
Fix: Wait and retry once. If it keeps bouncing, remove the contact—it might be abandoned.
3. Blocked Email
Some email servers (corporate, education, government) are extra strict.
If they don’t recognize your domain, or if you triggered a filter, they’ll block you.
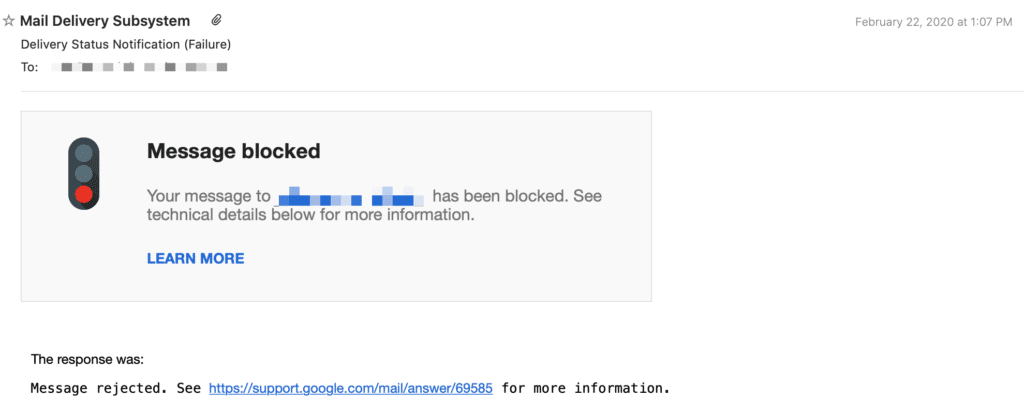
Type: Hard or Soft Bounce
Fix: Ask the contact to whitelist your domain, or improve your authentication (SPF, DKIM, DMARC).
4. Email Server Issues
Sometimes the recipient’s server is just… down. It happens.
It might be overloaded, in maintenance, or temporarily offline.
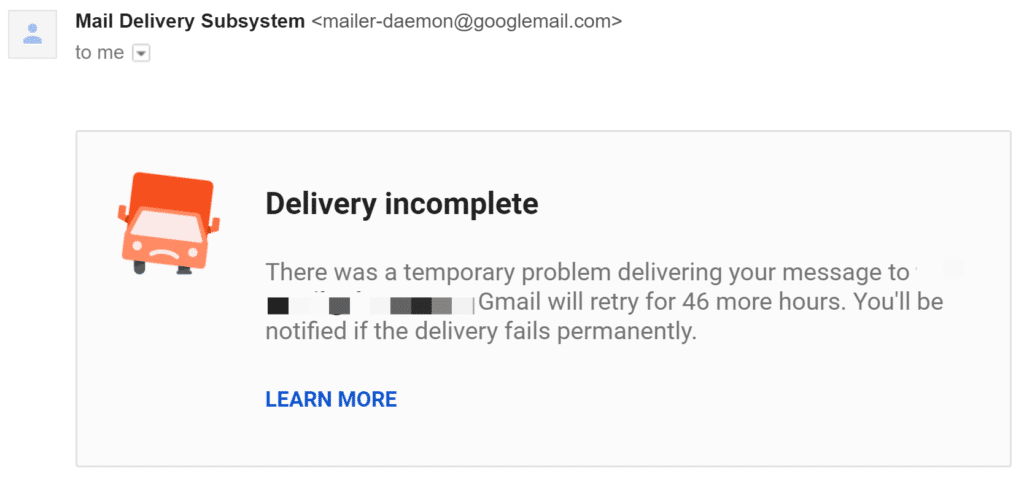
Type: Soft Bounce
Fix: No worries, your ESP will usually retry automatically. If it keeps happening, you may need to investigate deeper.
5. Content Filters
Spam filters don’t like shady-looking content.
If your email subject line, links, or body text look suspicious, your email might get bounced before it’s even read.

Type: Soft Bounce
Fix: Avoid spammy language, sketchy links, and excessive formatting.
6. Authentication Problems
If your domain isn’t properly authenticated with SPF, DKIM, or DMARC, some servers will reject your emails outright.
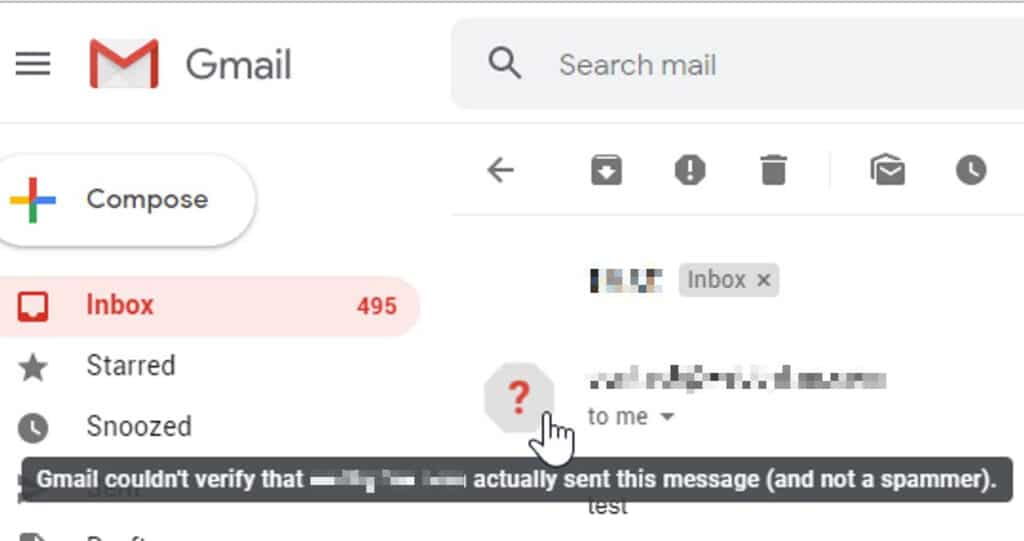
Type: Hard Bounce
Fix: Set up all three technologies (SPF, DKIM and DMARC). It’s non-negotiable in 2026.
7. Too Many Emails At Once
If you send a massive volume of emails too fast—especially to new or cold contacts—some servers will temporarily block you.
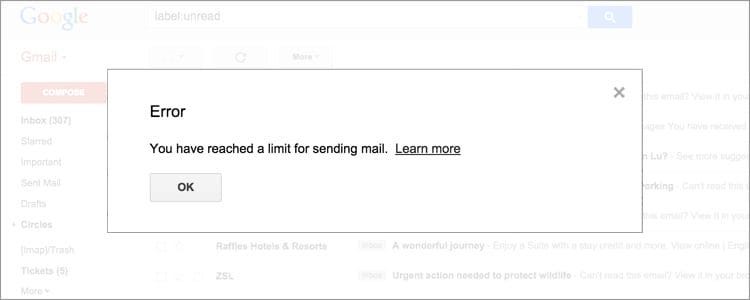
Type: Soft Bounce
Fix: Warm up new domains/IPs and throttle your sends.
How Email Bounces Impact Sender Reputation
Bounced emails don’t just disappear, they leave a mark.
When too many of your emails bounce, mailbox providers (like Gmail, Outlook, etc.) take notice.
They use bounce data to judge your credibility as a sender. If your bounce rate is high, you’re seen as careless—or worse, spammy.

Here’s how it hurts you:
- Lower Deliverability: Your future emails are more likely to land in spam or be blocked entirely.
- Poor Sender Score: ISPs assign a reputation score to your domain and IP. Bounces drag that score down fast.
- Blacklisting Risk: Repeated hard bounces can trigger spam traps and get your domain/IP listed on blocklists like Spamhaus.
- Throttled Sending: If you’re seen as a risky sender, mailbox providers might limit how many emails they’ll accept from you—aka rate limiting.
Your bounce rate is a signal. And if it’s too high, your emails stop getting through.
How To Fix And Prevent Bounced Emails
Now the good news: bounces are fixable.
Here’s what to do to bring your bounce rate down and keep it low:
- Set Up SPF, DKIM, and DMARC
- Remove Hard Bounces Immediately
- Avoid Purchased Or Scraped Lists
- Warm Up New Domains And IPs
- Avoid Spam Trigger Words
- Follow the Law
- Use Email Verification Tools
1. Set Up SPF, DKIM, and DMARC
If you send emails from your domain, it’s important to authenticate your domain records.
These records allow email service providers to verify that your emails are actually coming from your domain, helping to prove that you’re the legitimate sender.
You can authenticate your email by verifying SPF, DKIM, and DMARC records.
1. Sender Policy Framework (SPF): SPF verifies that the IP address sending your email is authorized to do so by your domain.

It checks the sender’s IP against a list of approved IPs in your domain’s DNS record, confirming your identity and helping prevent unauthorized use of your domain.
By authenticating your domain, you’re signaling to email providers like Gmail or Microsoft that your emails are trustworthy, reducing their chances of being marked as spam.
You can use GoDaddy platform to verify your DNS records.
2. Domain Keys Identified Mail (DKIM): DKIM adds a digital signature to your emails, ensuring they aren’t altered during transmission.
This verification helps maintain the integrity of your emails and prevents them from being tampered with while en route to the recipient.

3. Domain-Based Message Authentication, Reporting & Conformance (DMARC): DMARC builds on the foundations of SPF and DKIM by requiring both for email delivery.
It also reports your email authentication status, helping you monitor and improve your email security.
4. Brand Indicators for Message Identification (BIMI): BIMI allows you to display your brand’s logo next to your emails, making them instantly recognizable and enhancing your brand’s credibility.

This visual trust signal can increase recipient engagement and trust in your emails.
To protect your sender reputation, it’s important to monitor also these key metrics regularly:
- Open Rate: A low open rate suggests that your audience may not be engaged or that your sending reputation has been damaged.
- Click-Through Rate: If your click-through rate is low, it might indicate a need for better audience segmentation or clearer, more compelling calls-to-action (CTAs) in your emails.
- Hard Bounce Rate: A high hard bounce rate usually means your email list contains outdated or invalid addresses.

- Unsubscribe Rate: An elevated unsubscribe rate could signal that your content isn’t aligning with subscribers’ expectations or that your list is no longer fresh.
- Spam Complaint Rate: A high spam complaint rate is a red flag that your recipients weren’t anticipating your emails, which can severely harm your sending reputation.
You can find all these metrics in your CRM. So, make sure to track and improve them for your future emails.
2. Remove Hard Bounces Immediately
If an email address returns a hard bounce, it means it’s permanently undeliverable. Resending to it won’t help.
Every time you send to a hard bounce, you damage your sender reputation and increase the risk of getting blocklisted.
Here’s what to do:
- Automatically suppress hard bounces in your email platform. Most tools—like Mailchimp, HubSpot, and Brevo—have automatic suppression lists. Make sure this setting is active.
- Monitor bounce reports after every campaign. Check the bounce type and reason (e.g.,
550 5.1.1 – user doesn’t exist) and ensure the address is flagged or removed.
- Sync your CRM and email tools. If you’re using HubSpot or a similar CRM, make sure contacts marked as hard bounces are also marked inactive in your sales sequences or workflows.
Don’t wait for a second bounce. One is all it takes to trigger deliverability problems at scale.
3. Avoid Purchased Or Scraped Lists
These lists are filled with invalid and inactive addresses. Even if they “look legit”, they destroy your sender reputation.
If you don’t want to suffer later, you better start building high-quality email lists now.
It’s the number one success factor in email marketing.
Make sure you extract emails using scraping tools that offer GDPR-compliant and accurate data.
Collect contacts through legitimate sources like opt-in forms, sign-up pages, or other consent-based methods.
4. Warm Up New Domains And IPs
Start slow. Sudden volume spikes lead to soft bounces or throttling.
That’s why warming up your Gmail account is critical if you plan to send many emails, especially from a new or inactive account.
Using a tool like Mailreach, you can gradually increase the number of emails you send daily.
1. Go to your Mailreach and connect your email account.

2. Follow all the steps to set up your account if it’s a new email address.

Mailreach will guide you through all the steps of this process.

Ultimately, you’ll have warmed-up email lists ready to send emails without getting into spam and improve your overall deliverability.

This process helps to build your email sender reputation, as email providers see consistent, low-volume sending as a sign of legitimate activity.
5. Avoid Spam Trigger Words
Certain words and phrases are commonly associated with spam and junk mail.
This can trigger email filters to flag your messages.

These “spam trigger words” include terms like “free,” “guaranteed,” “act now,” and others that often appear in unwanted promotional emails.
Here is a list of spam trigger word lists by HubSpot.

To avoid having your emails filtered as spam, be mindful of your language and focus on creating clear, honest, and directly relevant content for your audience.
6. Follow the Law
Compliance with email marketing laws like CAN-SPAM (in the U.S.) and CASL (in Canada) is non-negotiable.
These laws require you to:
- Include a clear and easy-to-find unsubscribe link in your emails
- Refrain from using misleading subject lines
- Ensure that your email content is truthful

Following these legal guidelines helps protect your sender’s reputation and prevents potential legal issues, ensuring your emails land in the inbox rather than the spam folder.
7. Use Email Verification Tools
The email open rate indicates email deliverability, and your goal is to keep it high.
To maintain high deliverability rates, ensure that the email addresses on your list are valid and active.
You can verify your emails manually and with automation.

For example, on LinkedIn, you can go to anyone’s profile and check their contact information to verify their email.

Use automation tools like NeverBounce or ZeroBounce if you have hundreds of emails.
These tools can verify the validity of your email addresses, flagging those that are inactive, incorrect, or likely to bounce.
5 Tools To Verify Email Addresses
Email verification tools are the best way to save time when building email lists for your marketing and scale campaigns.
Here are 5 tools you can try:
- Evaboot
- ZeroBounce
- Hunter
- EmailListVerify
- NeverBounce
1. Evaboot
Evaboot is an all-in-one Email Verifier and LinkedIn Sales Navigator data scraper designed to help you build clean, compliant, and ready-to-use lead lists.
Its main features include:
- Find professional emails
- Verify emails
- Export leads from LinkedIn Sales Navigator
- Export company profiles
- Export LinkedIn profile URLs
- Clean the data (emojis, capital letters, typos…)
- Detect false positives in your search results
The Email Verifier feature allows you to verify email addresses in bulk and instantly clean your contact lists.
It’s very easy to use:
Drop your CSV file (up to 2,500 rows), and Evaboot will process the list: verifying and labeling emails in one go.
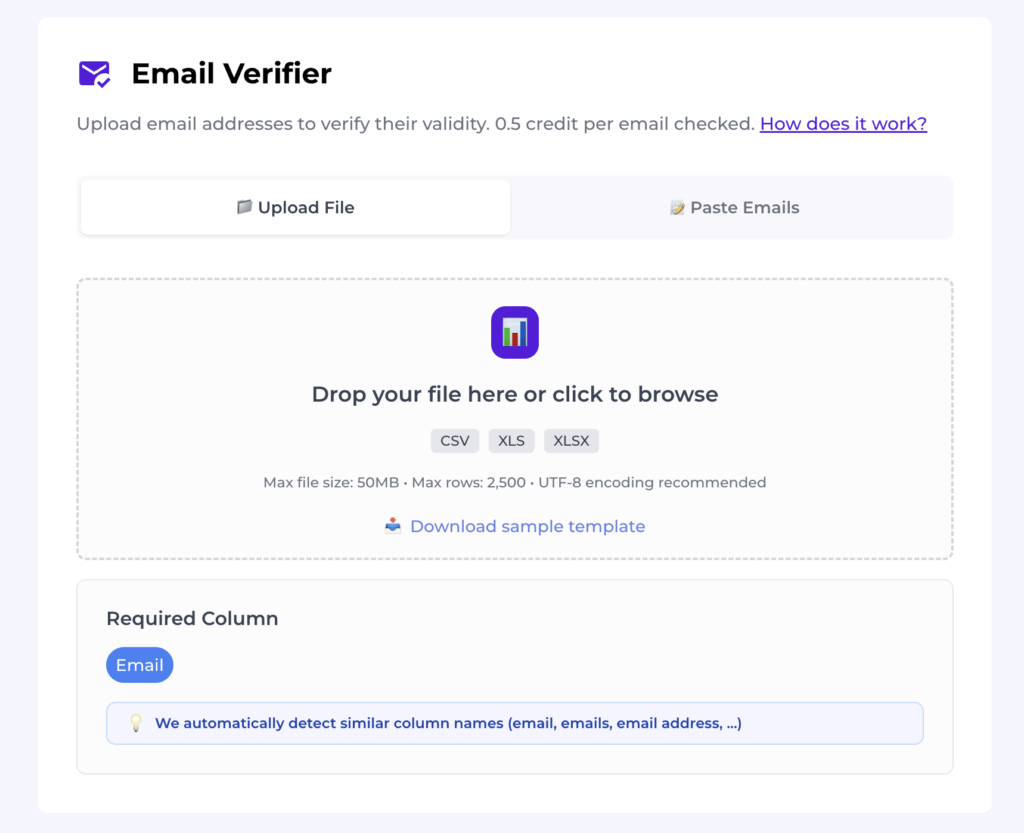
You’ll get back a file with “safe” vs. “riskier” annotations based on bounce likelihood.
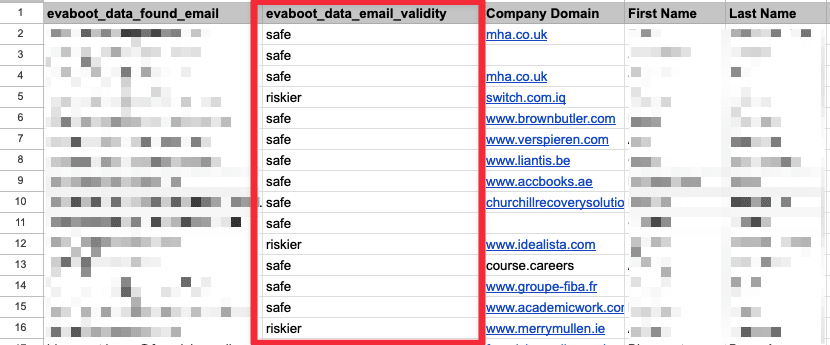
Here’s a video tutorial if you prefer to watch how it works:
And if you don’t already have an email list to verify, you can use Evaboot to scrape your lead data from LinkedIn Sales Navigator.
It’s the perfect solution if you want to create lead lists from your LinkedIn network and enrich them with real-time verified emails.
It provides you with ready-for-outreach Excel files in just one click.
Here’s how it works:
1. Click the extension button on the top right of your Sales Navigator page.

2. It’ll redirect to the Evaboot dashboard, where you can launch the export.

Once the export is done, you can download the email lists with all the other lead information needed to personalize your outreach messages.
To better understand how it works, you can also watch this video showing the full process of exporting Sales Navigator leads to Excel:
With Evaboot, you don’t have to worry about the quality and legality of the data.
You’ll have GDPR-compliant and verified emails ready to exploit in your next outreach campaign.

Evaboot’s pricing is credit-based.
The most basic plan starts at $9 for 100 credits.
2. ZeroBounce
ZeroBounce is an easy-to-use email verification tool with a user-friendly interface and high accuracy.

It’s a great starting point for those new to email verification.
The tool checks for invalid addresses, spam traps, and syntax errors to ensure your email list is clean and deliverable.

ZeroBounce provides email validation and an email finder API, which is available in 13 languages, including PHP, iOS, Scala, Javascript, and more.
Installing the verification API on your preferred system, platform, and website will allow you to validate emails automatically using your software or application.

Their pricing is built for businesses of all sizes.
They offer a free trial, and their prices are credit-based, with a price per credit of $0.009.
3. Hunter
Hunter.io is a leading email search engine specializing in discovering and verifying professional email addresses across the web.
Hunter finds and verifies emails via any company domain, company name, prospect name, Bulk email finder, API, Google Sheets Add-on, or Hunter plugin.


Hunter’s main features are:
- Finding professional email addresses associated with any domain
- Domain search to find all the publicly available email addresses associated with it
- Integrate Hunter.io with your CRM, such as HubSpot or Salesforce, to automate lead generation
- Perform bulk searches to find multiple email addresses at once
- Use the Hunter API to find emails
- Email Finder extension to find emails from the website you use

You can try Hunter.io for free, which offers 25 searches and 50 verifications per month. The Starter Plan starts at €49/month, including 50

4. EmailListVerify
EmailListVerify is an email list cleaning and verification tool that ensures the addresses on your list are valid, deliverable, and safe to send to.

This helps improve email deliverability, reduce bounce rates, and protect your sender’s reputation.
Key features include:
- Bulk email verification
- Syntax checking
- Domain and MX record validation
- Disposable and role-based email detection
- Spam trap and abusive email detection

The pricing is based on the number of emails you want to check, with options ranging from pay-as-you-go credits to monthly subscriptions.

5. NeverBounce
NeverBounce is an email verification and list-cleaning service that ensures your email lists are accurate and up-to-date.

Verifying email addresses in real-time and cleaning bulk lists helps reduce bounce rates and improve email deliverability, ensuring your emails reach their intended recipients.
Main Features:
- Real-time email verification
- Bulk email list cleaning
- Automated list cleaning via integrations
- Instant bounce analysis
- Seamless API for developers

NeverBounce offers a price-per-email pricing model. This means that you pay for the number of emails you verify.
This model lets you verify or clean as many emails as you want.
Conclusion
Bounced emails aren’t just a technical glitch: they’re a signal. A signal that something’s wrong with your list, your content, your setup, or your sender reputation.
The fix isn’t complex, but it does require consistency:
- Verify every email before you hit send using tools like Evaboot, ZeroBounce, or NeverBounce.
- Monitor bounce reports like a hawk.
- Authenticate your domain properly.
- Clean your list like it’s your job—because it is.
Do that, and your emails will start landing exactly where they should: in the inbox.
FAQs
What Does It Mean When An Email Is Bounced?
A bounced email is one that couldn’t be delivered to the recipient. The server either rejected it or couldn’t find the address.
This usually triggers a notification with an error code explaining the issue.
How To Fix A Bounced Email?
Start by identifying the bounce type (hard or soft).
For soft bounces, retry after a short delay.
For hard bounces, remove the email from your list immediately.
Also check your authentication setup and list hygiene practices.
What Is It Called When An Email Bounces Back?
It’s typically called a “bounce” or a “non-delivery report (NDR)”.
These reports explain why the email wasn’t delivered and whether the issue is temporary or permanent.
What Is The Difference Between Bounced And Blocked Emails?
Bounced emails fail due to delivery issues (e.g., invalid address, full inbox). While blocked emails are intentionally rejected by the recipient’s server—often due to content, domain reputation, or spam filters.
What Is A Bounced Email Example?
Example: You send an email to jane@company.com, but the domain doesn’t exist. You receive a bounce message like: 550 5.1.1 – User does not exist.
This is a hard bounce, and you should stop emailing that address.


![How To Verify Email Addresses? 5 Tools To Use In [year] 84 verfy email](https://evaboot.com/wp-content/uploads/2024/08/Verfy-Email-768x432.webp)
![Best Email Verification Tools Compared In [year] 86 best email verification tools](https://evaboot.com/wp-content/uploads/2025/04/best-email-verification-tools-1-768x431.png)